EvoLutionX
New Member
Hey guys,
It was in January when I first found out about this amazing forum and Pepakura and all the things...I was amazed about the things that can be achieved just with paper and foam. And because the German carnival was only two months away I decided to give it a shot with a Mark 3 helmet.
But because I`ve been under time pressure and also did a few greenhorn mistakes, the quality of the helmet wasn't satisfying to me.
You just could see that it was made by hands.
So I`m currently working on my second Iron Man helmet and want to share my progress with you.
I used the Pepakura file from gimpee, thanks for that m8 :thumbsup
But to cut a long story short, I'll just begin with showing you some pictures")
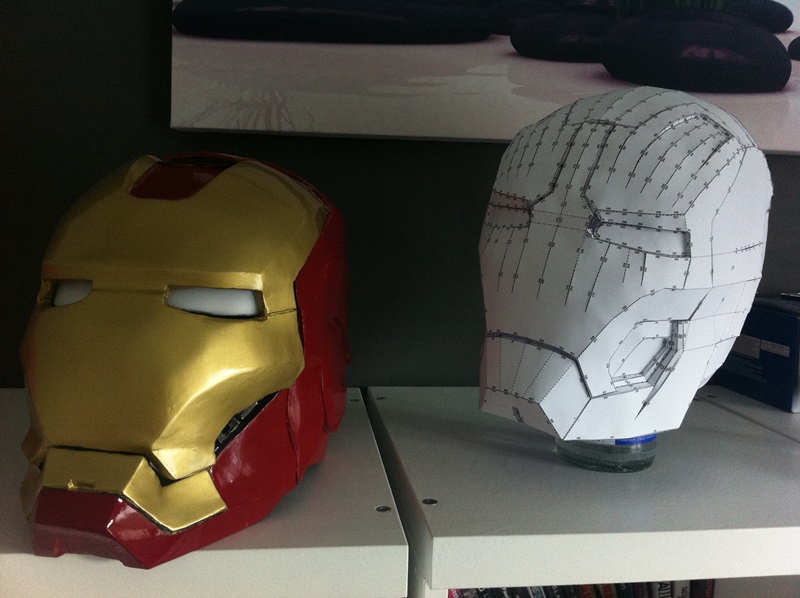
Here`s the finished Pepakura model next to my first helmet:
 [/URL]
After the first layer of resin:
 [/URL]
What`s my biggest fear every time? Will the helmet be to small?
So right after it was dried I cutted away the back piece and did a fitting test: :thumbsup
 [/URL]
Then I started the filling process. At this point, my intension was to get one area ready before I start the next one:
 [/URL]
Also cutted away the ears:
 [/URL]
filling and sanding:
 [/URL]
more filling and sanding:
 [/URL]
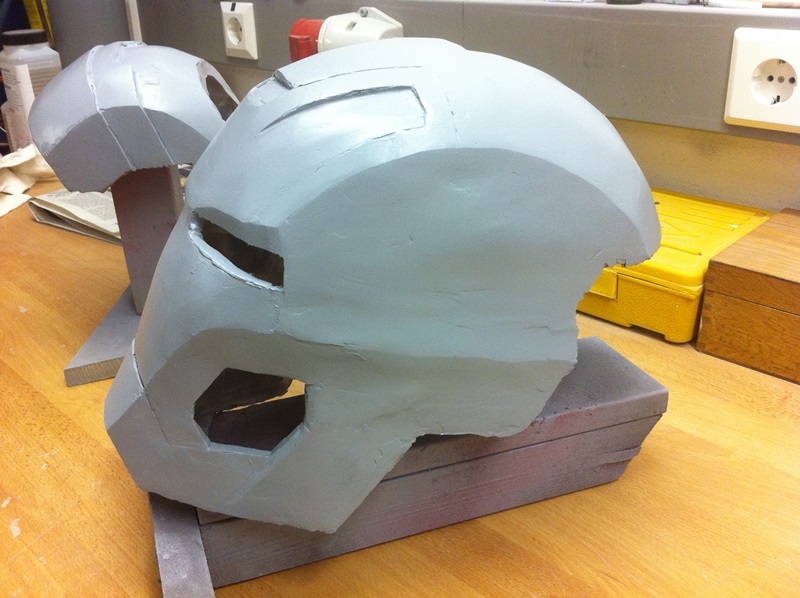
Then I decided to prime the helmet to see where it`s going and to see all the bumps:
 [/URL]
 [/URL]
Aaand that`s where I am at the moment
Still a long way to go but I'll keep you guys up to date.
Cheers!
It was in January when I first found out about this amazing forum and Pepakura and all the things...I was amazed about the things that can be achieved just with paper and foam. And because the German carnival was only two months away I decided to give it a shot with a Mark 3 helmet.
But because I`ve been under time pressure and also did a few greenhorn mistakes, the quality of the helmet wasn't satisfying to me.
You just could see that it was made by hands.
So I`m currently working on my second Iron Man helmet and want to share my progress with you.
I used the Pepakura file from gimpee, thanks for that m8 :thumbsup
But to cut a long story short, I'll just begin with showing you some pictures
Here`s the finished Pepakura model next to my first helmet:
After the first layer of resin:
What`s my biggest fear every time? Will the helmet be to small?
So right after it was dried I cutted away the back piece and did a fitting test: :thumbsup
Then I started the filling process. At this point, my intension was to get one area ready before I start the next one:
Also cutted away the ears:
filling and sanding:
more filling and sanding:
Then I decided to prime the helmet to see where it`s going and to see all the bumps:
Aaand that`s where I am at the moment
Still a long way to go but I'll keep you guys up to date.
Cheers!


