Painting my Terminator 1 bust.

Alaneye

Sr Member
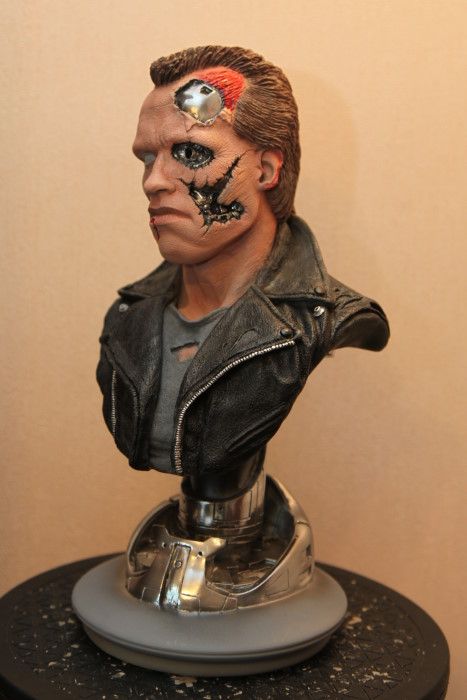
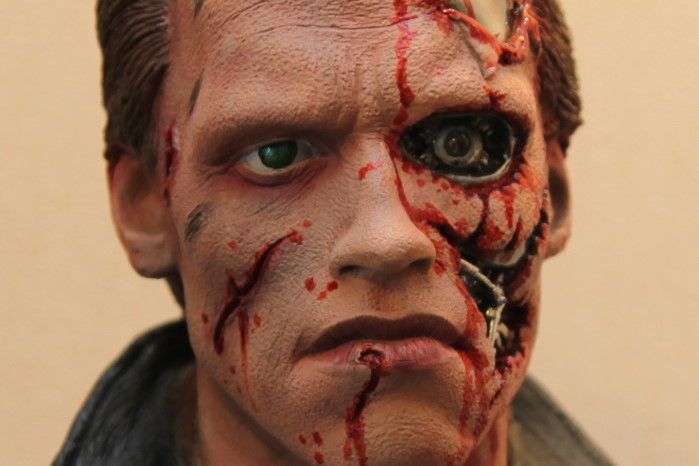
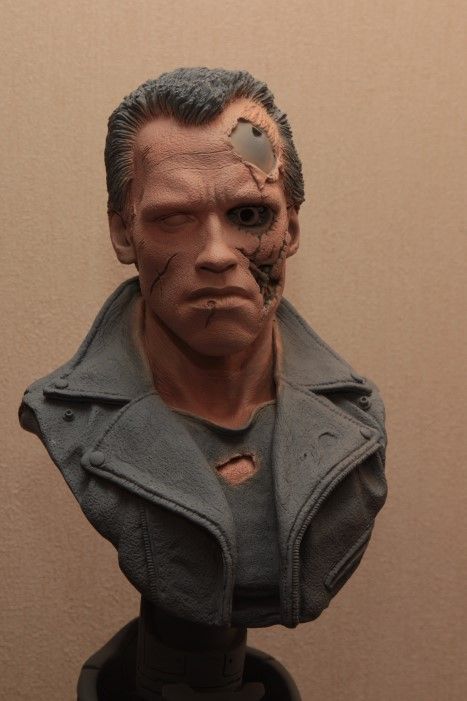
I have a Terminator bust to paint so I thought I'd take some pics and document it. I'm not the greatest painter and take a lot of inspiration from these and other boards. I can't paint as well as some, but I'm learning :)

First off I prepped the bust for painting and drilled the eye out ready for the LED. Then I primed the bust with Hafords' grey car primer, and airbrushed the skin with Winsor and Newton Pale Teracotta. I've tried mixing my own flesh but it was pretty disasterous.

paint1.jpg


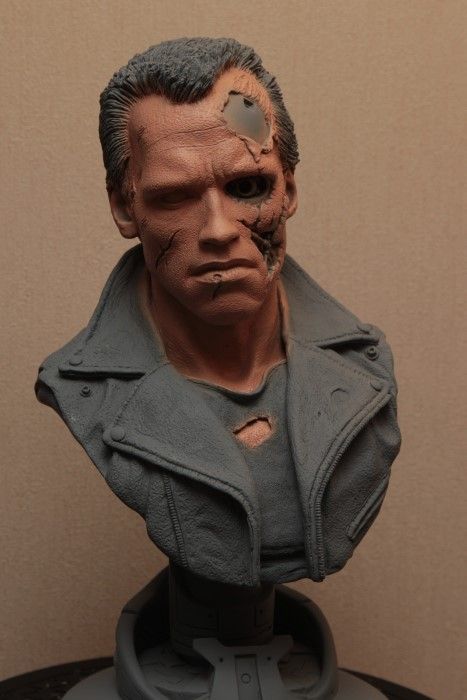
Next I lightened it all up by drybrushing with Dale and Rowney Buff Titanium.

paint2.jpg


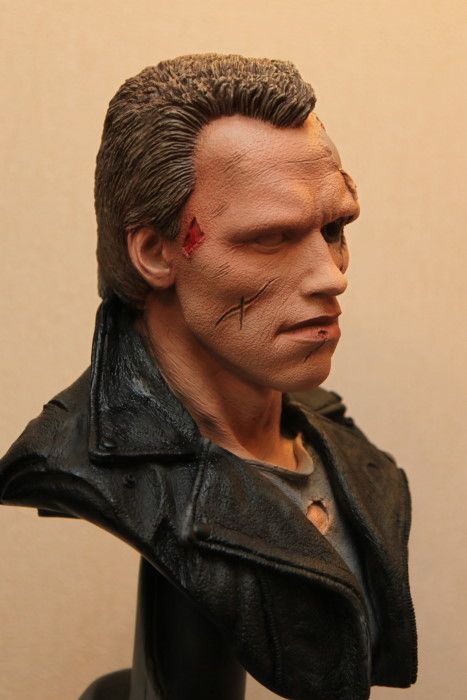
I airbrushed the face lightly with Tamiya Red Brown XF-64 and also gave the hair a base coat of the same.

paint3.jpg


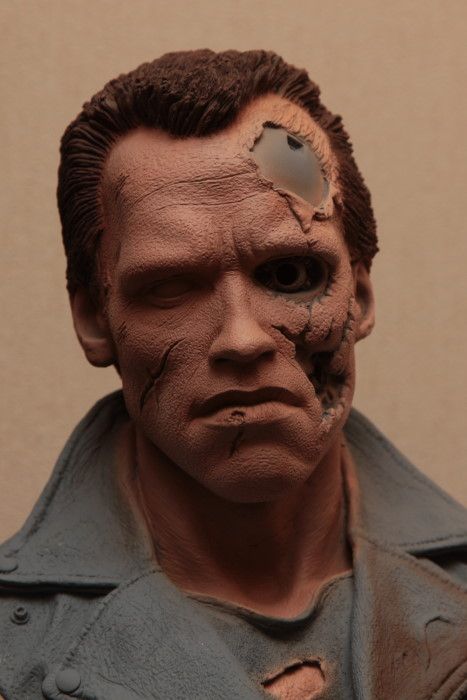
Next up was a light airbrush of the skin and lips with Tamiya Red X-7 and I also filled in the big scrape on the head.

paint4.jpg


Airbrushed the jacket with Tamiya Black X-1.

paint5.jpg


Next I wanted to lighten and texture the hair a bit, so I tried starting with a dry brush of Tamiya Flat Earth XF-52, followed by Tamiya Wooden Deck Tan XF-78.

paint6.jpg


paint7.jpg


I thought that had taken it up a bit too much so I lightly airbrushed with the Tamiya Red Brown again to bring it back down a touch.

paint8.jpg


The skin looked a little light so I drybrushed with a little more Pale Terracota.

paint9.jpg


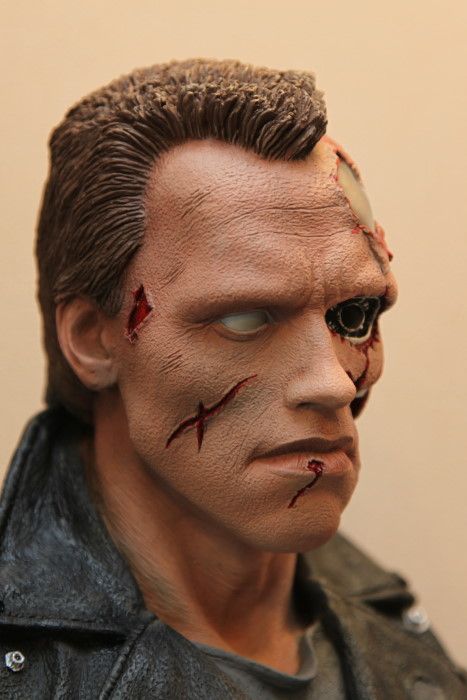
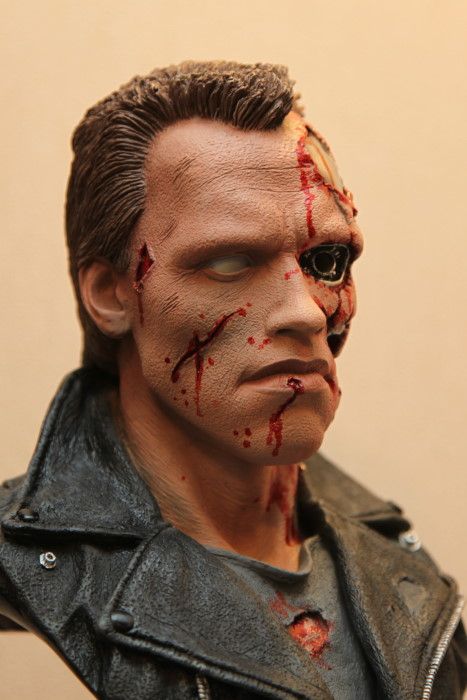
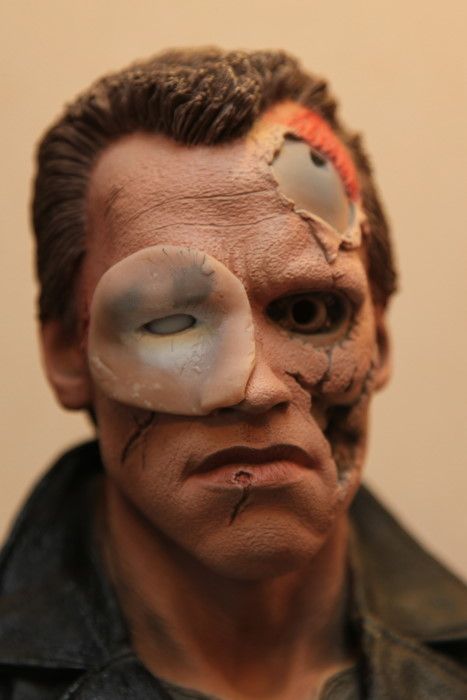
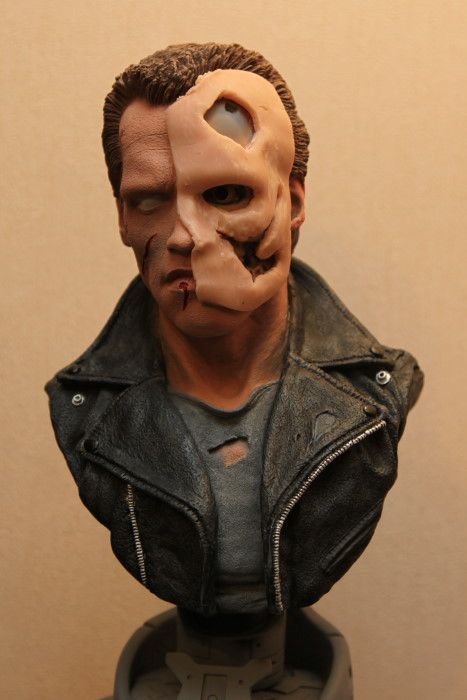
Bet you never thought you'd see a Terminator playing the Phantom of the Opera... this is a quick mask I made out of super sculpey so I can smoothly airbrush the eye with Floquil Reefer White. I find it's not as good if I brush paint. I made it out of sculpey because I figured I'd be painting more than one.

paint10.jpg


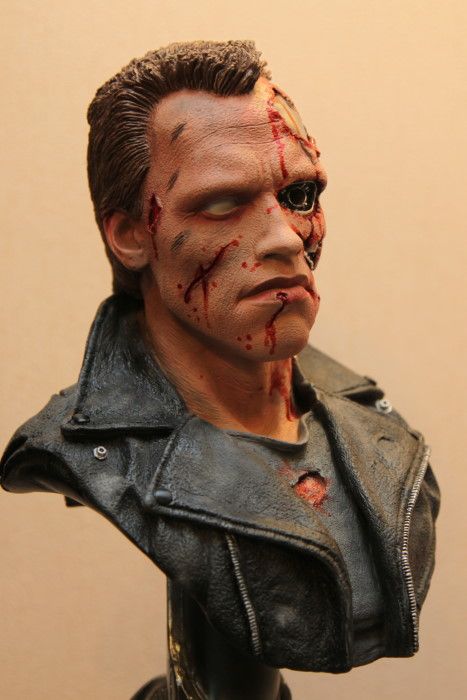
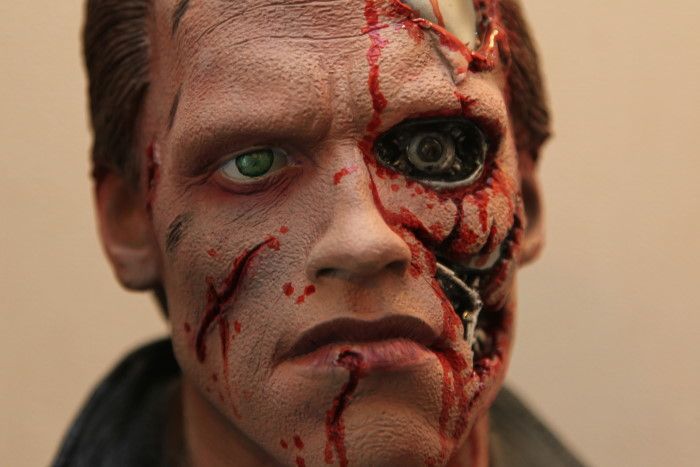
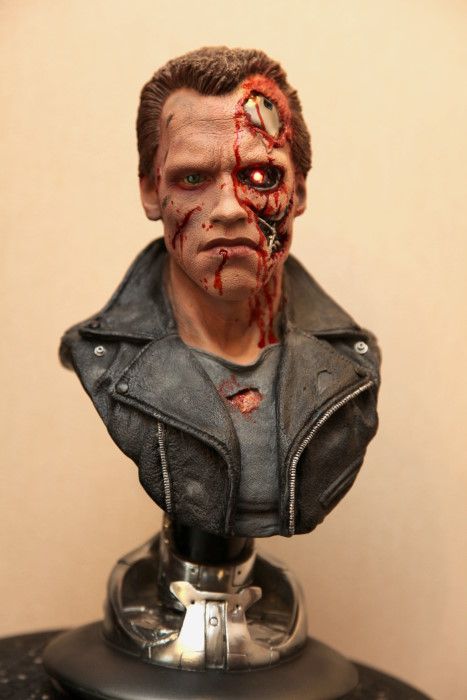
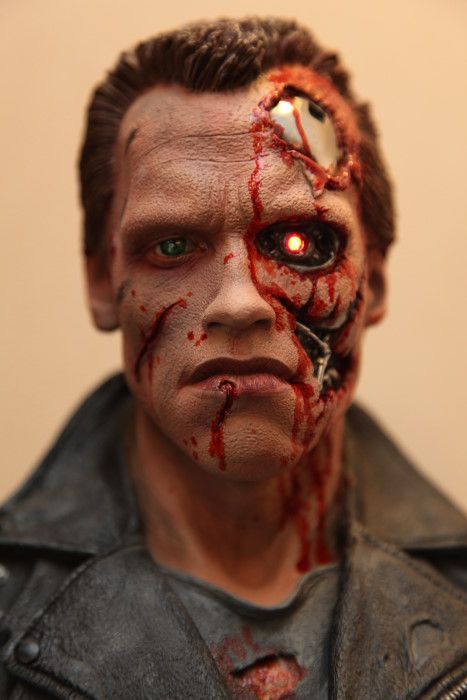
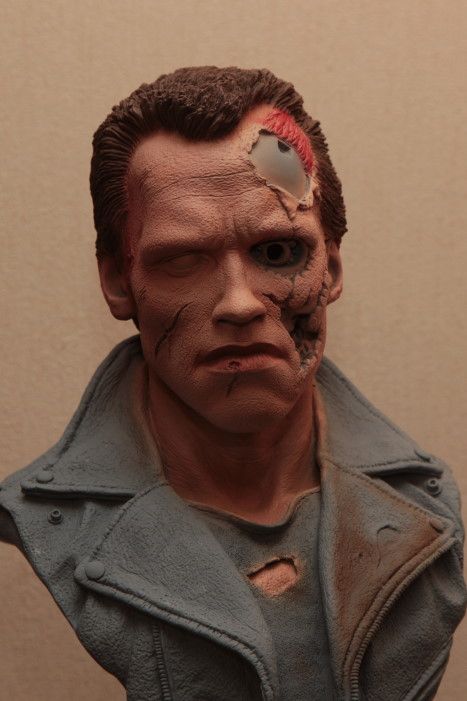
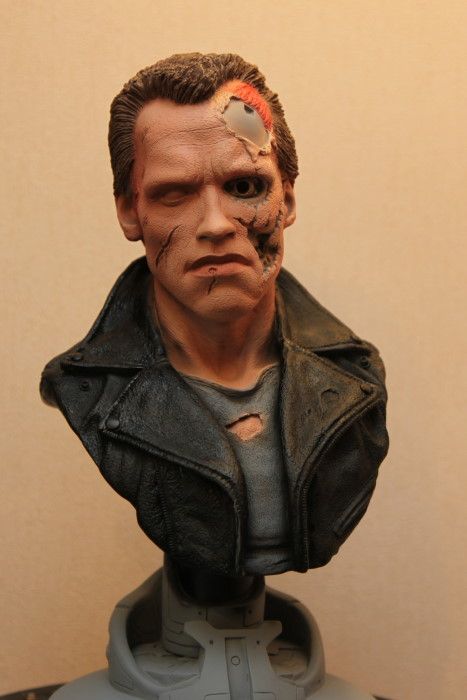
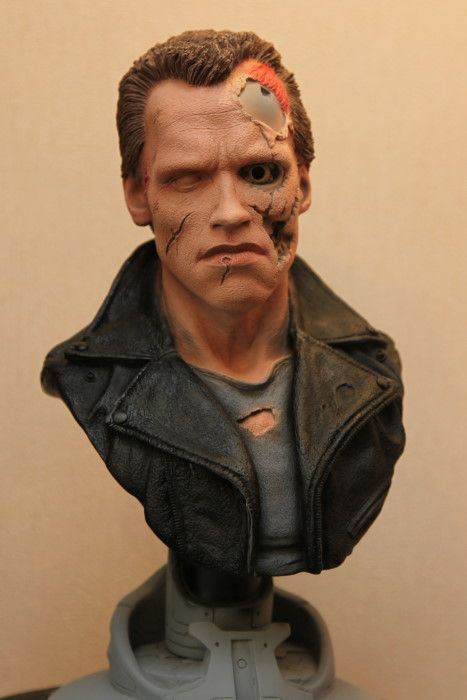
With Tamiya IJN Grey (Kure Arsenal) XF-75 I airbrushed the shirt and the eye was a little too white so I gave that a light spray too, again using the mask. I also dry brushed the jacket with the same and filled in the visible cuts and scuffs on the jacket with the grey.

paint11.jpg


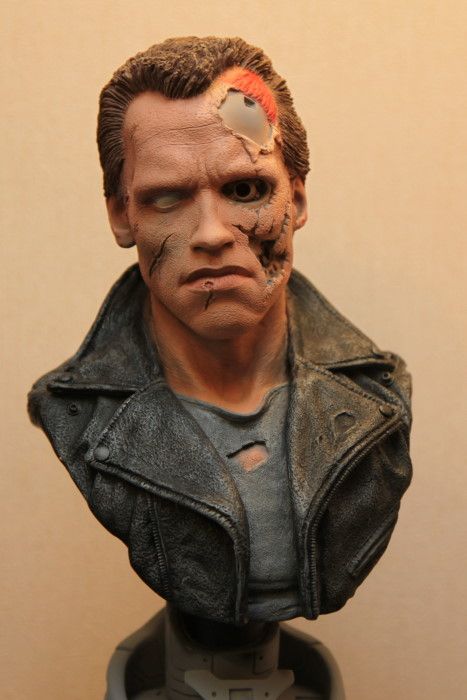
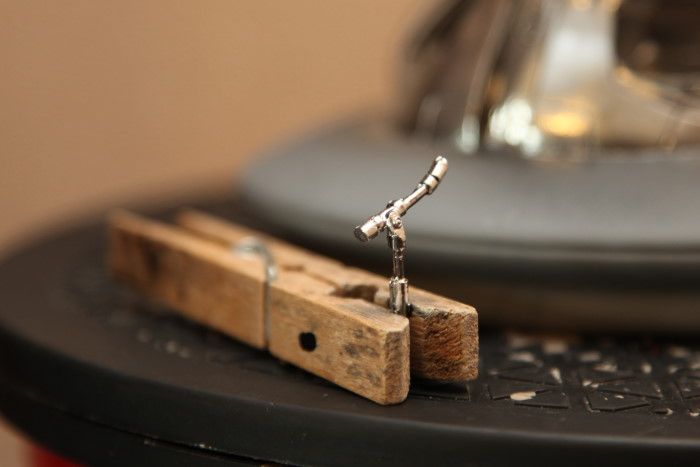
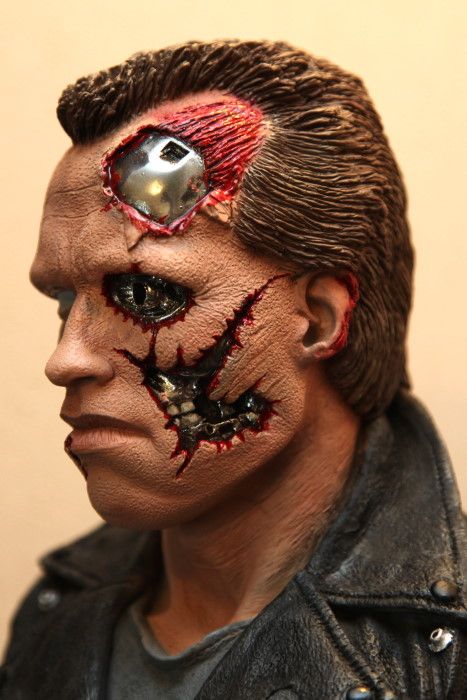
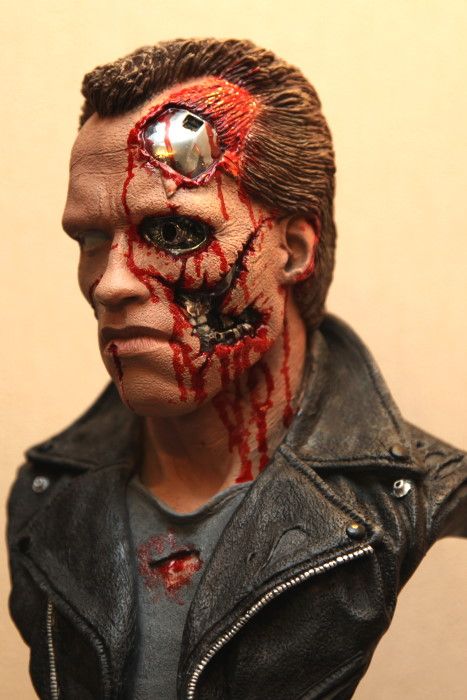
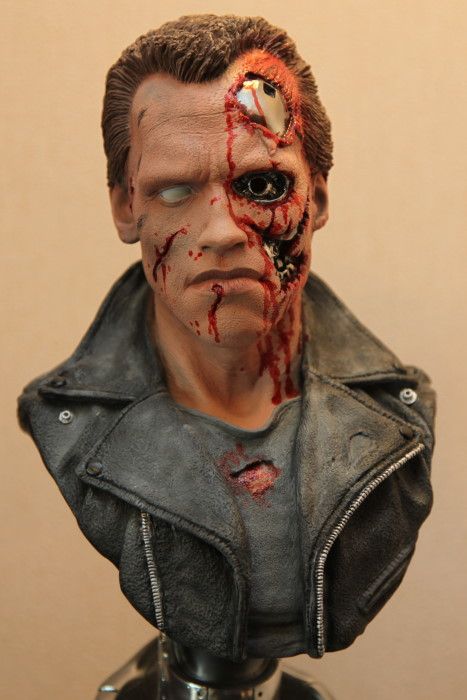
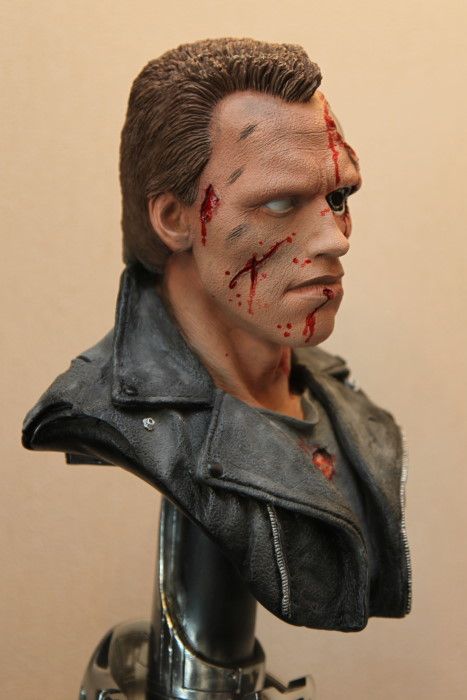
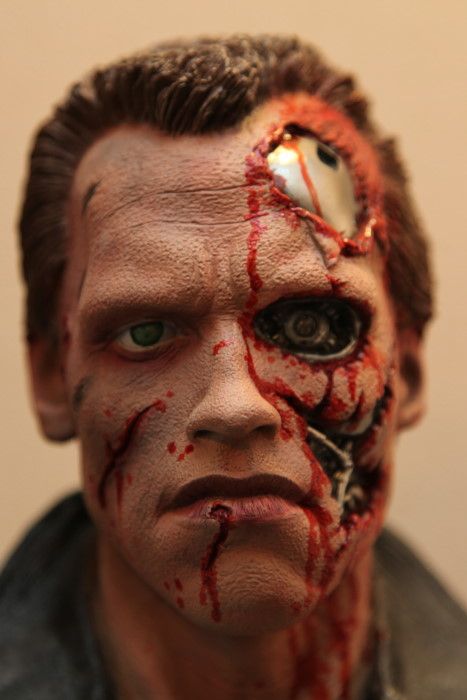
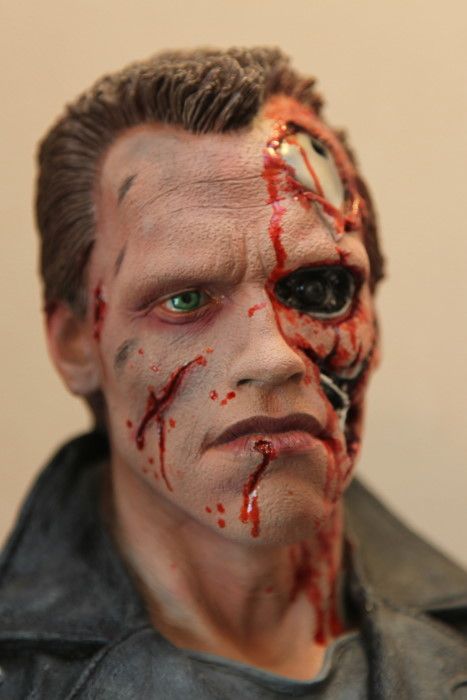
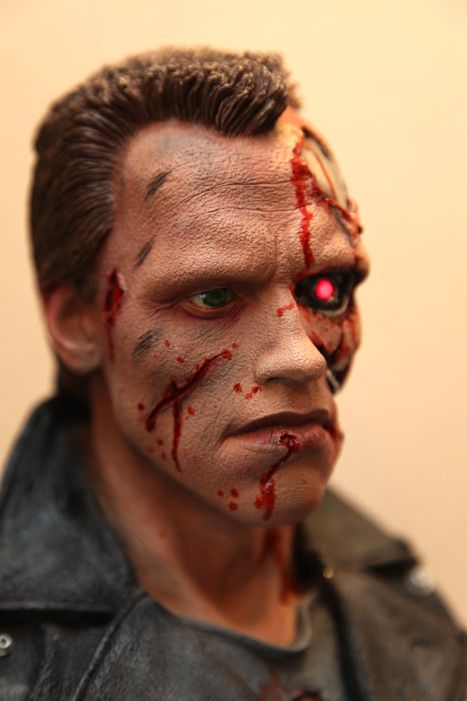
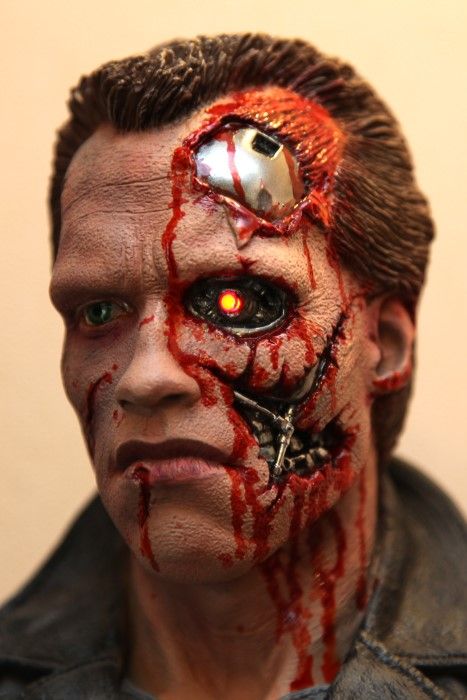
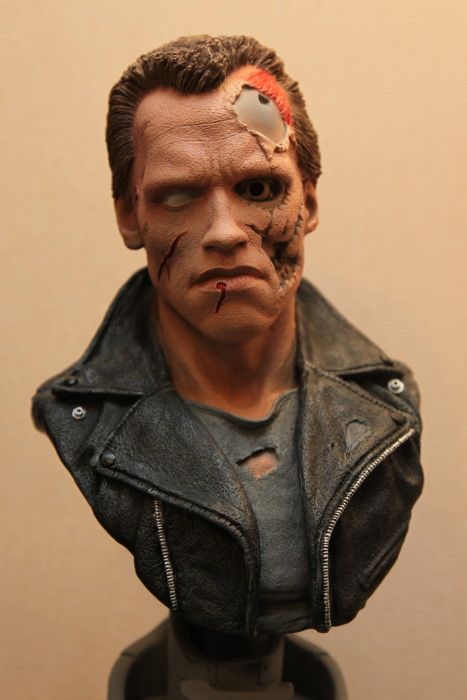
Tamiya Red X-7 for the cut on his lip and face and Tamiya Chrome Silver X-11 for the zippers and the press studs. I also dry brushed the jacket a little with Tamiya Flat Black FX-1 to tone down the grey dry brushing I did earlier.

paint12.jpg


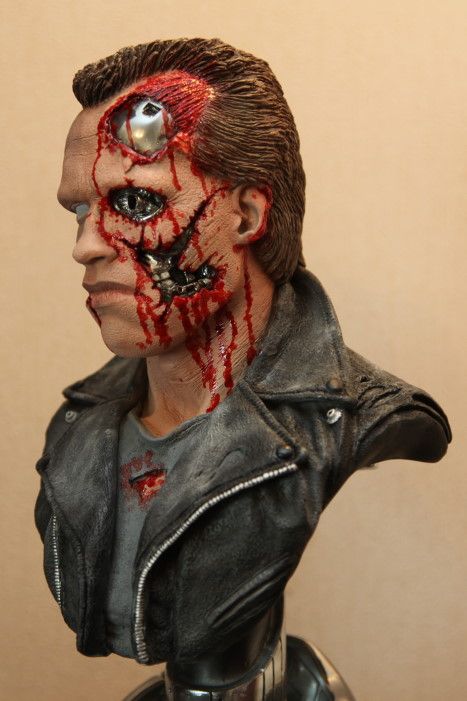
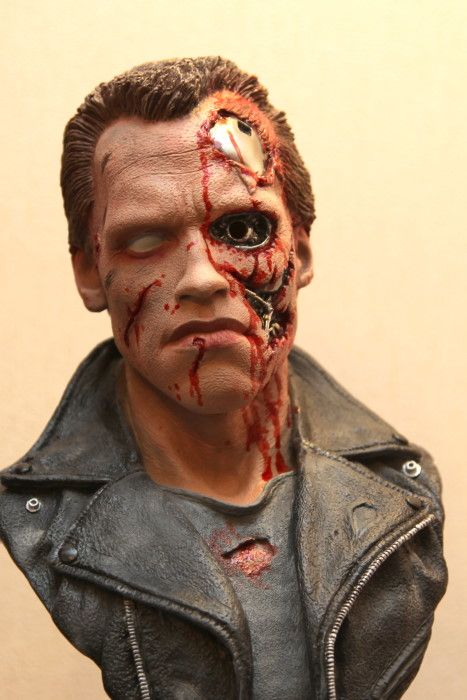
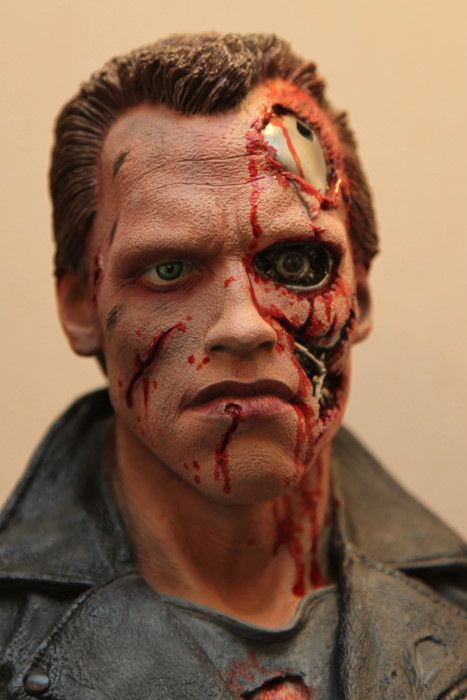
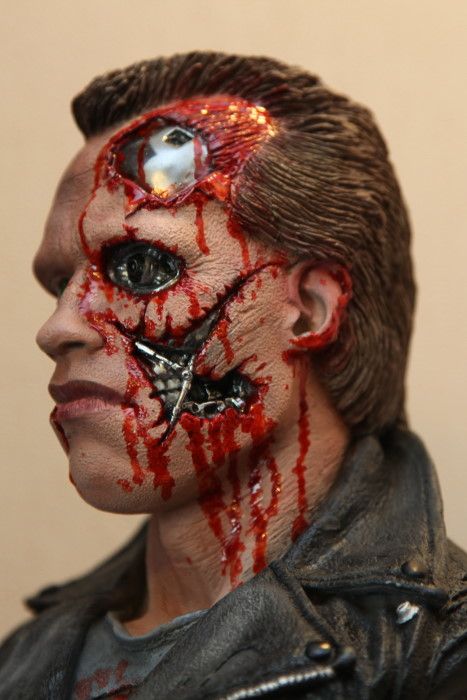
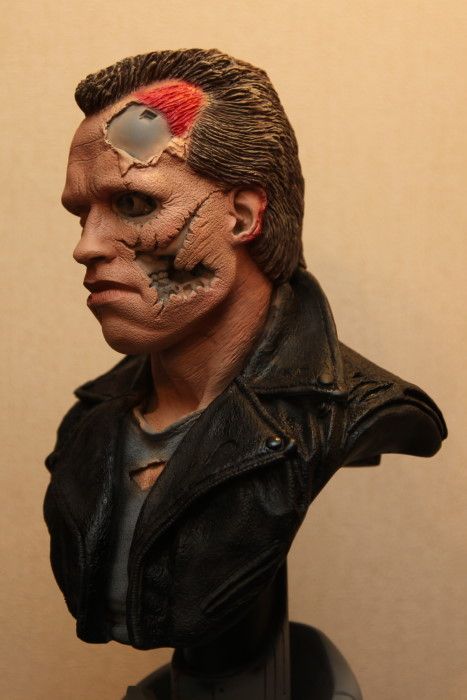
Using another sculpey mask, I airbrushed Humbrol Gloss Black onto the endo parts in preparation for the Alclad Chrome tomorrow.

paint13.jpg


paint14.jpg


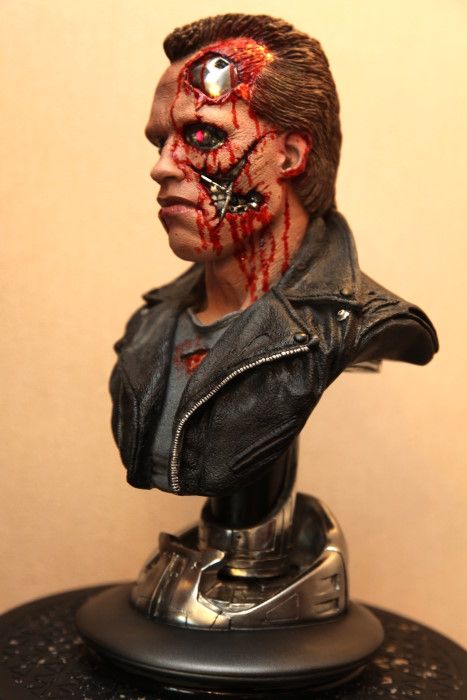
So that's it for now. I'll let the Humbrol Gloss Black dry over night, and hopefully be able to finish him off tomorrow.
 
Last edited:
Very nice work!

Thanks.

The sculpey mas is a great idea, love the paint too :)

I only used sculpey on this occasion as I wanted a mask I could use over.

Very nice :thumbsup

Love the sculpt and everything about it.

Thanks, glad you like it.

Really nice , look forward to more pics...

Thanks. Look no further :)

Looking awesome, as always!

Thanks, man :)

Can't paint he says! Bwah ha ha. Looking awesome mate.

Best
TAZ

I didn't say I couldn't paint, I said I'm not great at it... ;) but I get by :D

So, onto part 2. The gloss has dried so now's the time to give 2 or 3 light coats of Alclad Chrome. You have to be careful not to over do the Alclad or it just looks like silver paint. The secret is to let the gloss black show through the Alclad. I also chromed the jaw piston and the base while I was at it. I also painted the teeth Folquil Reefer White and washed them with Tamiya Smoke X-19 to run between them.

paint15.jpg


paint16.jpg


paint17.jpg


Next comes the fun part... the blood! I start by applying Tamiya Red X-7 around all the open flesh of the wounds, then I add a little Tamiya Smoke to give the wounds some depth.

paint18.jpg


paint19.jpg


For all the blood runs, I like to use Tamiya Clear Red X-27. When painting blood runs, I try not to apply straight lines, remembing to follow gravity, and let my brush waver a little. I let the blood run sideways too if it goes into a fold or a line in the skin.

paint20.jpg


paint21.jpg


A while ago I bought a pack of various shades of grey soft pastels.

paint22.jpg


When the Terminator is dragged under the truck, he picks up a lot of dust and dirt, so I use the pastels to dust the jacket. I find the pastels give a more realistic dust effect than trying to dry brush grey paint. I use a fairly light grey to gegin with, and the one of the darker shades to break it up and to dust the three grazes on his face. Some some reason, in the movie, these are just dark with no blood.

paint23.jpg


paint24.jpg


paint25.jpg


After the dusting, I decide to give a light spray or Testor's Dullcoat, and just like the last time I did that, the pastels all but disappear, so if anyone can tell me what's going on there, I'd be greatful :) is it the type of pastel I'm using? So I dust again over the tacky Dullcoat and hope the pastel will stick to it.

paint26.jpg


I mix up a little Winsor and Newton Ultramarine and Tamiya Red and airbrush it lightly under the eye and a little on the lips to darken them a touch.

paint27.jpg


Next up is the part I always dread a little: painting the eye. I always thought Arnold's eyes were blue, as they appear that way in many photos... but then in some photos there is a little green to them. I hear them also claimed as hazel. The eyes on the puppet head in The Terminator are very green looking, so I go for that option. First I paint a circle of Tamiya Green X-5. When painting this first circle I bare in mind that when looking straight ahead, the bottom of the iris touches the bottom eyelid and probably a quarter to a third of the upper iris is hidden under the upper eyelid. If you frame the iris so that it is right in the middle and the whole of it is visible, it gives a wide-eyed, staring appearence.

You can also see here that I've added in the LED and I had to patch it a bit with Aves putty because the hole was a bit too big.

paint28.jpg


Then I use Tamiya Khaki XF-49 and paint little lines all around the iris to break up the colouration.

paint29.jpg


Next I lighten the Khaki with Tamiya White X-2 and dab it in here and there, also pulling a little of the original Green in to mix it up a little.

paint30.jpg


When I'm finally happy with it, I mix a slightly darker version of the original green and broaden the ring around the iris; and finish off with a black dot for the pupil.

paint31.jpg


With the Tamiya Clear Red and a fine brush, I paint the rim of the eyelid and the corner of the eye (the caruncula).

paint32.jpg


Finally a coat of Tamiya Clear X-22 gives it that nice watery shine. You have to be careful with the Tamiya Clear because it will reactivate the underlying paint (if Tamiya), but it can also produce a nice blended effect too. I've also painted the Aves around the LED with Tamiya Black.

paint33.jpg


Using the Tamiya Clear, I coat all the blood runs to make them look fresh and glistening.

paint34.jpg


paint35.jpg


Finally I finish up the endo eye by painting a little Alclad over the black. The lens on this LED is clear and the LED is a little on the bright side, so I paint the lens with some Tamiya Red. I airbrushed the saucer part of the base with Tamiya Gun Metal X-10 earlier, so all that remains is to wire up the endo eye, switch on and we're done.

paint36.jpg


paint37.jpg


paint38.jpg


paint39.jpg


paint40.jpg


paint41.jpg
 
Last edited:
thats some really amazing painting, really like the shiny look of the blood really impressive and realistic!
 
This exact piece is now in my collection - Over the moon with it! was great meeting the man behind the creation. Superb work and completely jealous of your collection too!

Thanks for pointing me into the direction of this site, I've spent a good couple of hours on here already :)

After seeing your T2 bust in the flesh that is also looking very tempting too. Need to put up another shelf and create the space....Fantastic!!
 
Alan, your paint job is too notch, and turned out amazing.

Cheers, Chuck, I'm still waiting to see your paint ups ;)

Very cool! I love the progress pictures.

Thanks, glad you liked it.

Wow thats a paint job!!!

Thanks!

thats some really amazing painting, really like the shiny look of the blood really impressive and realistic!

Thanks, Joe.

This really blew my mind! So much detail and realism. Nice job!

:)

Damn cool! Pro job for sure!

Thanks.

This exact piece is now in my collection - Over the moon with it! was great meeting the man behind the creation. Superb work and completely jealous of your collection too!

Thanks for pointing me into the direction of this site, I've spent a good couple of hours on here already :)

After seeing your T2 bust in the flesh that is also looking very tempting too. Need to put up another shelf and create the space....Fantastic!!

Was nice to meet you too, Tom. T2 is calling to you ;)

love it!! really good work :)

Thanks :)
 
This thread is more than 8 years old.

Your message may be considered spam for the following reasons:

  1. This thread hasn't been active in some time. A new post in this thread might not contribute constructively to this discussion after so long.
If you wish to reply despite these issues, check the box below before replying.
Be aware that malicious compliance may result in more severe penalties.
Back
Top