twinight
Active Member
I've joined RPF 2 years ago when I was inspired by the tron legacy thread. I made my first costume for the premier and it came out great. A second one for my son using EL tape came next for our first comic-con trip. After a year on haitus, my son needed a new halloween costume.
His current favorite shows were my little pony and ninjago. I suggested my little pony to test the waters and indeed it was cold. A crossover character as depicted in Deviant art didn't fly either :0
It was to be a Ninjago character. And he had to have armor.
I wanted to do Jay with his plated right side or maybe the bushido training armor.
But to my 5 year old's favorite Kai wins. To a 5 year old, the sword beats all other weapons. And who wields a sword? KAI
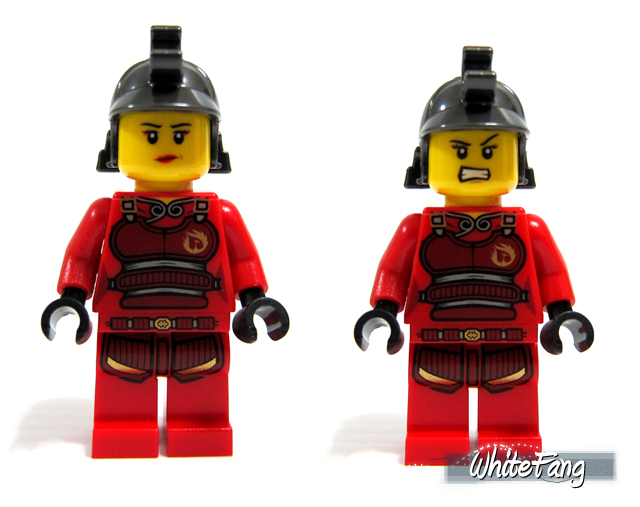
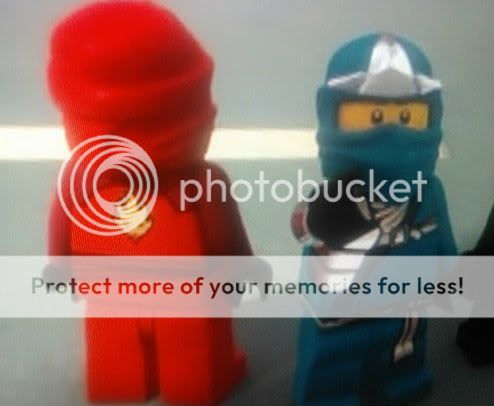
First thing was to sit down with my son and watch a few episodes of the cartoon and get some reference pictures.


The problem of converting a 1" toy to a real life costume is the lack of detail.
Scale it up and it ends up looking too simplistic. Some details are just colored lines which need interpretation to translate.
First I start off with the base Gi which fortunately also comes in red.
After a test fitting, the 000 is still a but large on him. I will have to hem the sleeves and pants. Good thing is the costume can be enlarged to fit him as he grows in the following years.

10/10
A trip to Jo Anne fabrics is in order. I pick up some matching fabric for the hood, some breathable fabric for the mask, grey fabric for the trim and faux leather for the armor.
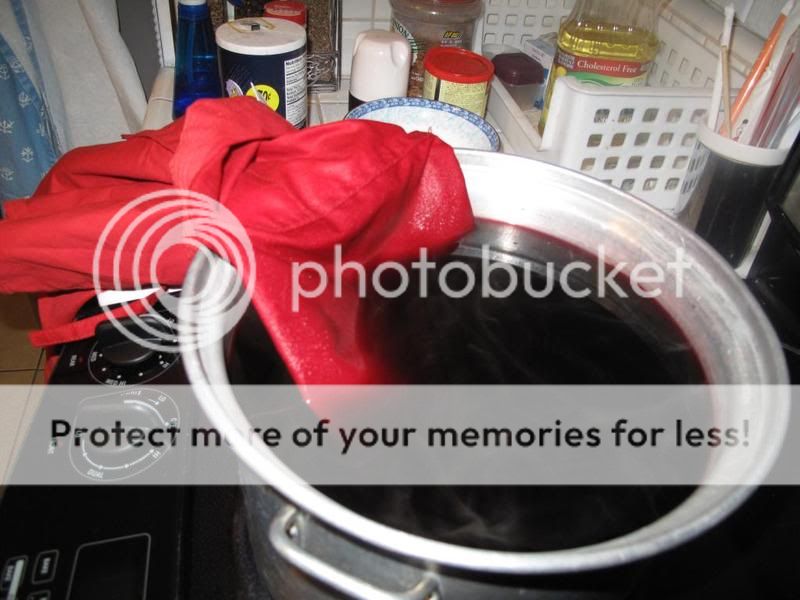
Dying the sleeves burgundy to darken them. To stop the dye from bleeding past the shoulder seam, I let the dye bleed up and then I wet the rest of the fabric to stop the bleeding.
10/12
I went and got the sewing machine down from the attic.
I cut the grey fabric into strips and sew on the trim. The sleeves were especially difficult,trying to sew around a 4" diameter cuff.


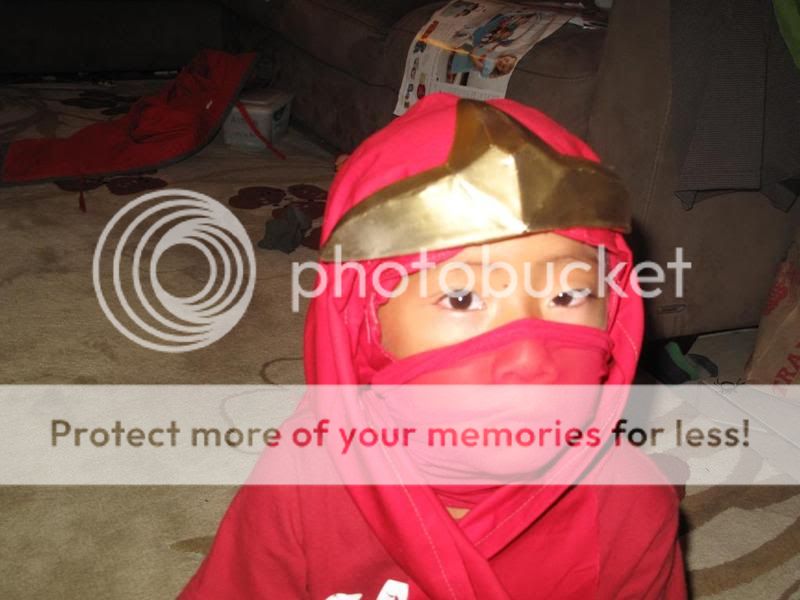
The hood needed to be somewhat loose fitting and at the same time, needed to keep the head crest in place. It was built in 3 parts. The base bavaclava which holds tight to the head. The breathable fabric that goes around the face. And the triangular hood which wraps around and gives the whole thing the ninja look. The hood was sewed to the bavaclava at the forehead where the crest was velcroed on. The elastic face wrap was sewed in the back to the bavaclava to keep it from sliding down as he moves.
I am not a fairy princess!
10/13
I have a nieces birthday part to go to today, but spent some of the morning making the belts.
I cut some brown pleather into strips, folded them over and sewed them into belts. The buckles were also from Jo-Ann fabrics.

10/14
Finally a full day to make some progress.
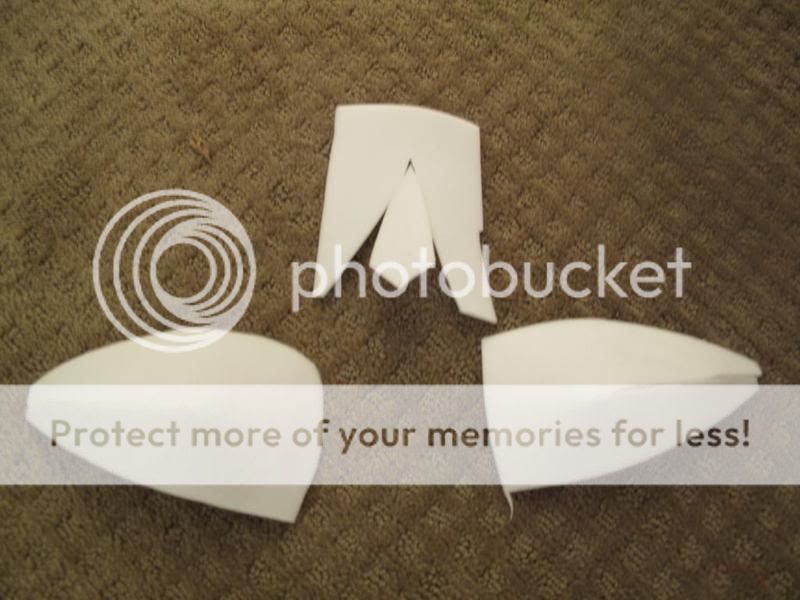
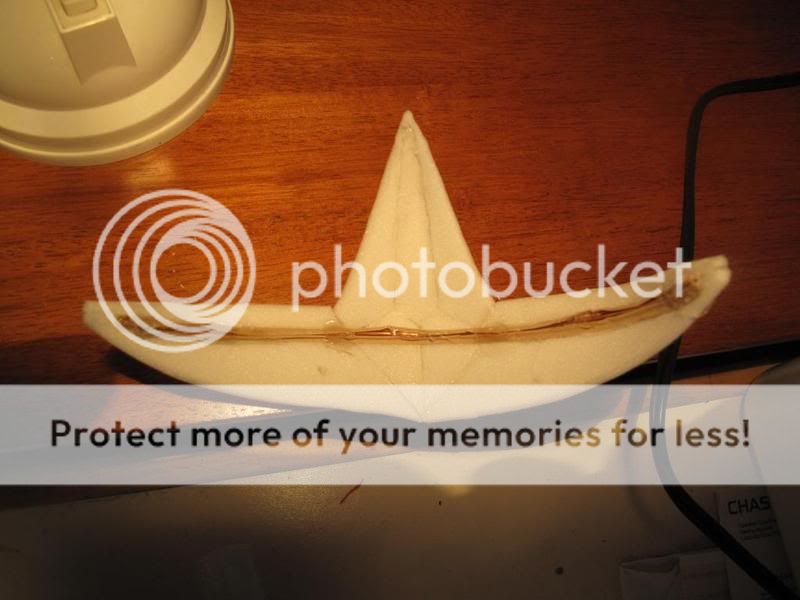
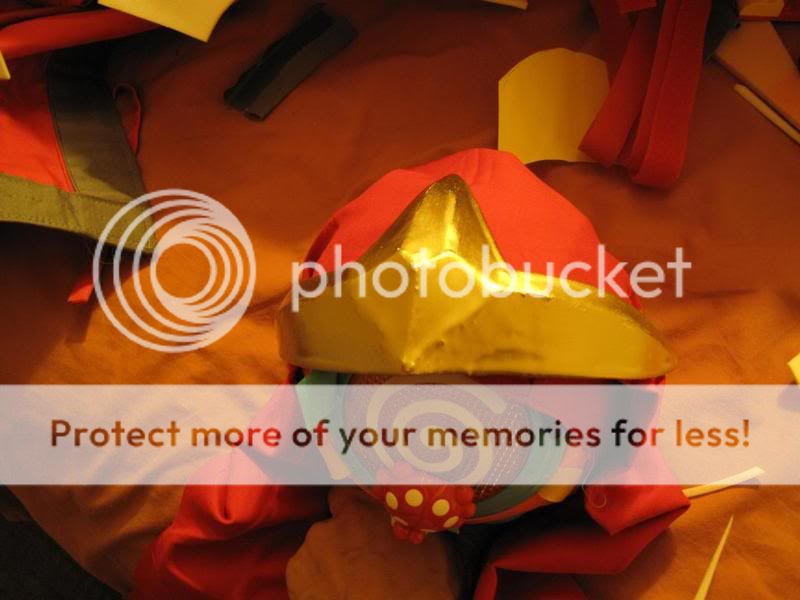
I had some 1/8" and 1/4" plastazote left over from the tron build for the armor parts. I began with the head crest. It was difficult to get the facets correct and have it curve to fit a head . First I had to make some convex V -cuts to get the piece to curve at the right diameter. After which I made a couple oversize pieces which I could trim down to the right shape later. I should have tested with paper first and save a bit of foam.
The back, I hot glued some 14 gauge wire to keep the curve and eventually some velcro for attaching to the hood.
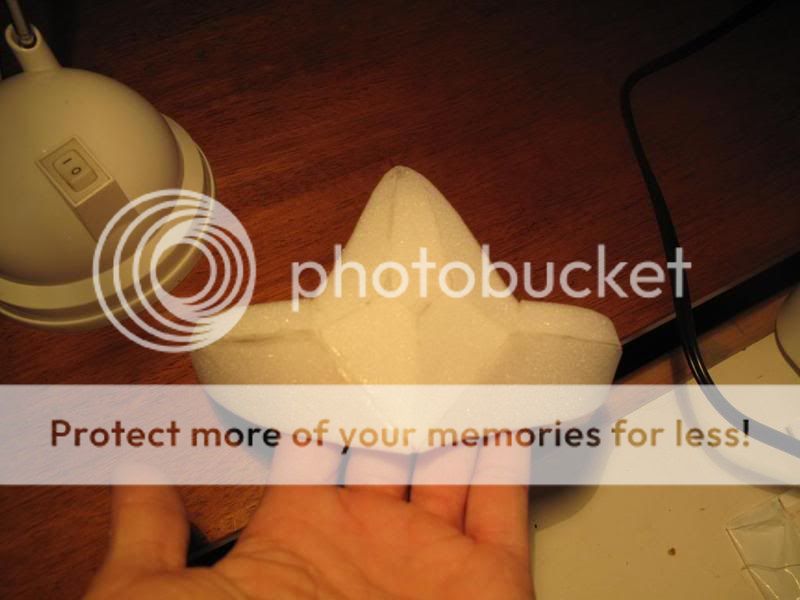
Painted and attached
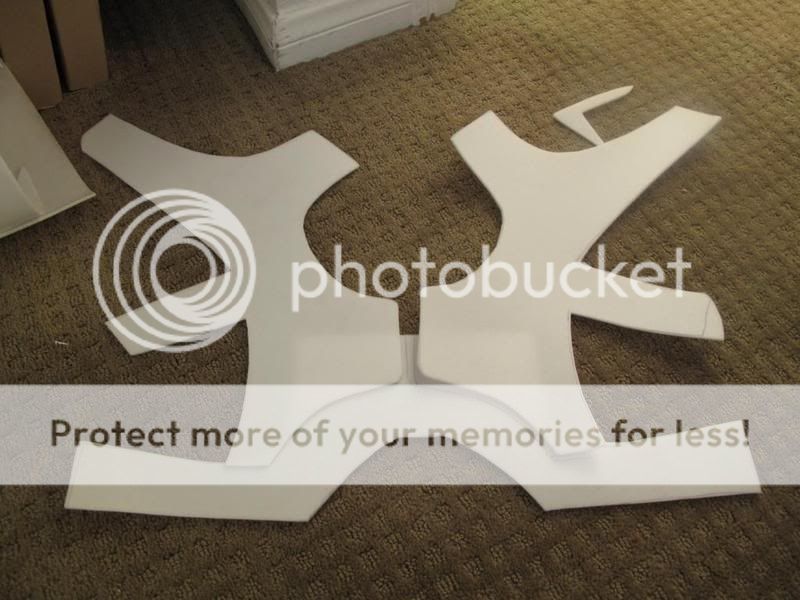
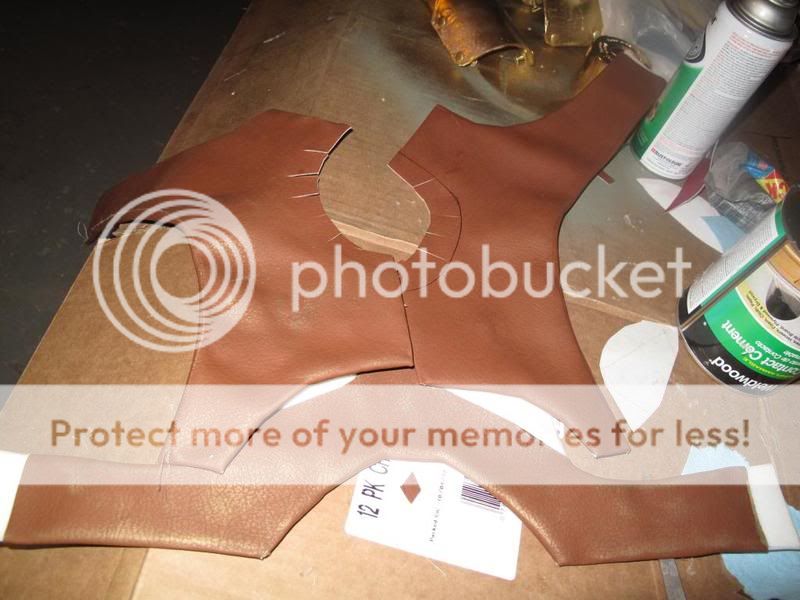
Using some construction paper, made some patterns for the breastplate armor. I left some tails for the shoulder pads as another possible method of attachment. I'm winging it at this point, and need a plan before I move forward.
Then I moved onto the shoulder armor. I made some scalloping scales from 1/4" plastazote. I bevelled the edges with a razor blade and coated them with mod podge. The rubber band to hold the curve turned out to be a mistake since the mod podge would create a raised edge against the side of the rubber bands.
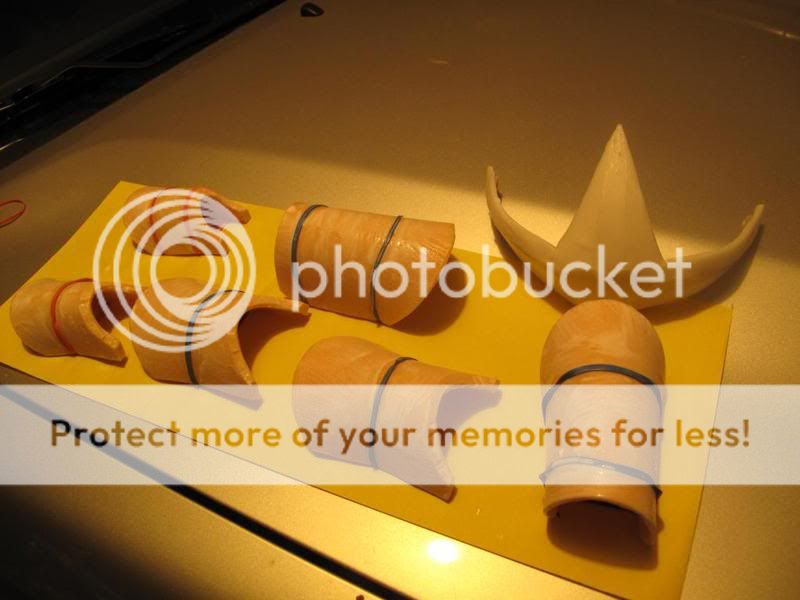
The next step was to use Xrobot's method of coating the foam with casting resin to get a smooth finish. Since I was using metallic gold paint, a glossy base was crucial for a reflective finish.
To hold the curve, I used bamboo skewers. I carefully located the skewers where the pins that ultimately hold the scales together would be located.
I used the only casting resin I had on hand. Crystal Clear 202. With a 9 minute pot life, it should work the same.

My mistake was trying to coat too many pieces at once. What resulted was some pieces showing runs and brush strokes. I started sanding some of the runs and tried a second coat. Unfortunately I had an allergic reaction to the dust from the sanded resin. My arms and face paid the price. It's just like getting poison oak. My ears and nose welled and dried up in an itchy mess. My arms were itching like mad.
Here is the painted and assembled shoulder armor. Looks like wax on a snowboard before scraping, but I dare not sand it anymore.

10/16
The sword.
"Can't he use the one he bought at legoland?" asked my wife. "uh, NO".....
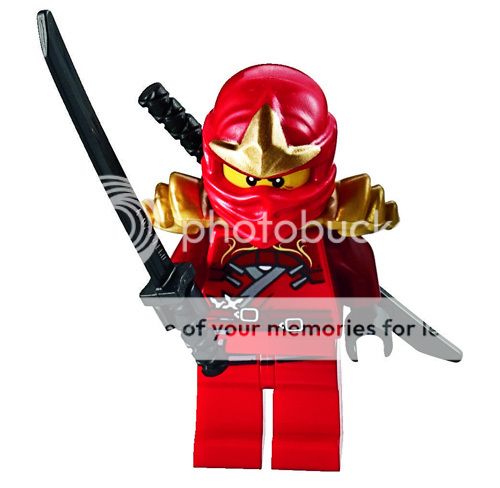
Kai all guilded up in gold armor need more than an off-the shelf toy ninja sword, he needs the Legendary Dragon sword of fire.
The golden dragon sword is the coolest accessory for the costume. It's all about the sword.

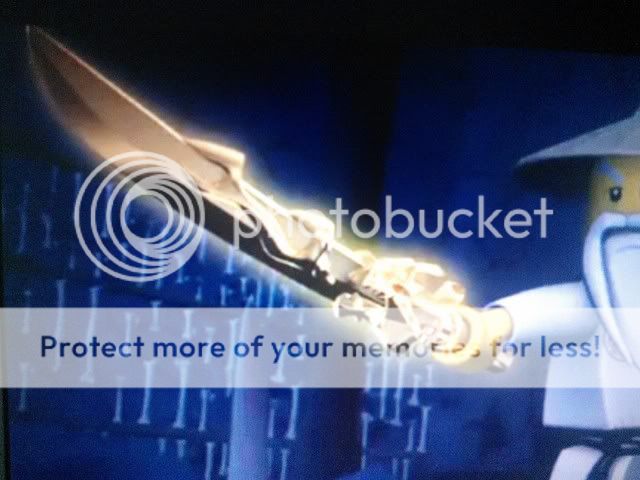
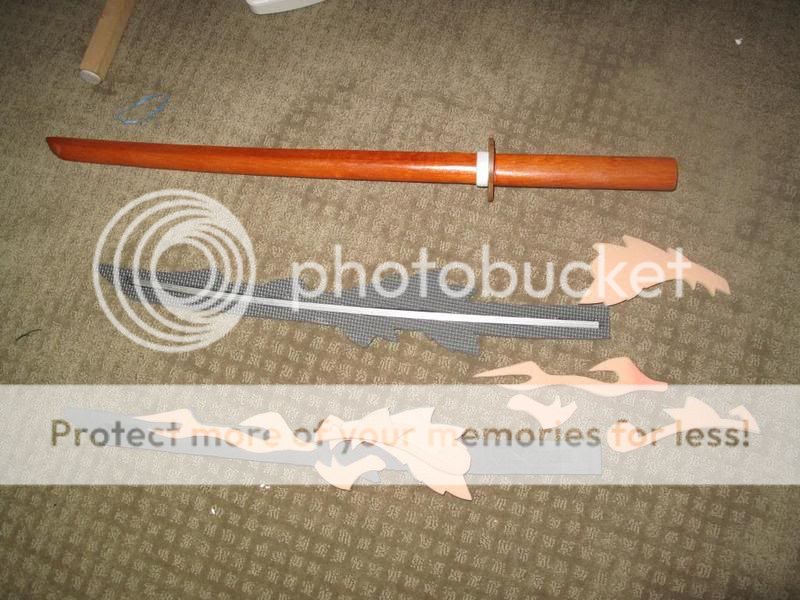
I had originally bought a wood boken for him, but decided to start from scratch and make it out of foam using EvilFX's method
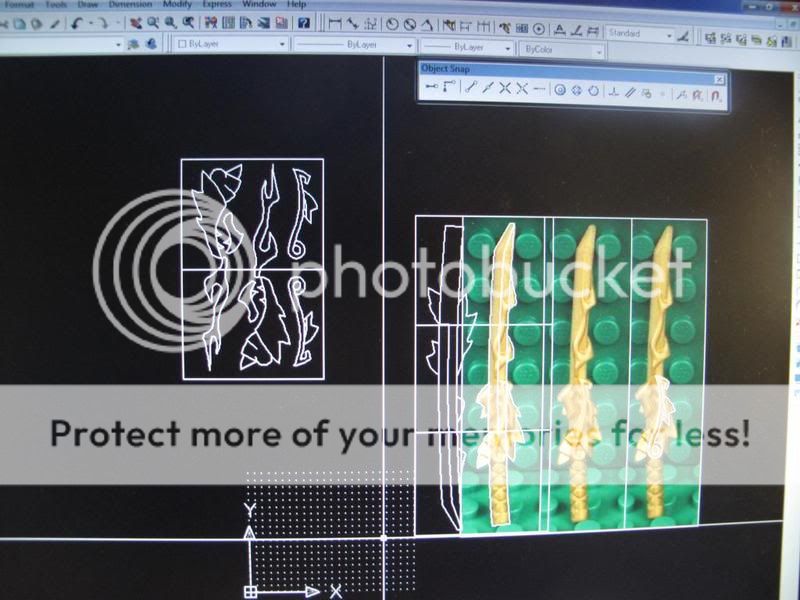
So I started out making paper templates tracing photographs in autocad. I carefully sized the sword so he can draw it from his back by himself. I cut the main halfs from EVA mats, and the layered detail pieces from 1/4" plastazote. The center spine was a 1/4" piece of aluminum rod.
10/17
The sword "ring"
On Kai's back is a gold ring that holds the sword.

When I went to the local True value hardware for fasteners for the shoulder armor, I found some trim rings for the old electric stoves. These were a little large in diameter, but had good thickness. I pinned two of them together with 2" standoffs and polyethylene tubing to hold the rings apart.
10/18
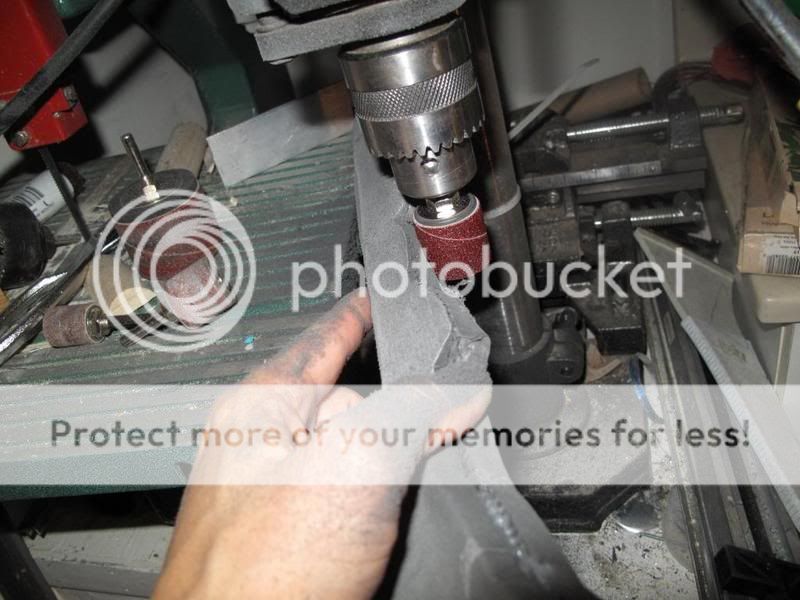
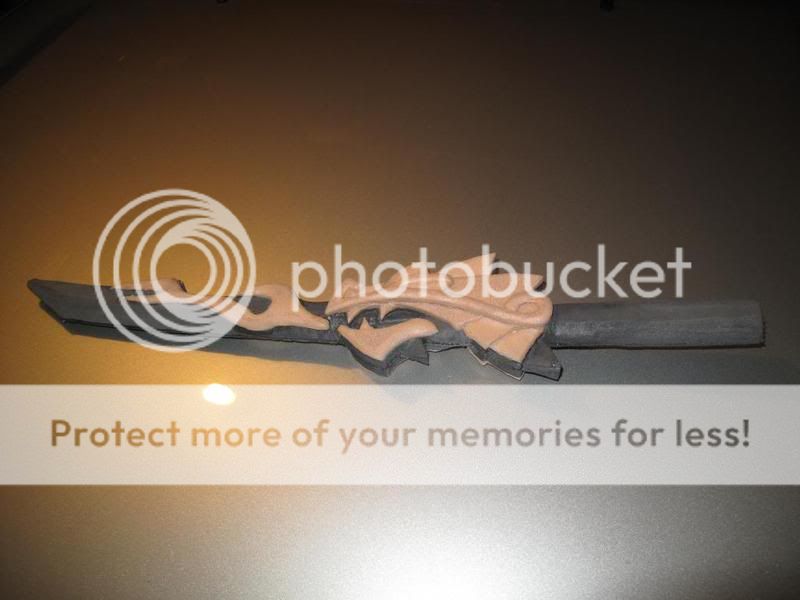
Applying the casting resin to the sword.
After a few coast of mod podge, I mixed up a little bit of casting resin.
This time it went on much better. The resin did a good job filling in the some of the sanding marks made by the drum sander.

10/19
One night left. No more procrastinating on the breastplate.
I covered the foam armor using the pleather. The contact cement I had from years past dried up into molasses. It appears that it has been replacde with some environmentally friendly water based stuff which turned out to be a waste of $15. Following the instructions of letting it sit for 40 minutes before attaching did not help. It seemed too dry and had little tack, but after waiting a day to dry, I could easily separate the pieces by hand. The adhesive was still wet and had no tack to it. So I went back to using hot glue.
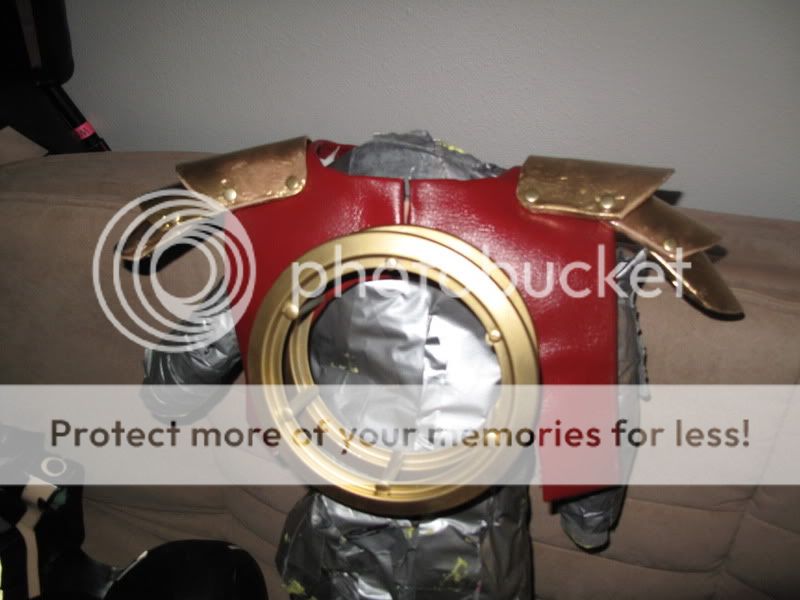
The ring was attached by 2 screws to the back of the breast plate. The front is attached with velcro to allow removal with buckles to from the upper plate to the lower. I painted the brown pleather red for the upper breastplates.

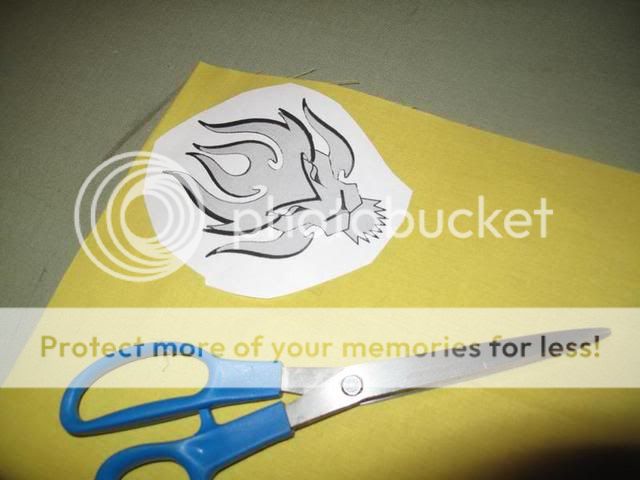
My wife found some scroll tattoo patterns and printed and cut out one that looked detailed enough and fit the breastplate proportions.

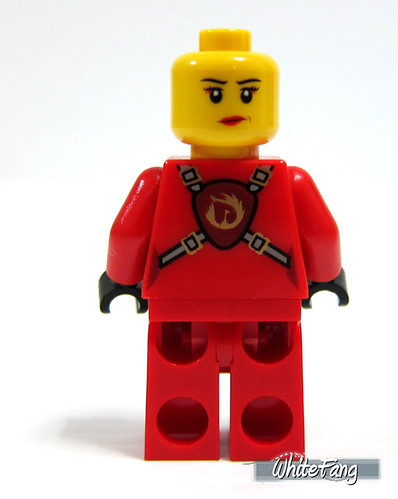
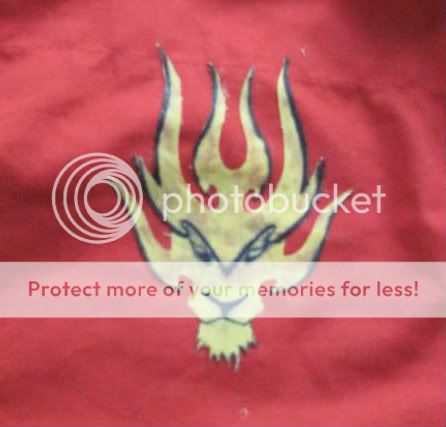
In the center of his back is the lion crest with a flaming mane. You can barely make out the shape from the toy.
I took some creative liberty by taking some elements from some googled images to make a more detailed crest of a flaming lion. It was cut out of yellow fabric and the lines drawn on with a sharpie.
Here's the finished breastplate.

His current favorite shows were my little pony and ninjago. I suggested my little pony to test the waters and indeed it was cold. A crossover character as depicted in Deviant art didn't fly either :0
It was to be a Ninjago character. And he had to have armor.
I wanted to do Jay with his plated right side or maybe the bushido training armor.
But to my 5 year old's favorite Kai wins. To a 5 year old, the sword beats all other weapons. And who wields a sword? KAI
First thing was to sit down with my son and watch a few episodes of the cartoon and get some reference pictures.
The problem of converting a 1" toy to a real life costume is the lack of detail.
Scale it up and it ends up looking too simplistic. Some details are just colored lines which need interpretation to translate.
First I start off with the base Gi which fortunately also comes in red.
After a test fitting, the 000 is still a but large on him. I will have to hem the sleeves and pants. Good thing is the costume can be enlarged to fit him as he grows in the following years.
10/10
A trip to Jo Anne fabrics is in order. I pick up some matching fabric for the hood, some breathable fabric for the mask, grey fabric for the trim and faux leather for the armor.
Dying the sleeves burgundy to darken them. To stop the dye from bleeding past the shoulder seam, I let the dye bleed up and then I wet the rest of the fabric to stop the bleeding.
10/12
I went and got the sewing machine down from the attic.
I cut the grey fabric into strips and sew on the trim. The sleeves were especially difficult,trying to sew around a 4" diameter cuff.
The hood needed to be somewhat loose fitting and at the same time, needed to keep the head crest in place. It was built in 3 parts. The base bavaclava which holds tight to the head. The breathable fabric that goes around the face. And the triangular hood which wraps around and gives the whole thing the ninja look. The hood was sewed to the bavaclava at the forehead where the crest was velcroed on. The elastic face wrap was sewed in the back to the bavaclava to keep it from sliding down as he moves.
I am not a fairy princess!
10/13
I have a nieces birthday part to go to today, but spent some of the morning making the belts.
I cut some brown pleather into strips, folded them over and sewed them into belts. The buckles were also from Jo-Ann fabrics.
10/14
Finally a full day to make some progress.
I had some 1/8" and 1/4" plastazote left over from the tron build for the armor parts. I began with the head crest. It was difficult to get the facets correct and have it curve to fit a head . First I had to make some convex V -cuts to get the piece to curve at the right diameter. After which I made a couple oversize pieces which I could trim down to the right shape later. I should have tested with paper first and save a bit of foam.
The back, I hot glued some 14 gauge wire to keep the curve and eventually some velcro for attaching to the hood.
Painted and attached
Using some construction paper, made some patterns for the breastplate armor. I left some tails for the shoulder pads as another possible method of attachment. I'm winging it at this point, and need a plan before I move forward.
Then I moved onto the shoulder armor. I made some scalloping scales from 1/4" plastazote. I bevelled the edges with a razor blade and coated them with mod podge. The rubber band to hold the curve turned out to be a mistake since the mod podge would create a raised edge against the side of the rubber bands.
The next step was to use Xrobot's method of coating the foam with casting resin to get a smooth finish. Since I was using metallic gold paint, a glossy base was crucial for a reflective finish.
To hold the curve, I used bamboo skewers. I carefully located the skewers where the pins that ultimately hold the scales together would be located.
I used the only casting resin I had on hand. Crystal Clear 202. With a 9 minute pot life, it should work the same.
My mistake was trying to coat too many pieces at once. What resulted was some pieces showing runs and brush strokes. I started sanding some of the runs and tried a second coat. Unfortunately I had an allergic reaction to the dust from the sanded resin. My arms and face paid the price. It's just like getting poison oak. My ears and nose welled and dried up in an itchy mess. My arms were itching like mad.
Here is the painted and assembled shoulder armor. Looks like wax on a snowboard before scraping, but I dare not sand it anymore.
10/16
The sword.
"Can't he use the one he bought at legoland?" asked my wife. "uh, NO".....
Kai all guilded up in gold armor need more than an off-the shelf toy ninja sword, he needs the Legendary Dragon sword of fire.
The golden dragon sword is the coolest accessory for the costume. It's all about the sword.
I had originally bought a wood boken for him, but decided to start from scratch and make it out of foam using EvilFX's method
So I started out making paper templates tracing photographs in autocad. I carefully sized the sword so he can draw it from his back by himself. I cut the main halfs from EVA mats, and the layered detail pieces from 1/4" plastazote. The center spine was a 1/4" piece of aluminum rod.
10/17
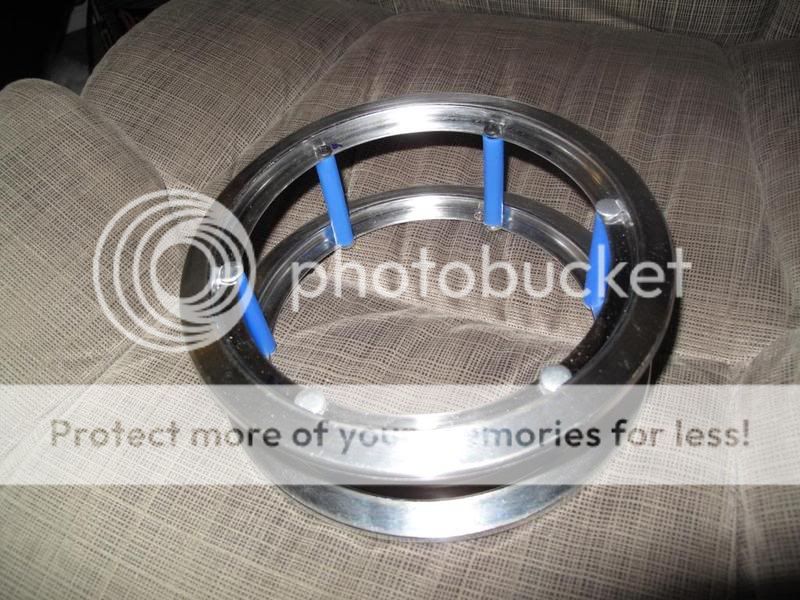
The sword "ring"
On Kai's back is a gold ring that holds the sword.
When I went to the local True value hardware for fasteners for the shoulder armor, I found some trim rings for the old electric stoves. These were a little large in diameter, but had good thickness. I pinned two of them together with 2" standoffs and polyethylene tubing to hold the rings apart.
10/18
Applying the casting resin to the sword.
After a few coast of mod podge, I mixed up a little bit of casting resin.
This time it went on much better. The resin did a good job filling in the some of the sanding marks made by the drum sander.
10/19
One night left. No more procrastinating on the breastplate.
I covered the foam armor using the pleather. The contact cement I had from years past dried up into molasses. It appears that it has been replacde with some environmentally friendly water based stuff which turned out to be a waste of $15. Following the instructions of letting it sit for 40 minutes before attaching did not help. It seemed too dry and had little tack, but after waiting a day to dry, I could easily separate the pieces by hand. The adhesive was still wet and had no tack to it. So I went back to using hot glue.
The ring was attached by 2 screws to the back of the breast plate. The front is attached with velcro to allow removal with buckles to from the upper plate to the lower. I painted the brown pleather red for the upper breastplates.
My wife found some scroll tattoo patterns and printed and cut out one that looked detailed enough and fit the breastplate proportions.
In the center of his back is the lion crest with a flaming mane. You can barely make out the shape from the toy.
I took some creative liberty by taking some elements from some googled images to make a more detailed crest of a flaming lion. It was cut out of yellow fabric and the lines drawn on with a sharpie.
Here's the finished breastplate.
Last edited:


")