My Captain America: TFA WIP

steamshovel

Well-Known Member
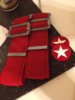
Hey everyone, I have been slowly working on my costume for the Cap. Attaching some pics of my build so far. I got an INCREDIBLE helmet from Roblenzz on here and am having to do everything else on a budget. The nice thing about living in NYC is that you have access to everything. It just costs money. A Bit different than southern CA as far as having space to create as well, so you may see some fun places in the future, like my fire escape, or kitchen sink with fabric being dyed. Either way, my home is yours on this fun journey, so I'd love to get feedback from all you fans of the film costume. Cheers!

I'm starting off with the helmet, again from Roblenzz, and I just added my own padding and liner made from leather and vinyl straps.
 
Here is the second set of pictures. They are for the side stars on the shoulders. I searched everywhere in the city and could not find the correct size, or distinct shape of the raised center. So I decided to make my own. I went to Michael's yesterday on 96th and Columbus and grabbed some sculpey. Just a $2.50 small package since I figured I'd try, and if I failed, I'd only be out a few bucks. So here what I started off doing:

I used sculpey to sculpt out a star for the shoulder piece. I gave about an inch between the points, and about a 1/4 inch for the height in the middle. I also didn't know that it was glow in the dark when I bought it... double bonus.

Then, I tried melting down rubber bouncy balls, didn't realize once rubber is vulcanized, it won't melt easily. So I tried the next best thing, hot glue. I just sprayed a bit of pam cooking spray, (I said I was on a budget), and after it cooled, it lifted right out!
 
HAH, the star idea is brilliant!

its flexible, its clear, you could even make the chest star that way. just melt more glue sticks in a pot and cast it in a sculpey mold :D
any chance on showing the finished star?
 
Good show, for sure! Got my helmet from him as well. Plus, I know what you mean about where you live-I live in Vancouver, and being such a movie/artsy community and a big city, there are always places to find what you are looking for!
 
wow.. nice job! I have the helmet too, and about half the padding.. I need the piece for the eyes and nose.. any chance you can share your template?
 
Woohoo! Found my post again! For some reason, I couldn't find it for the life of me! Alright, to answer your questions, I have a quick pattern I drew up for one of the members. It isn't exactly accurate, but it gives you an idea. I had already attached my piece, so I didn't want to rip it out. Sorry. :)

But this at least gives you a good idea, just remember to always leave extra room for cutting!


Now, here are the rest of the pics for a better idea of the finished stars and straps!

I used plastic buckles from a place here in NYC called Pacific Trimmings. Cheaper to do it myself than to purchase the metal buckles. As you can see, the plastic buckles were meant to melt in the oven, but it being so hot here, I said "fuggetaboutit" and just broke them, glued them, sanded them, added rounds of hot glue for the round edge in the crease, then painted them. At some point, I will get the real ones. :) And sorry the pics aren't right side up.
 

Attachments

  • finished buckles.jpg
    finished buckles.jpg
    47.1 KB · Views: 658
Happy Fourth of July week everyone. May the spirit of freedom and independence continue to flourish, and may the tree of Liberty continue to grow its roots deep into the hearts of men. To all the service men and women, thank you for giving your all and helping keep America safe.

God bless,
Mike
 
I won't be able to work on anything until after the Fourth, but if anyone is near El Paso Texas and headed to the Fort Bliss Fourth of July celebration with the El Paso Symphony, I'll be singing a few songs so come up and say hi after!

Happy propping and may the Fourth be with you!
Mike
 
Starting my belt buckle this morning, but while I go out and get materials for it, here is a picture of my wife who stole my helmet when I got it. This is what I come home too...
 
Here is the start of my buckle today. The top silver one was a prototype I made out of a dvd case for sizing. As you can see the measurements are on the foam core for the buckle. The sculpey is in the oven and half baked now. going to sand down the other pieces for the rest of the buckle that already baked and do a dry fit, sand, carve, sand, fit, adhere, and paint. :) That is the plan anyway.
 
Here is the start of my buckle today. The top silver one was a prototype I made out of a dvd case for sizing. As you can see the measurements are on the foam core for the buckle. The sculpey is in the oven and half baked now. going to sand down the other pieces for the rest of the buckle that already baked and do a dry fit, sand, carve, sand, fit, adhere, and paint. :) That is the plan anyway.


yup I think you where the reason I joined. Here is the helmet idea I stole from you :D well I think it was yours I seen it and that got me started

I use rondo and fiberglass for my captain america mask if you want really thin and really strong go with fiberglass resin and fiberweave cloth.

IMG_00660.jpg


IMG_00665.jpg


IMG_00671.jpg


IMG_00673.jpg
 
Progress so far today. Also, I have my fabric in the dryer at the laundromat. Drying from my hopefully uncrappy dye job in my kitchen sink.
 
This thread is more than 9 years old.

Your message may be considered spam for the following reasons:

  1. This thread hasn't been active in some time. A new post in this thread might not contribute constructively to this discussion after so long.
If you wish to reply despite these issues, check the box below before replying.
Be aware that malicious compliance may result in more severe penalties.
Back
Top