Blue Ranger / Tricera Ranger follow up thread & a favor to ask of the community

firion1234

New Member
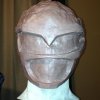
Hello all! I'm finally getting around to posting the results of my homemade Blue Ranger helmet and the accompanying costume. While I'm sure no one was waiting with bated breath to see the outcome, I am sorry I took so long just the same. I had a blast at Dragon Con and everyone was very complimentary of the helmet. I am proud of it, no doubt, but the reception from the con goers was really flattering. When I set out to make it, my goal was to make a helmet indistinguishable from one of Aniki's. I knew from the outset I would fall very short of this, and yet, one person told me that the only difference he could see between my helmet and another cosplayer's, dressed in a perfect, screen accurate costume, was that his helmet was shinier. He must have been drinking... Nonetheless, his kindness and everyone else's warmed my heart and made it that much more worth it. I'll start off with the "hero" pictures from the event and then follow with the "making of" photos.

Last but not least, I was wondering if anyone owning a stunt cast helmet could provide me with some measurements. My helmet was not so drastically large that it ruined the overall look, but I want my sculpts to be as close to show accurate as possible. It is my intention to sculpt all the MMPR/Zyuranger helmets (and all the other super sentai helmets someday!) and any measurements provided would prove invaluable. For example, around the center line of the helmet, from under the chin around to the back or from side to side over the apex of the helmet. Any measurements of the features such as the lips, eyes, tusks, teeth, etc. would be helpful too. Many, many thanks to anyone willing to take the time to do so!

IMG_0825.jpgIMG_0821.jpgIMG_0856.jpgIMG_0862.jpg
 
Last edited:
I made a lot of mistakes along the way and I hope this write up will save at least one person some heartache. Unfortunately, tutorials are very brand specific, and depending on the products you choose for your project, your mileage may vary. Unless you opt to buy each and every product in a write up, your outcome and experience will differ. Even then there is still room for variance. The information you'll find herein I hope will contain enough general advice to make reading it worth your while. It will, of course, also serve to reflect on the pros and cons of the products I chose. Let's get to the mistakes!

#1 Don't purchase your products until you have something to mold! I purchased all my products naïvely believing I was going to make a full Iron Man suit (let's just say pepakura isn't for me). When this didn't pan out, *gasp* they sat on my shelf for a full year before I put them to good use. To my credit, I decided in September of last year I was going to do the Blue Ranger and I made it happen! Fortunately they were still good but they just as easily could have expired and I would have been out $250 dollars.

#2 Buy at least 10 pounds of oil based clay if you're wanting to do a helmet. I find that it takes at least that much to cover the adult male head to the proper thickness and proportions of most helmets. Get your self a good, sturdy armature (ideally I would advise making a lifecast of your head). If you use one of those foam heads you're going to need more clay, the diameter of the head is not life sized. I used monster clay and I recommend it.

#3 Maintain a center line around the whole sculpture. I only maintained a center line on the front of the helmet where the majority of the features were and I paid dearly for it when it came time to do the body work. LOTS of Bondo was called for. The asymmetry will only be visible if you have the visual queue that is the center line. Asymmetry doesn't stand out on the basic, overall shape of a helmet the way it does when you have a feature out of place. In other words, in the case of the Blue Ranger, it's easier to tell when a horn doesn't look like it's in the right place than the back of the helmet isn't filled out enough on one side.

#4 Don't add features until you have achieved the basic shape. Obvious, right? It's only obvious if you realize you still haven't attained the basic shape. The worst way to realize you haven't is when your features don't line up despite your best efforts. To put it another way, don't put your beautifully wrought features on an ugly canvas. This can be a tremendous time sink if you have cut off something you've sculpted, reshape the area, and try to reintegrate the piece you cut off back in. It may turn out that you can't and have to resculpt it.

Here are just a few pictures of the sculpture's humble beginnings. The holes poked in the sculpture of course represent where my eyes would be. After I'd added the lips the holes made the sculpture look hilarious so I had to cover them just to concentrate.


IMG_0689.jpgIMG_0690.jpgIMG_0692.jpgIMG_0693.jpgIMG_0694.jpgIMG_0696.jpg
 
Last edited:
I'm curious why you're wanting to sculpt all the helmets when you can buy fibreglass kits for most of them already. Are you just using this as a means to hone your skill?
 
I'm curious why you're wanting to sculpt all the helmets when you can buy fibreglass kits for most of them already. Are you just using this as a means to hone your skill?

I must confess, I'm surprised to have gotten that response on the RPF! You can buy most anything if the price is right. I mentioned in my last post that I had originally intended to make an Iron Man costume. It reads like I abandoned it after I found that I didn't like pepakura, but in fact, I attempted to sculpt the helmet and wanted to sculpt all the other armor pieces as well. It was just too ambitious so I chose a ranger because the only rigid part of the costume was the helmet. My father was a prop maker by trade, so no project seems too large when I'm day dreaming. I suppose that answers the question too. It's just in me to want to make it myself. Mind you, there is nothing wrong with buying something if it's the thing you really want. For me at least, it's generally the experience I really want. Having said that, I bought a Legacy Dragon Dagger because I didn't see the sense in reinventing the wheel when a beautiful replica was sitting on the shelf at a Toys"R"Us. In the case of buying a kit helmet, you're out $100 bucks and you're only halfway there. You still have to fill it, sand it, cut it, install hardware, paint it, and install a visor and padding! If when you're making props you have never had occasion to sculpt in clay before, I recommend you try it! There is something deeply satisfying about giving shape to a formless mass. It must be primal or something...
 
On to the next phase! The jacket mold. The product I used was Smooth-On's Brush On 40 urethane mold rubber. While it picked up incredible detail, it is not without its drawbacks. The most minor of which is that it's white in color. You have to tint either the plastic or the rubber so you can see what you're doing while slush casting. It's difficult to dispense and the cure time is quite a bit longer than most silicones, sixteen hours. However the biggest drawback its poor performance when bonding to itself. The layers have to be added while the material is still tacky or delamination may occur. In other words, the structural integrity of the successive layers is comprised by waiting too long. This makes adding on registration keys made of the same material a pain because they have to be set up enough to handle but not so cured that they just don't stick.

Let's continue to enumerate my mistakes.

#5 Thankfully I only made one very minor mistake in process of making the jacket mold. When making the registration keys I mixed up too much rubber and by the time I'd poured the last few the material was too viscous. The product didn't settle and the sides that were supposed to be flat to join with the wet urethane layer were rounded and didn't want to stay in place. Let me tell you, it's not as simply as just cutting off the rounded bit! Urethane is tough stuff, very dense. So, I battled with my registration keys slowly sliding off. In the end I got them all where I wanted but it was a mess.

#6 I'm not well versed in the chemical compositions of these types of products, the difference between an epoxy and a urethane is completely lost upon me. However, from an observational standpoint the urethane rubber and polyester resin for the fiberglass mother mold didn't seem to play nice with one another. I feel like they bonded chemically. If you chose Brush On 40 to make your jacket mold, be sure to release it with some Universal Mold Release (another Smooth-On product) before laying up the fiberglass for the mother mold. I literally broke into a sweat trying to pry the thing free.

#7 Use more than just 2 layers of fiberglass. I am a skinflint of the first water. This has served me well financially but it can come back to bite you when taking on a project such as this. I had only fiberglassed once before this project and that was years ago. What's sad is I had plenty of glass that I got for free and I still skimped... I broke the mother mold during said prying but it still served it's purpose admirably.

I circled a couple of the registration keys that didn't sit flush to illustrate what meant about them not having a flat underside. These aren't even the worst of them! As I was alternating colors I put the registration keys on the second to last layer. This was my intention even before I realized how bad a few of them were and it helped me to fill in the gaps.

Blue ranger indeed, first coat.jpgIMG_0050.jpgIMG_0053.jpgIMG_0054.jpgIMG_0059.jpg

Last but not least, that bunk bed you see in the background of this picture is one of the prison bunks from The Walking Dead.

IMG_0058.jpg
 
Thanks for the thorough write up! #4...been there, done that. It's hard not to rush ahead of yourself!
 
There is nothing that I could hope to add to the collective wisdom regarding Bondo. When I first started working with it I thought it was more evil that Bandora. Get it? Bondo-ra? No? For the <1% of you who do get it, let's be friends! For those of you who don't, you're a Google search away from knowing how lame that joke was and you won't want to be my friend... Anyhow! Now I love the stuff. It's applications seem limitless. That said, I'd only ever chose to work with it if nothing else could do the job. I try to avoid toxic splooge as best I can, but it's versatile, cheap, and durable.

On to the mistakes! When it comes to paint, the information here applies to rattle can paints and primers. Obviously, these are not ideal for flawless, beautiful work. However, because you can get tolerable results and they are cheap & ubiquitous, people will continue to use them. Here is a list of things NOT to do.

#8 More or less finish sanding your piece before you prime. Even if your piece is stark white and it's difficult to discern where it needs it, do your best to hit every spot. You don't have to go crazy and work your all the way up to 2000 grit. However, take the time to make sure you rub out the tool marks that were in your sculpture. I didn't sand in the nooks and crannies where primer is wont to pool up, compound this with the micro rake marks that were notoriously bad about getting clogged with primer and you'll have a gummy mess before you know it. Needle files are obviously the way to go here. I left this picture large so you can see the rake marks at the base of the front horn. I simply did not sand well enough.

IMG_0085r.JPG

#9 This one belongs more to the sculpting phase but I didn't realize it was a mistake until it came time to cut the visor out. Don't recess the visor area too deep into your sculpt! The diameter of the cut wheel on my dremel wasn't as large as the area was deep so the grip of the tool bottomed out on the face of the helmet. This coupled with a really, really thick spot where the plastic cured in a blob made cutting it out a nightmare.

#10 Make sure when sanding to not allow any plastic to show through!! If you sand through your primer, prime it again and use a higher grit. It will take longer but you don't want to see any plastic. Embarrassingly, I thought it was ok that I could see the plastic because, hey that's just what happens when sanding your primer coat, right? Oh, and the box says the urethane is paintable right? Wrong. Sadly I sprayed my color with the helmet looking like this.

IMG_0107.jpg

Needless to say, the paint rubbed off and was pulled off by the blue masking tape. There were a number of spots I had to do touch paint on that turned out ugly because the paint wasn't at the same level, resulting in indentations.

#11 Don't apply Bondo's grazing and spot putty to a painted or even primed surface. It causes it to gum up and roll off. I had to sand, buff, and scrub off all the silver around the mouth. Both this and the last mistake I described took place just three days out from Dragon Con. This was the second most heartbreaking part as nothing looked as good as it did before I had to rub all the paint off.

Next post I'll cover what I had to do to make the belt and review Cosplay House's suit and cuffs.

IMG_0083.jpgIMG_0099.jpgIMG_0116.jpgIMG_0117.jpgIMG_0118.jpg
 
Last edited:
Surprisingly, even though it was my first rodeo, the helmet aspect of the project remained on schedule throughout. For years I've been watching videos of people doing similar projects so I knew when I started what kind of time frame I was looking at from start to finish. The sculpting phase was the only open ended part. You have to reign in your self criticism when you have a deadline. I could have happily pushed clay around ad infinitum, so having a deadline was good for me.

The scary part was whether or not the suit would arrive on time. I placed my order on July 9th, anticipating that with a stated 3 to 5 week turn around time and such a simple design I would get my costume in plenty of time... I received an email at the 3 week mark saying "If we exceed our average processing time, then please feel free to email us." Once it was five weeks to the day I placed my order I decided to take them up on that. To their credit, they responded back reasonably quickly, two days later, saying they would remind their tailors of the expected delivery date.

I got an email on August 21st saying my order had shipped. Ugh... Dragon Con started on the 29th and this package is coming from China... or so I thought. They say they are based in California but every impression I've gotten is that, maybe their corporate office is based there, but that the work is done abroad. I never bothered to corroborate since it would get here when it got here and there was nothing I could do about it. Then, as if by magic, there was a package on the doorstep by the 23rd.

My initial impression was quite favorable. However, below you'll find my review of the various parts after I'd worn it for Dragon Con and had a chance to look at stills from the show to check for accuracy.

Suit: 7/10 – The center diamond is too small and there is a seam up the stomach, so points docked for lack of accuracy, but it was very comfortable and a really good fit. By the end of the weekend a very small hole had begun to open in the lower back but no catastrophic wardrobe malfunctions took place. Any self respecting costumer should be able to mend a hole that size with ease.

Gloves: 5/10 – They're white, that's about all that can be said about them. A minor attempt was made to add the detail on the back of the hand to make them resemble the true Cacazan sentai glove. Only good enough to get the job done. The material is some cheap, thin, non breathing synthetic. Vinyl maybe? Anyway, the fit was too snug.

Cuffs: 4/10 – They are made of a thicker version of the same material. There is foam sewn inside them and they velcro together rather than zip. The diamonds are about 2 inches too long and are positioned in the center of the cuff rather than starting at the back. Also, the cuff itself is too long, it comes to my elbow rather than ending short of it.

Belt: 3/10 – Even if they hadn't sent me the wrong one I wouldn't likely have settled for it. You read that right, they sent me the wrong belt. The Green Ranger's belt to be exact. Have a look.

IMG_0113.jpg

The write up for what all it took to make their belt serviceable is considerable so I'd best save it for the next post. I'll also review the boots I purchased separately from hunny_lee.
 
Last edited:
This thread is more than 9 years old.

Your message may be considered spam for the following reasons:

  1. This thread hasn't been active in some time. A new post in this thread might not contribute constructively to this discussion after so long.
If you wish to reply despite these issues, check the box below before replying.
Be aware that malicious compliance may result in more severe penalties.
Back
Top