You are using an out of date browser. It may not display this or other websites correctly.
You should upgrade or use an alternative browser.
You should upgrade or use an alternative browser.
Studio Half Scale TOS Enterprise Scratch build
- Thread starter SteveNeill
- Start date
- Status
- Not open for further replies.
SteveNeill
Sr Member
Thanks Dennis. It will be awhile though. ")
Actias thanks. From the plans I get the diameter. The inside is a straight linear cylinder. At its base is an outside diameter former. The rest is easy. Make a paper pattern, apply it to styrene, cut the styrene, and wrap around.
Today I finished off all those concentric rings for the array. I went around my shop with calibers and found round shapes the correct size for each ring. It was simple then to cut the balsa, soak them in ammonia water and wrap them around held in place with rubber bands. I then placed them in my air circulating fan oven to dry.
Once dry CA them together, lightly sand, red spot putty and sand again. A bit of primer and I mounted them to the former that fits inside that cone. I will pull waste molds off these parts and cast them in Alumilite.
The idea here is to take these resin parts and sand and fix all the little flaws until perfect and mold. Much easier to point up and sand this way.
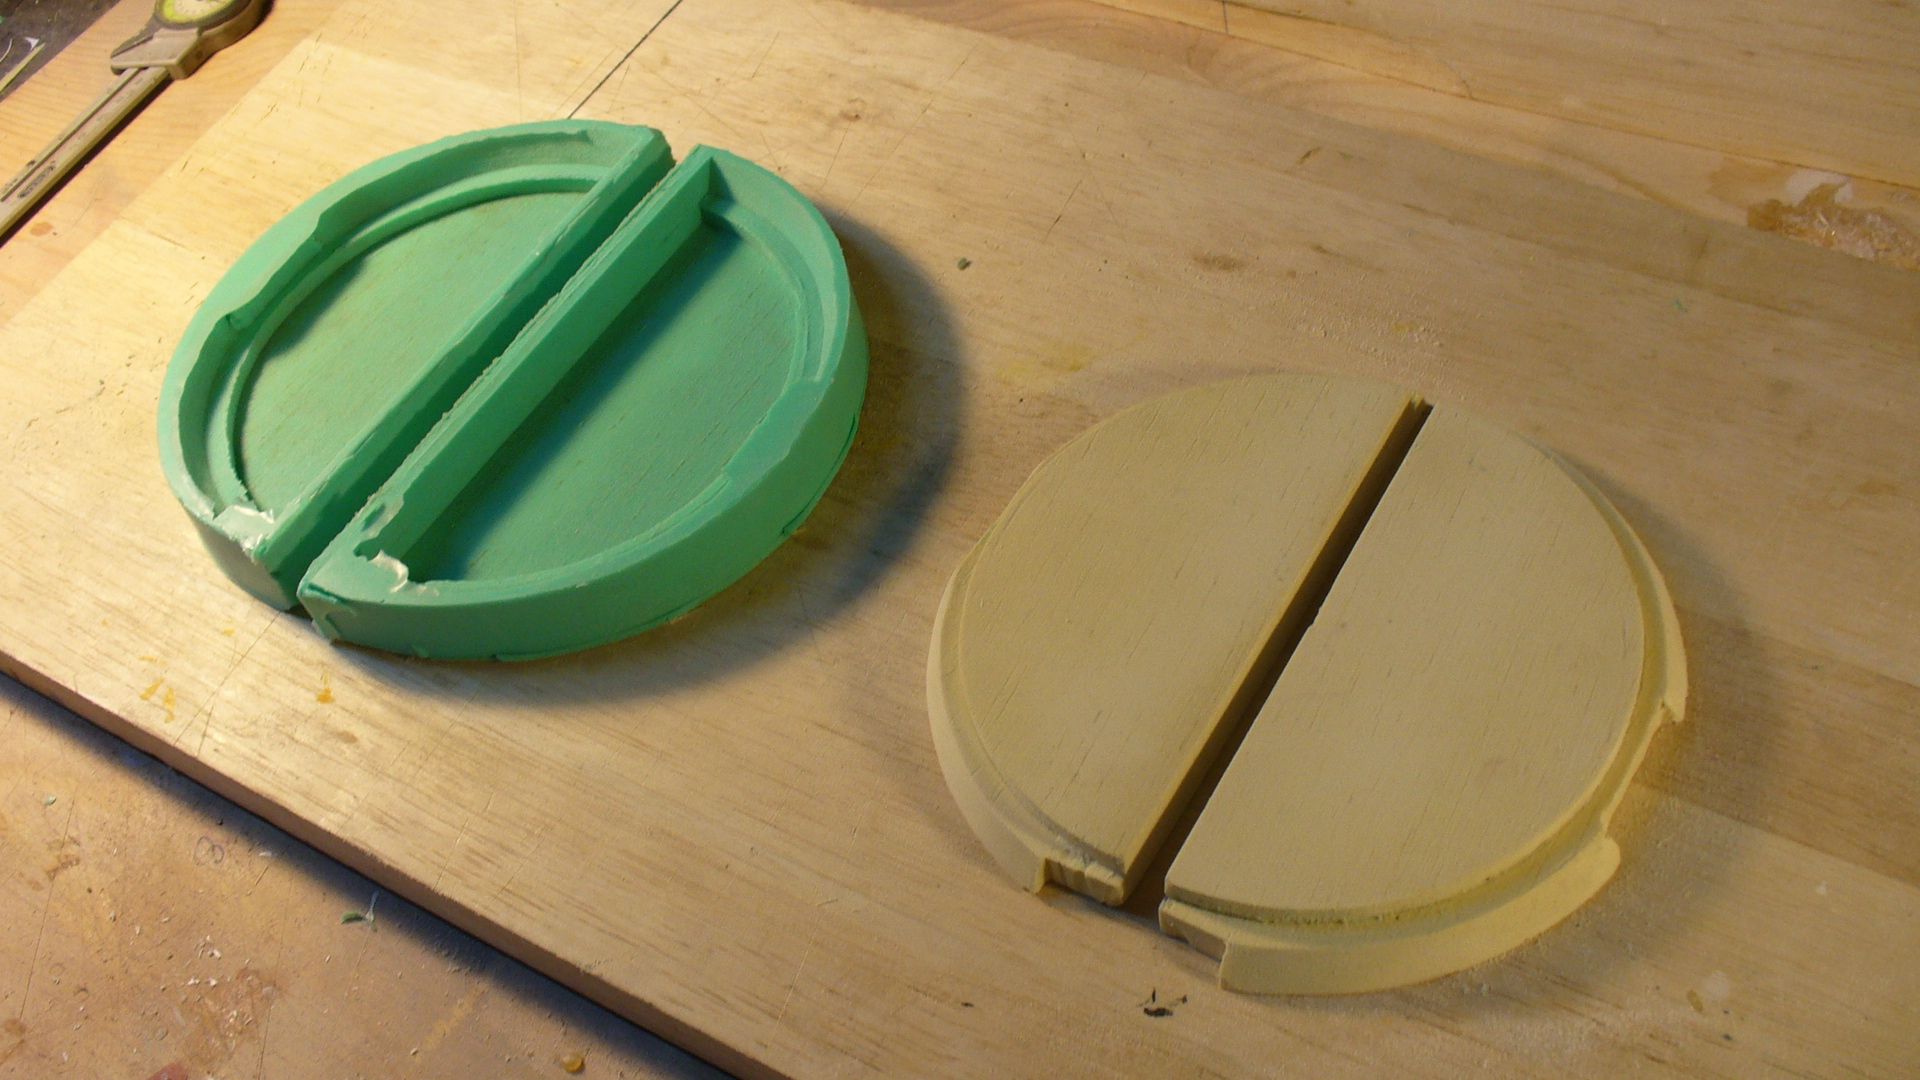
I removed the tape today from the hanger doors. The paint is so thick I’ll have to wait another day to point this part up but it came out very well. That Balsa foam works great BTW. I was able to use spot putty and primer on it directly without it eating the foam. As it turns out it water based and non toxic. Good for make small parts.
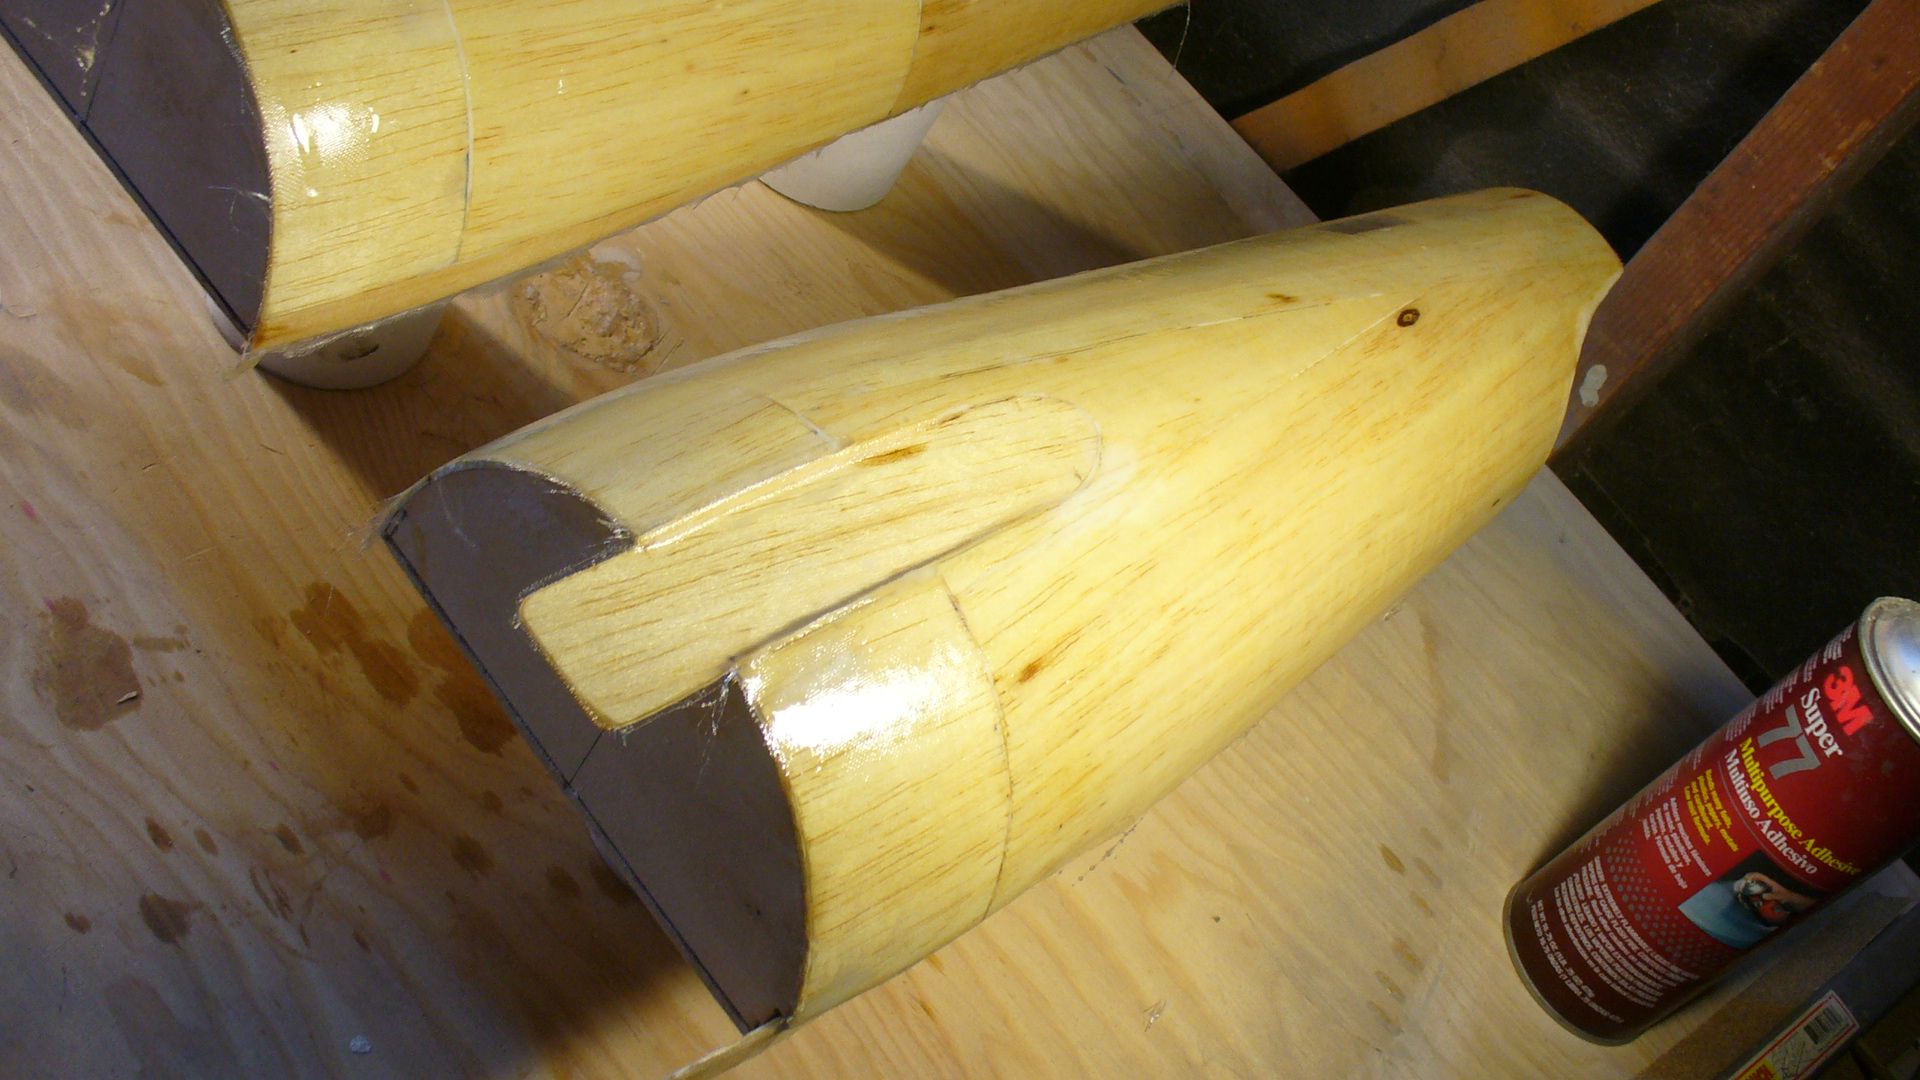
Tomorrow I’ll fill in behind those flat pieces against the array cone. Once this is done I can on Monday start glassing the secondary hull, the neck and the pylons. That leaves the nacelles. Getting there!
Steve


Actias thanks. From the plans I get the diameter. The inside is a straight linear cylinder. At its base is an outside diameter former. The rest is easy. Make a paper pattern, apply it to styrene, cut the styrene, and wrap around.
Today I finished off all those concentric rings for the array. I went around my shop with calibers and found round shapes the correct size for each ring. It was simple then to cut the balsa, soak them in ammonia water and wrap them around held in place with rubber bands. I then placed them in my air circulating fan oven to dry.
Once dry CA them together, lightly sand, red spot putty and sand again. A bit of primer and I mounted them to the former that fits inside that cone. I will pull waste molds off these parts and cast them in Alumilite.
The idea here is to take these resin parts and sand and fix all the little flaws until perfect and mold. Much easier to point up and sand this way.
I removed the tape today from the hanger doors. The paint is so thick I’ll have to wait another day to point this part up but it came out very well. That Balsa foam works great BTW. I was able to use spot putty and primer on it directly without it eating the foam. As it turns out it water based and non toxic. Good for make small parts.
Tomorrow I’ll fill in behind those flat pieces against the array cone. Once this is done I can on Monday start glassing the secondary hull, the neck and the pylons. That leaves the nacelles. Getting there!
Steve
Last edited by a moderator:
crackerjazz
Sr Member
Now that leaves me breathless! It would make a fine museum piece as it is, let alone when it's all done. You just plod on like a bull and amaze us every step of your creation.
robn1
Master Member
I've been away from the forum for a while, so I missed this when you started. WOW! This is some great work you're doing Steve, and the pointers are great and much appreciated. I would never have thought to use balsa to pattern a subject like this, but it's working great. But wouldn't the concentric circles be easier to cut from plastic tubes?
SteveNeill
Sr Member
Thanks guys. To use plastic tubes is a problem to get the exact sizes and wall thickness. I could have spent more time looking for the right tubing than I did just making the darn things myself.
For the dish I'm either going to lathe it or wait for my buddy to CNC the parts for me which is what I hope for.
Again you guys thanks so much for the kind comments and encouragement!
Steve
For the dish I'm either going to lathe it or wait for my buddy to CNC the parts for me which is what I hope for.
Again you guys thanks so much for the kind comments and encouragement!
Steve
brandomack
Sr Member
That looks COOL!!!! :thumbsup
Brandon
Brandon
A master class indeed. This project is a blast to follow!
crackerjazz
Sr Member
And there's really nothing like a large scale to bring out size - as any photo of it readily shows perspective and just cries out "BIG!"
SteveNeill
Sr Member
Thanks you guys as always.
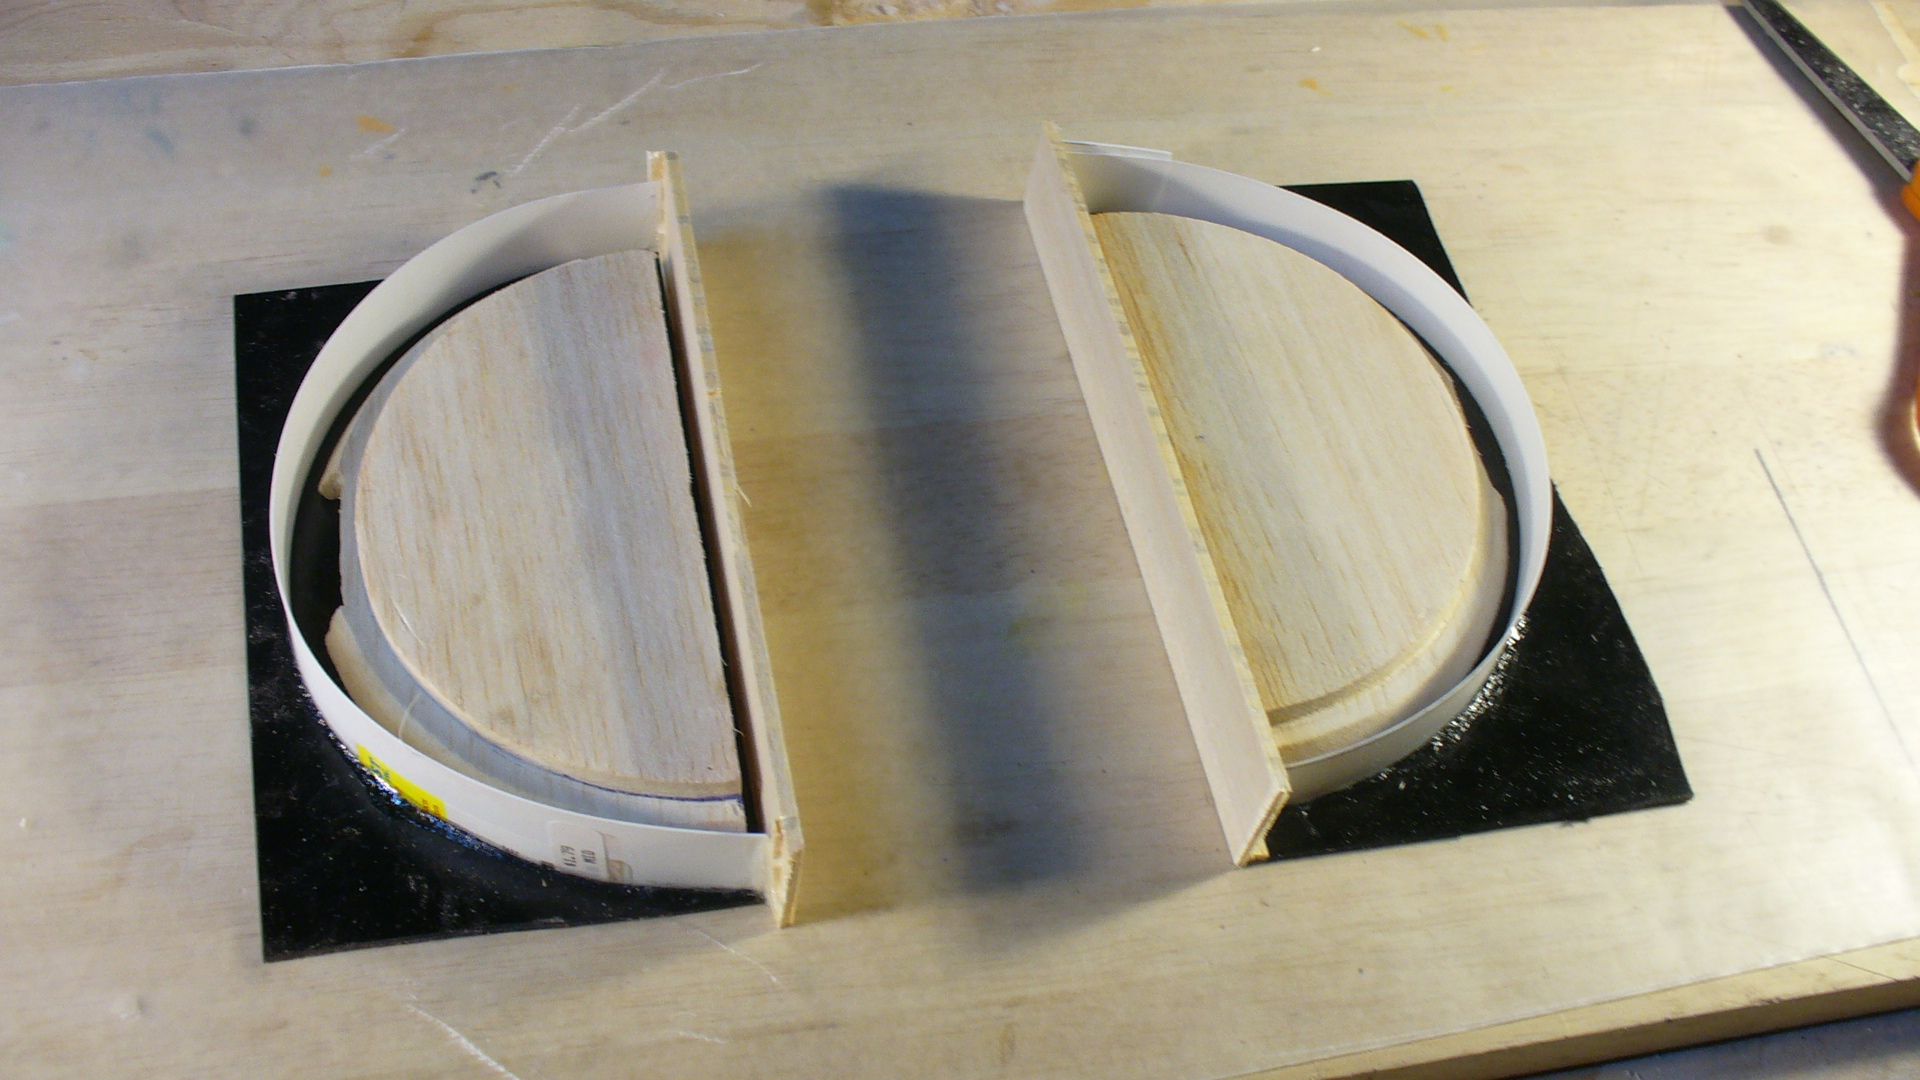
Today was honey do day and other stuff but I did manage to make a waste mold off the secondary hull base for the array. In order to fine tune this piece I need a hard resin casting to tool. Then mount that to the balsa hull master after I glass it and lock it in.
Basic procedure. Dam up the two halves and pour GI 1000 silicone. It will sit over night and tomorrow I can pour alumilite and tool it up.
More tomorrow.
Steve
Ramsbottom
New Member
Beam me up scotty. What a model.
SteveNeill
Sr Member
Randy it's great to hear from you. Thanks so much.
Ramsbottom thanks very much.
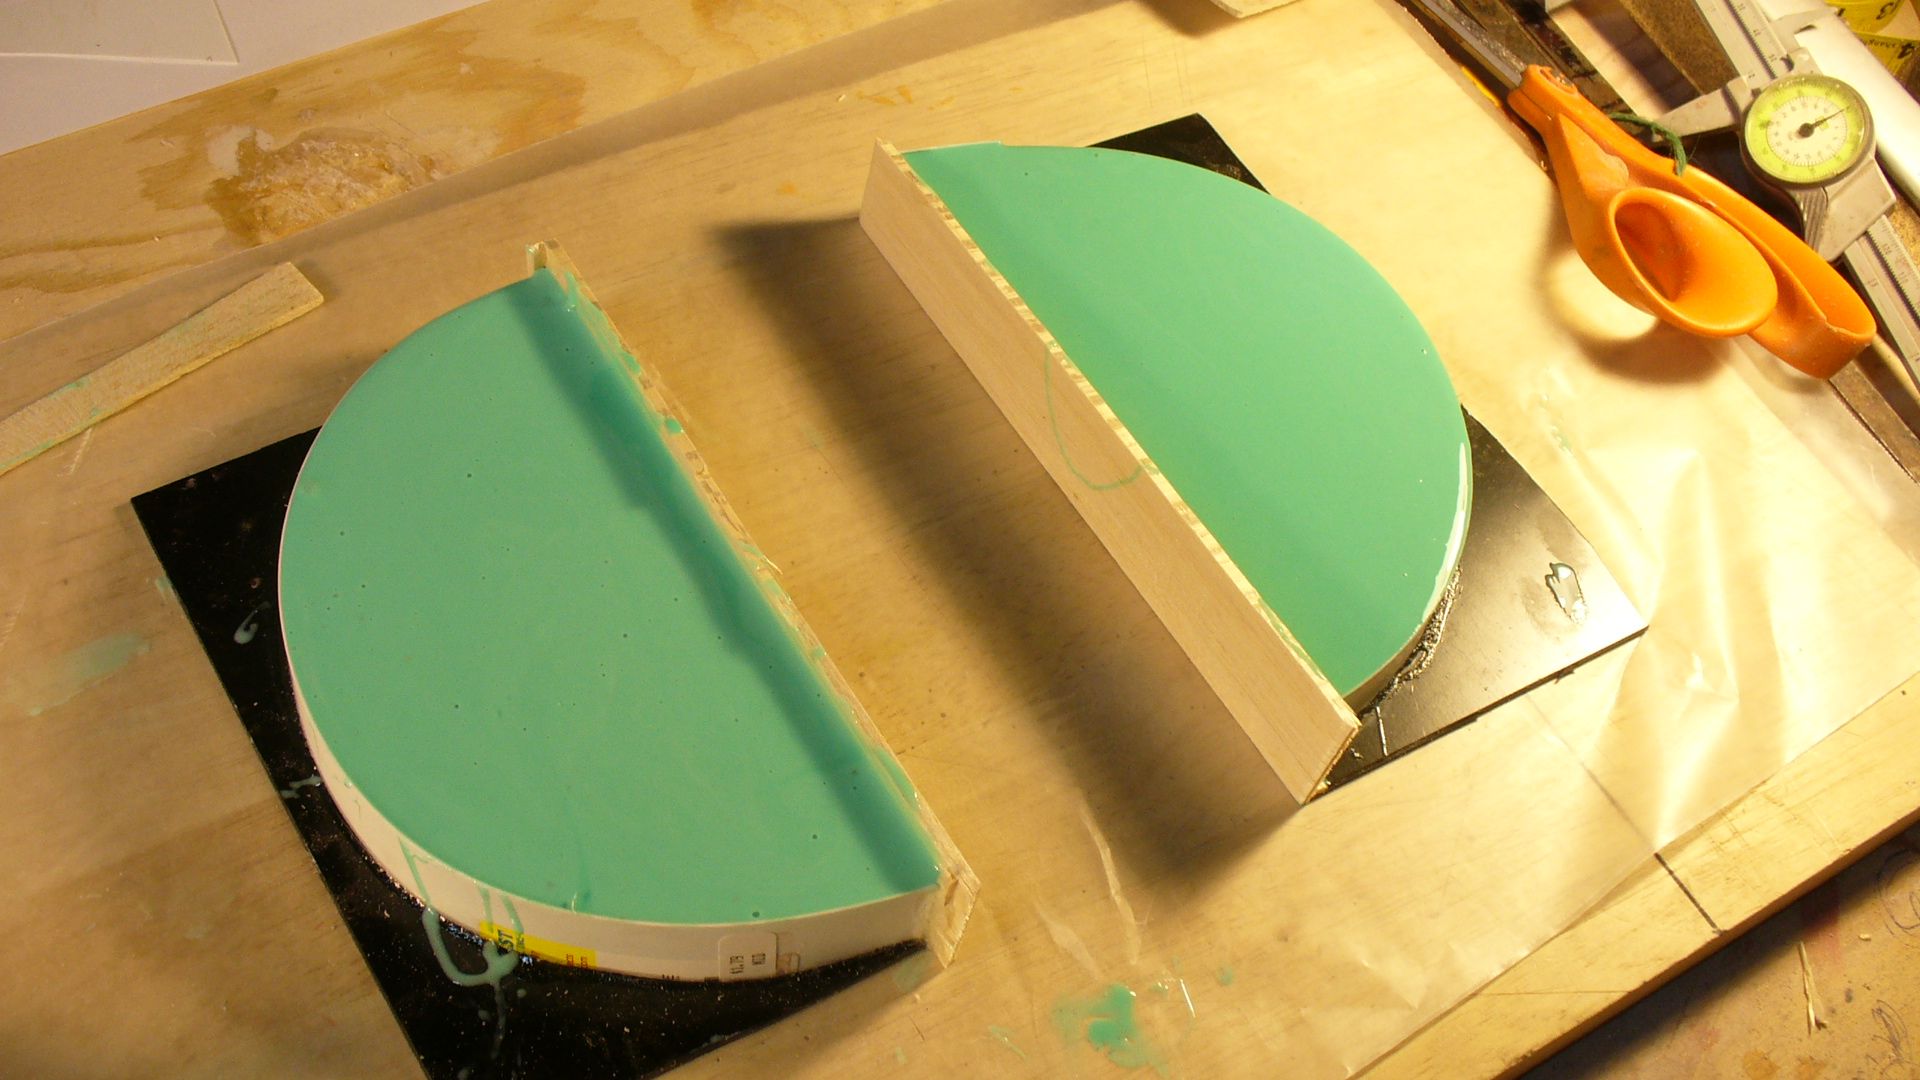
Molds came out great although it's hard to screw up silicone.
Now to pour some parts and glass the hull.
Steve
Ramsbottom thanks very much.
Molds came out great although it's hard to screw up silicone.
Now to pour some parts and glass the hull.
Steve
SteveNeill
Sr Member
I do those too.
Steve
Steve
SteveNeill
Sr Member
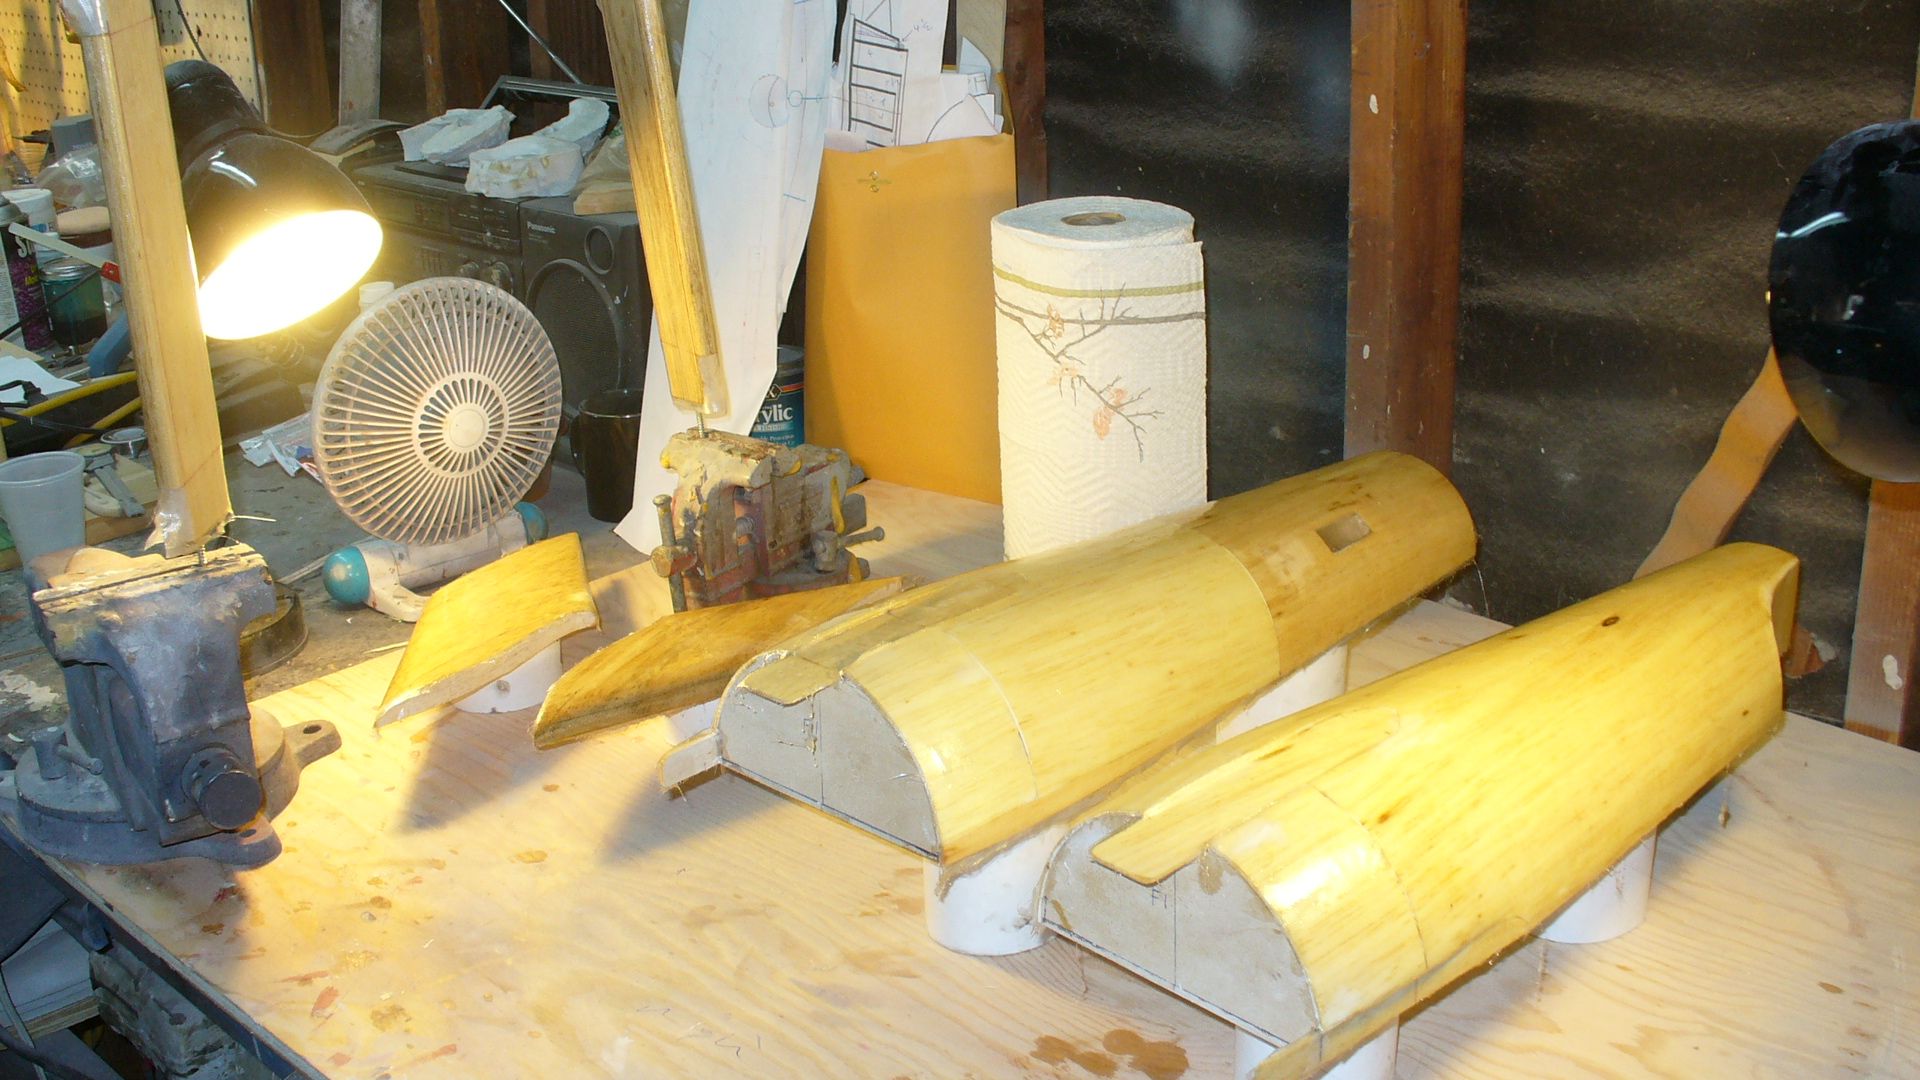
Glassing has to be one of my lease favorites in modeling. Epoxy is sticky, gooey, and generally nasty. Not as bad as polyester but right up there.
But it seals just about anything from wood to foam so you have a barrier and strength to really finalize your masters no matter what they are made of. And BTW. Unlike polyester, epoxy doesn't eat foam of any kind. A huge plus.
So the neck, hull and pylons are all glassed. Now they sit over night and tomorrow I can get back to work.
The silicone molds came out well and I already have the resin parts to tool. I hope to finish the secondary hull by this weekend.
Moving on...
Steve
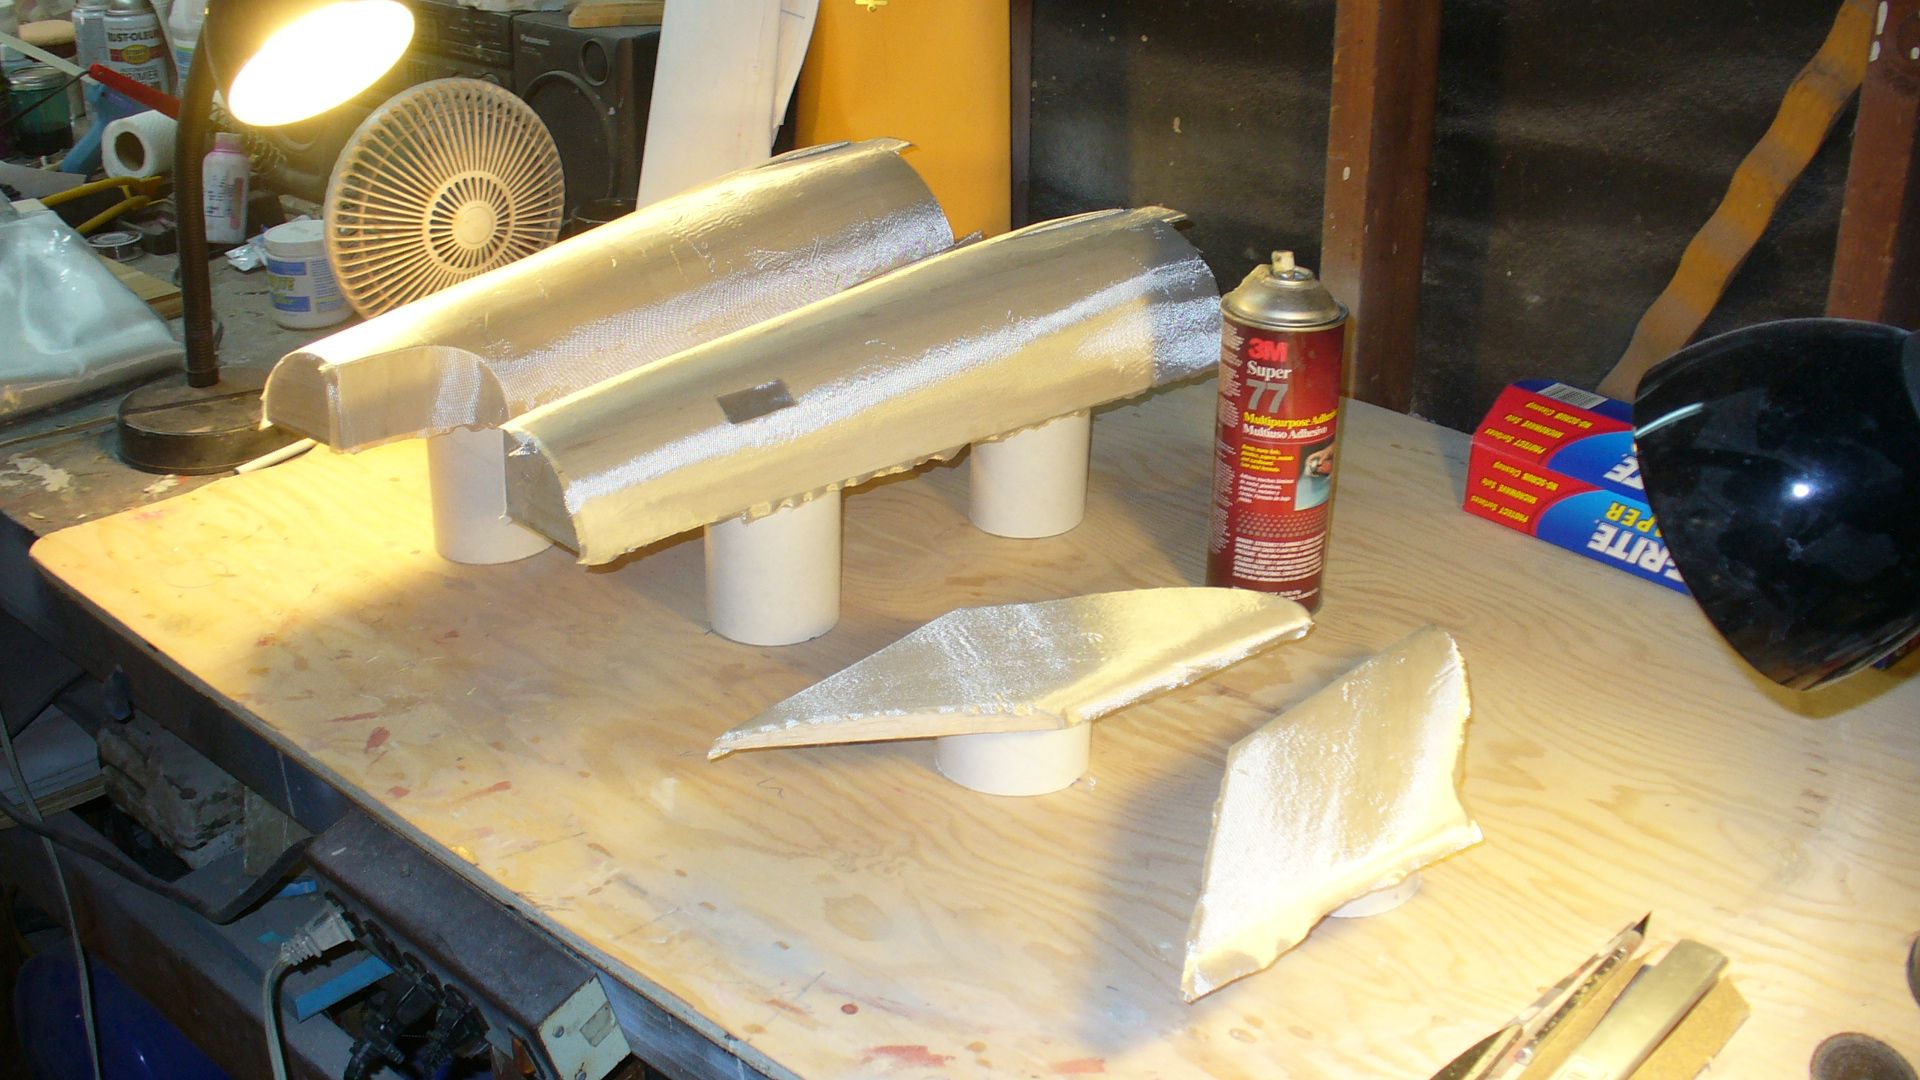
BTW I use a light dusting of 3M 77 spray adhesive on the wood to help position and conform the glass cloth before I apply the resin.
But it seals just about anything from wood to foam so you have a barrier and strength to really finalize your masters no matter what they are made of. And BTW. Unlike polyester, epoxy doesn't eat foam of any kind. A huge plus.
So the neck, hull and pylons are all glassed. Now they sit over night and tomorrow I can get back to work.
The silicone molds came out well and I already have the resin parts to tool. I hope to finish the secondary hull by this weekend.
Moving on...
Steve
BTW I use a light dusting of 3M 77 spray adhesive on the wood to help position and conform the glass cloth before I apply the resin.
Steve, you seem to have very little flash around the edges of the masters. Do you "green trim" the epoxy/glass flashing (like around the pylon openings) or do you let it set up completely and just grind/sand it off? And love the spray glue trick, by the way.
SteveNeill
Sr Member
West Systems epoxy sands very easy so I wait until it sets up all the way and hit it with the flat sander by hand. I just trim as close as I dare to start before I apply the epoxy.
Steve
Steve
- Status
- Not open for further replies.
Similar threads
- Replies
- 23
- Views
- 1,276
- Replies
- 10
- Views
- 1,209
- Replies
- 126
- Views
- 13,633
- Replies
- 11
- Views
- 1,279