Red Jammer (Revell Y-Wing Conversion)

Archive&Future

Sr Member
You saw it here first folks :D

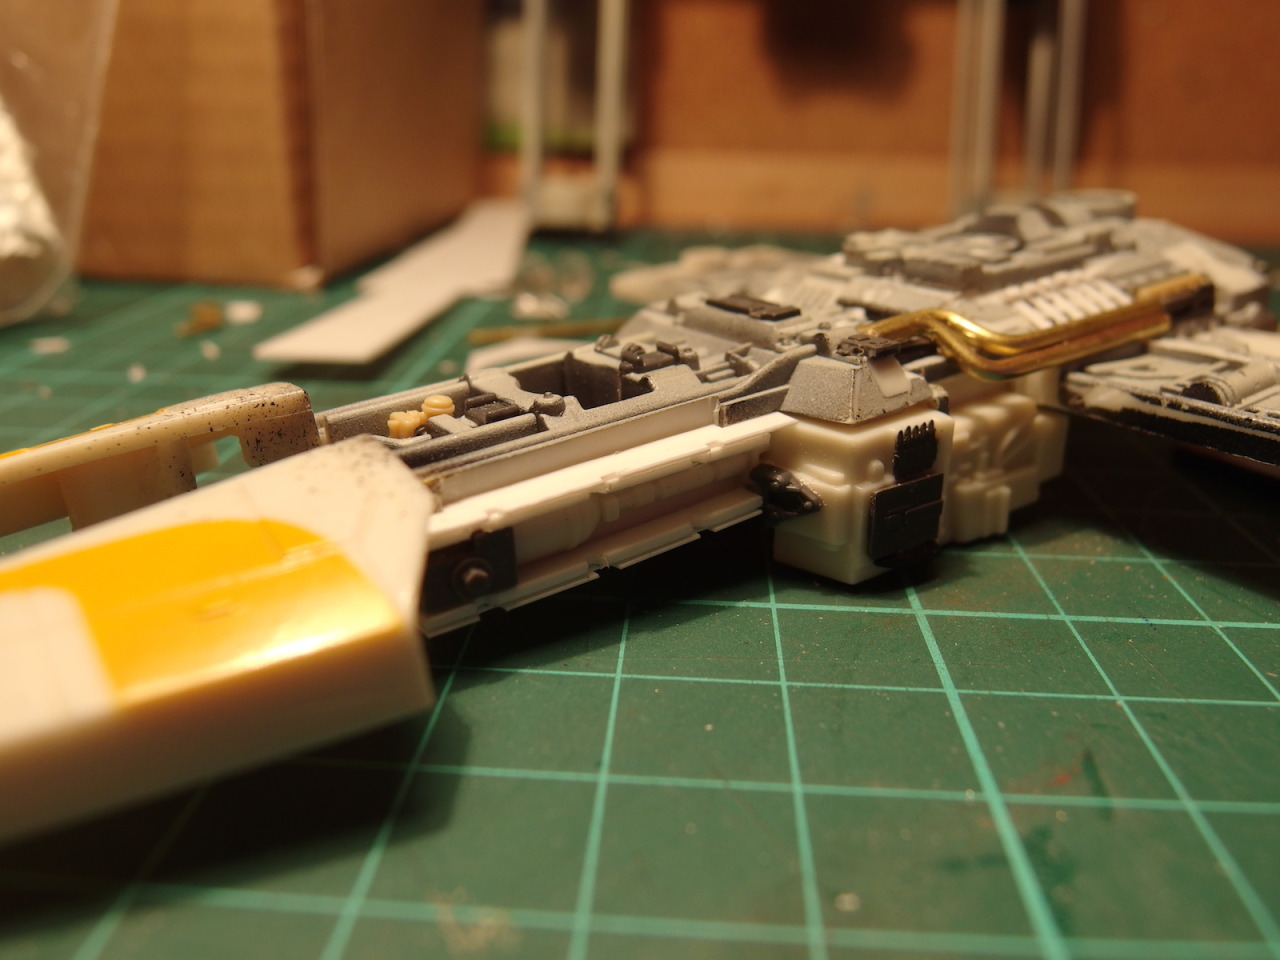
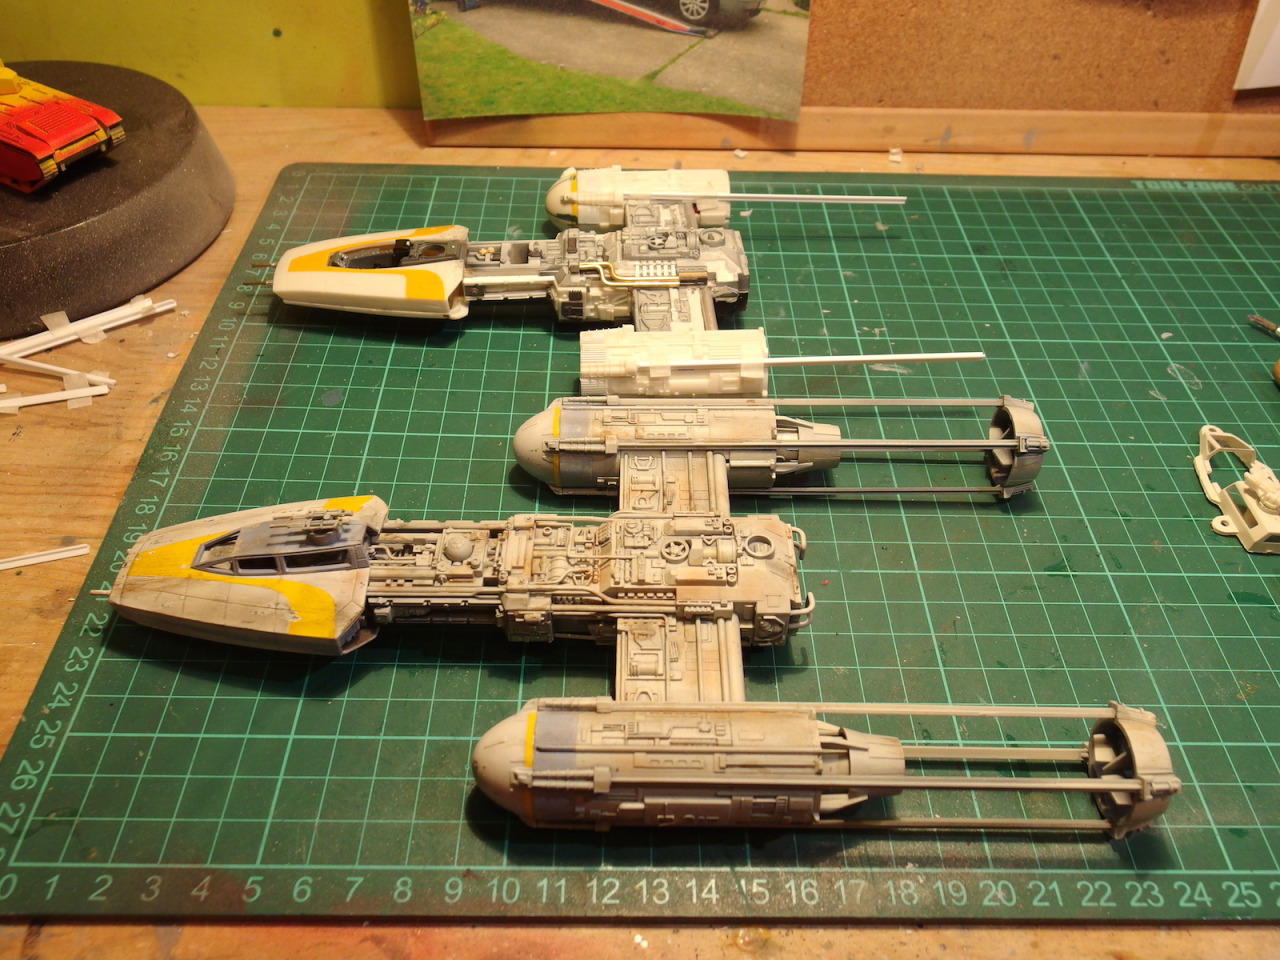
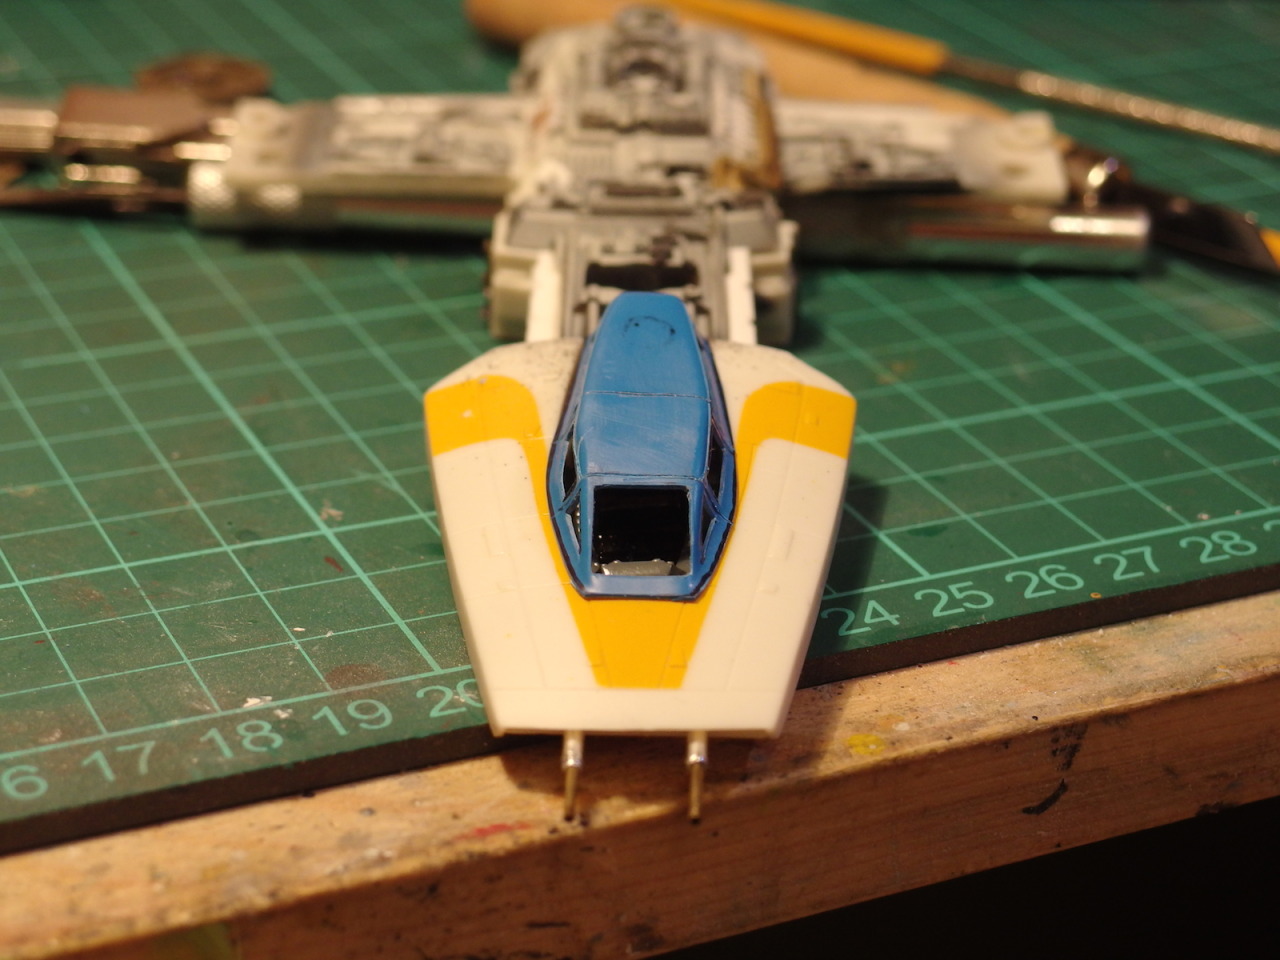
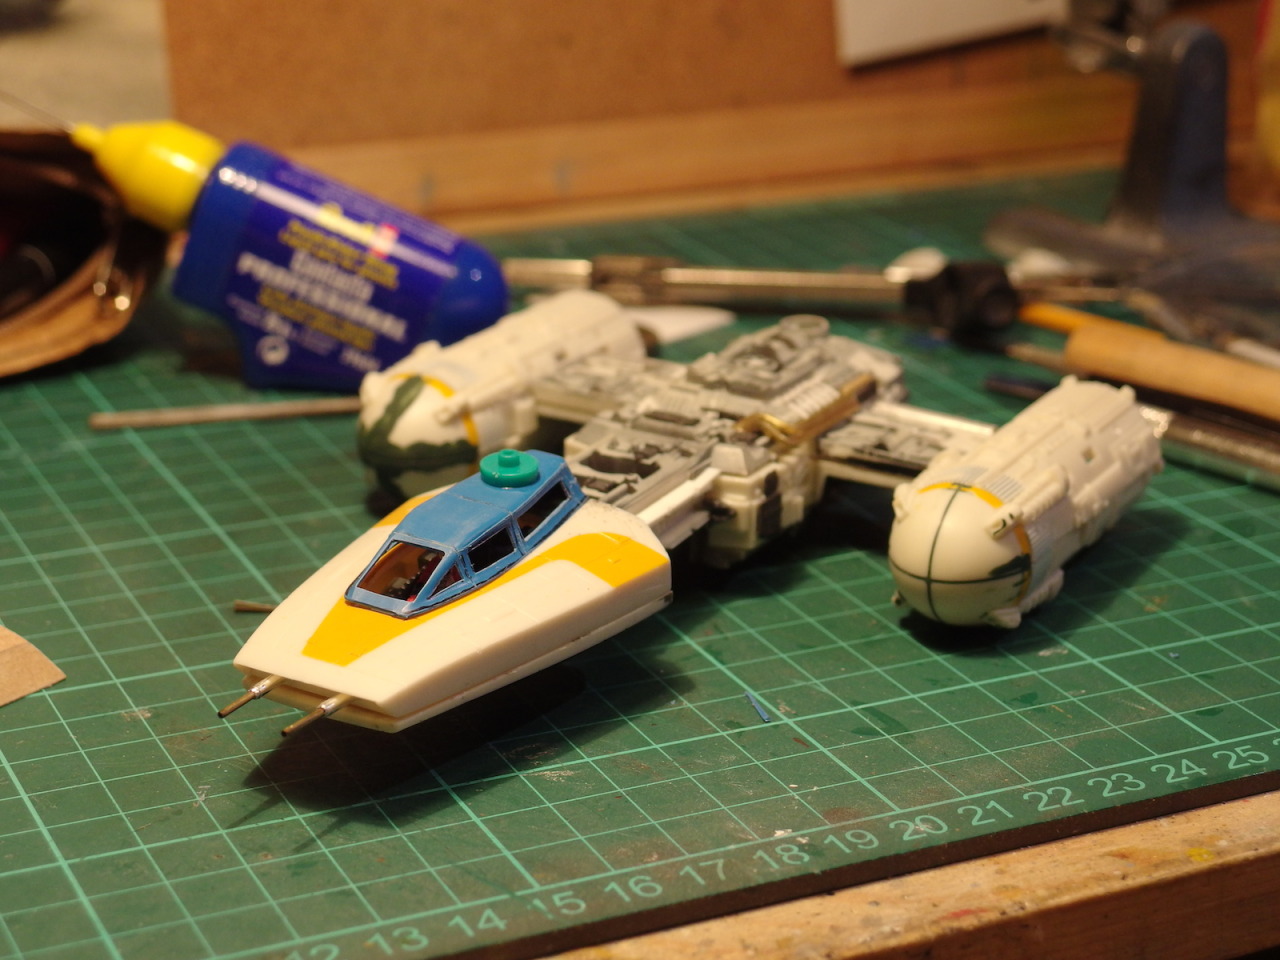
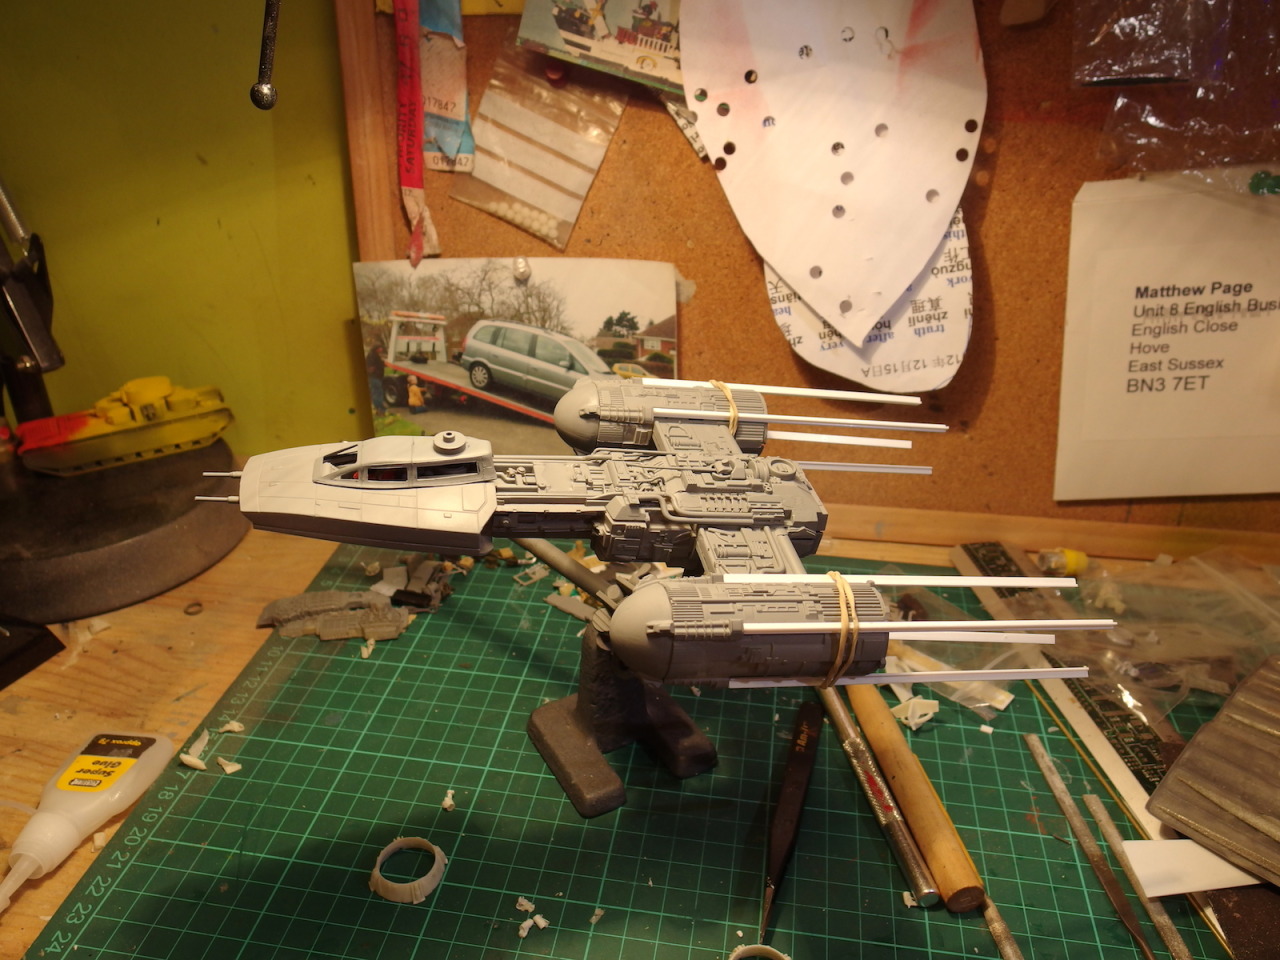
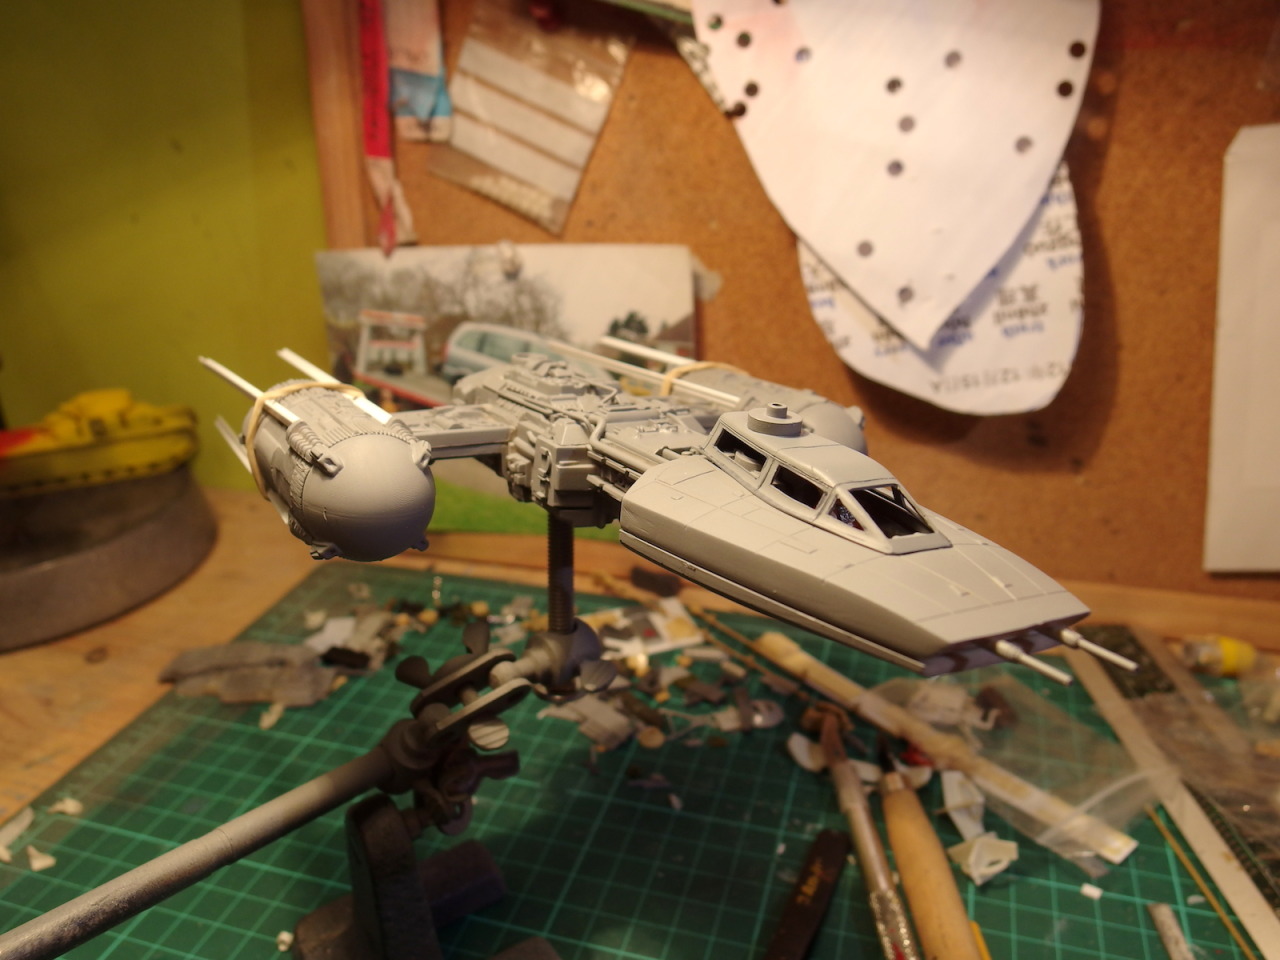
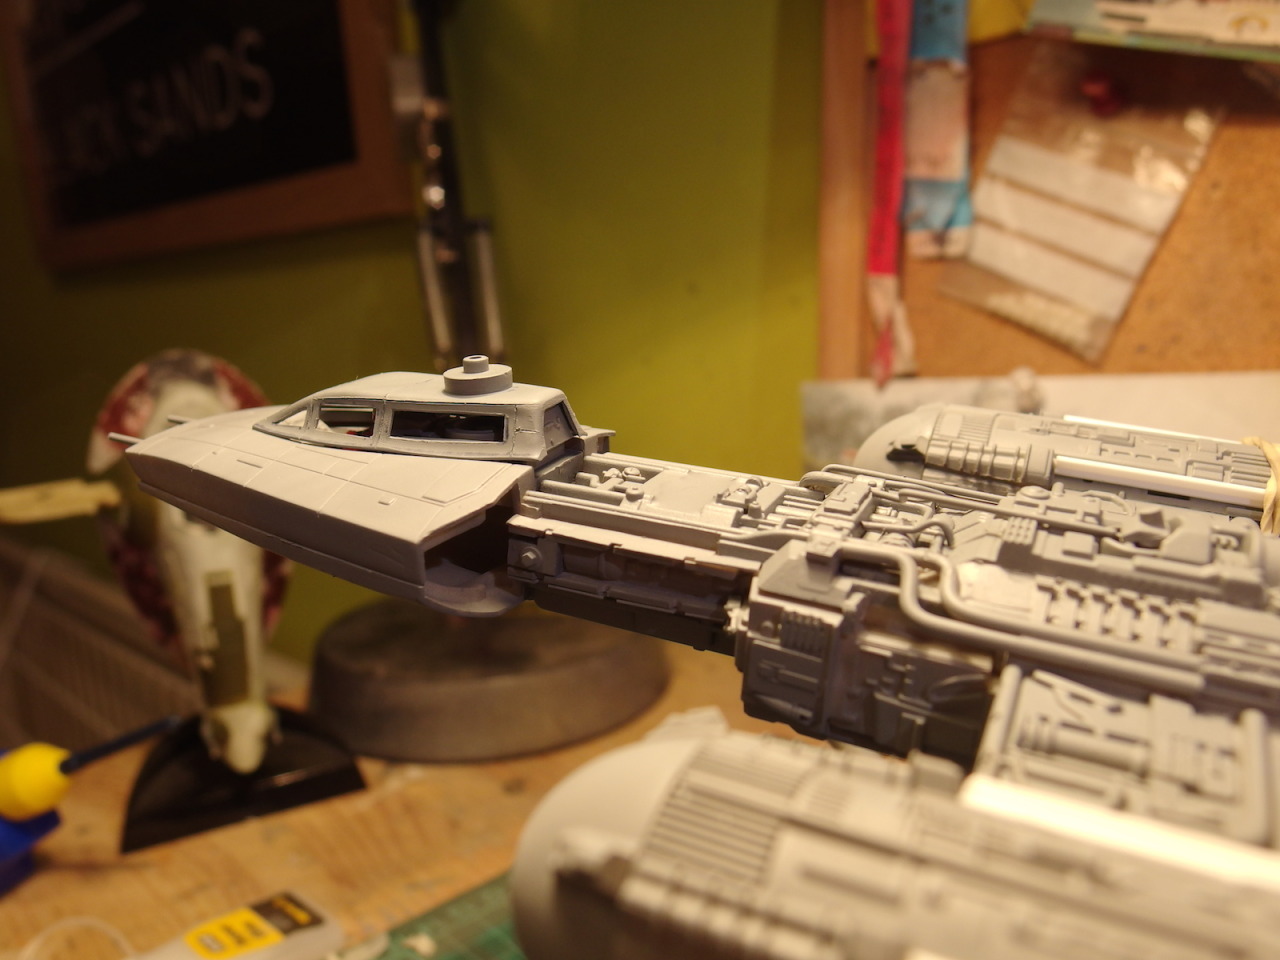
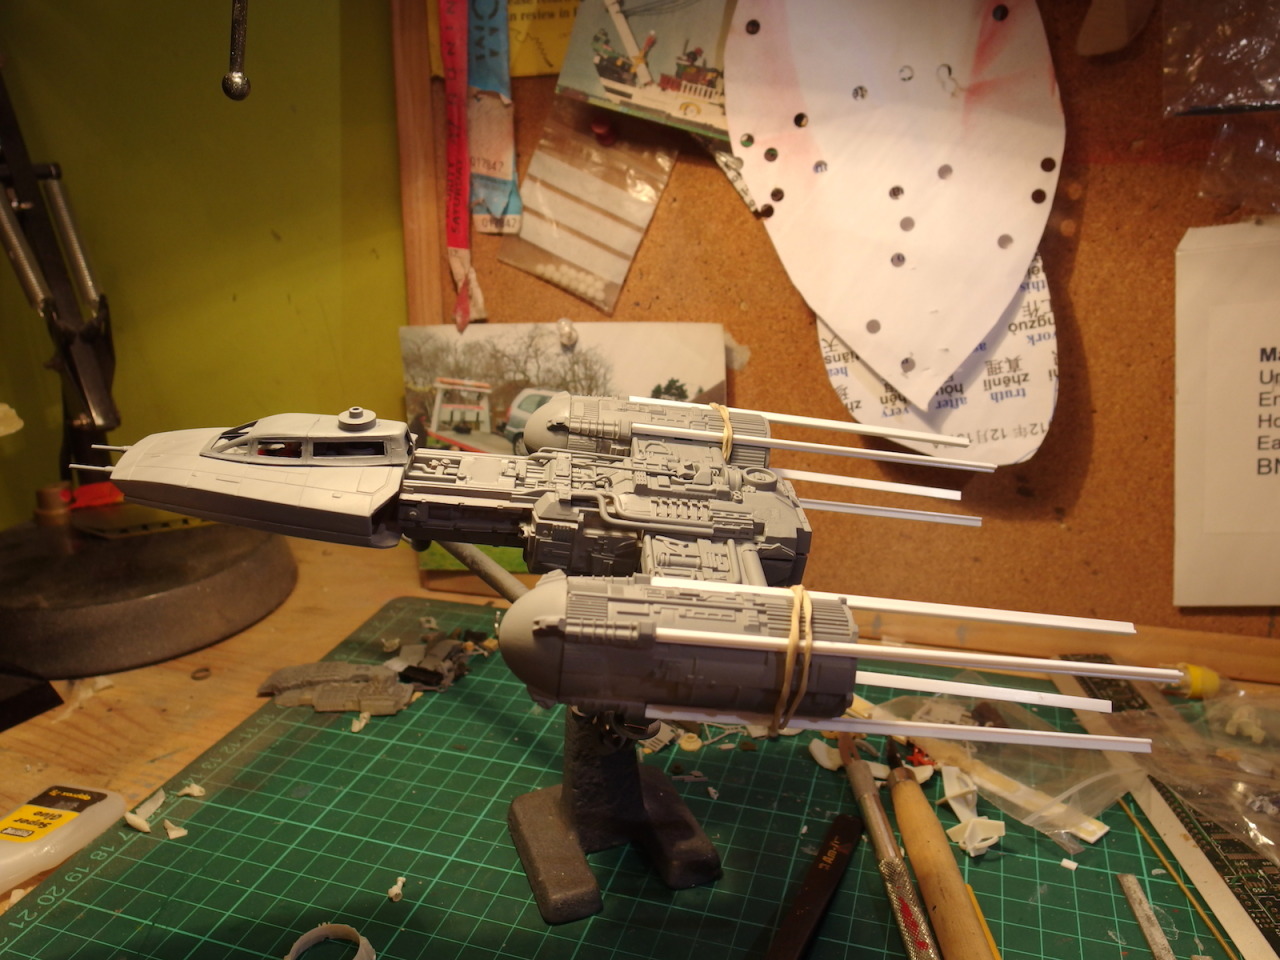
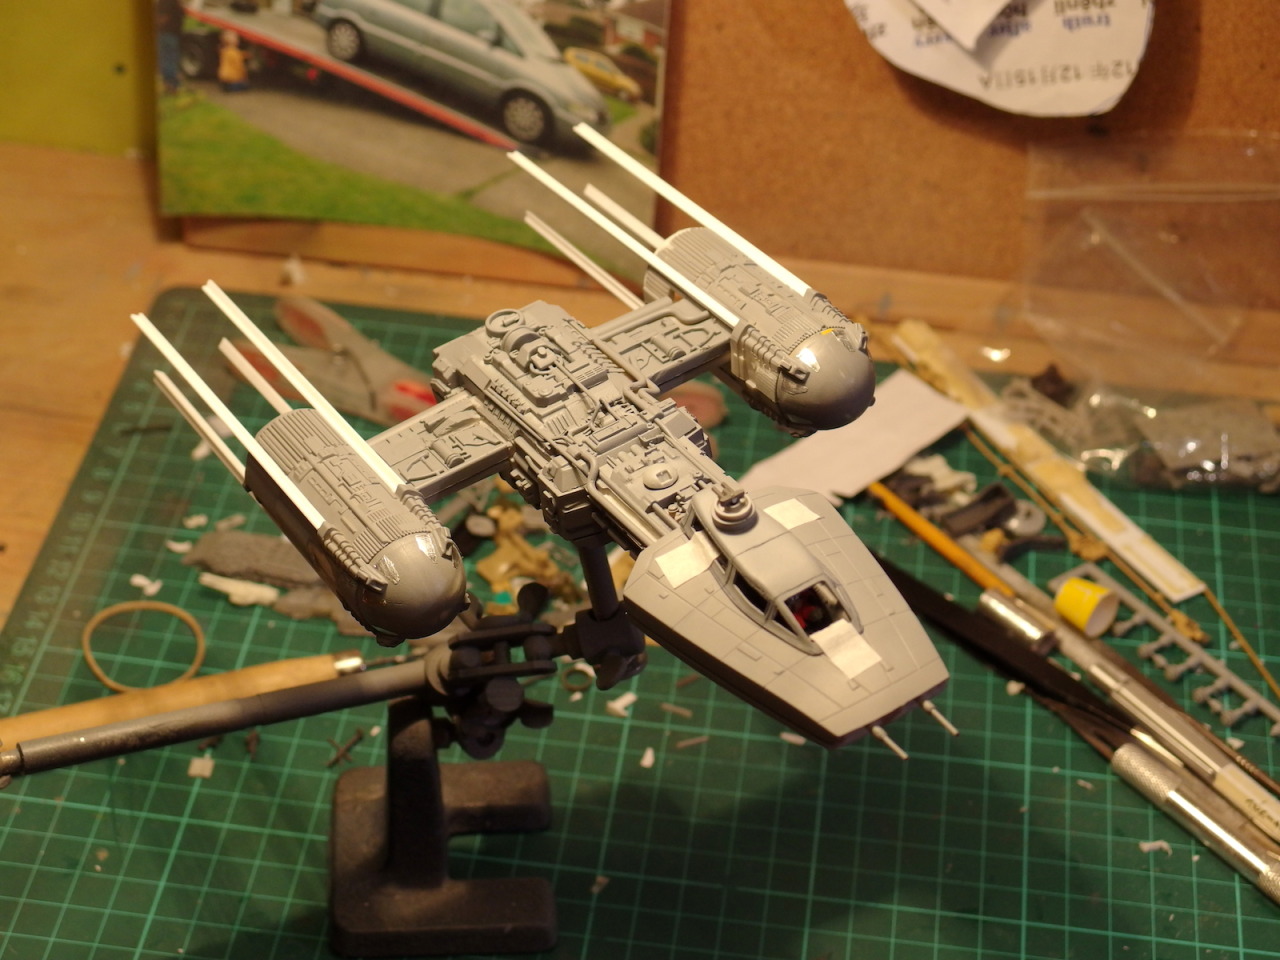
I picked up a load of Revell kits for ridiculously cheap off ebay, I think I paid about £15 for the whole lot? Anyhow, I sold my last Revell Y-Wing and so while I wait for my 2 FM kits to land I'll be heavily converting this into the legendary Red Jammer. I've never seen a completed 1:72 Red Jammer as of yet, so I'd like to be the first hehe

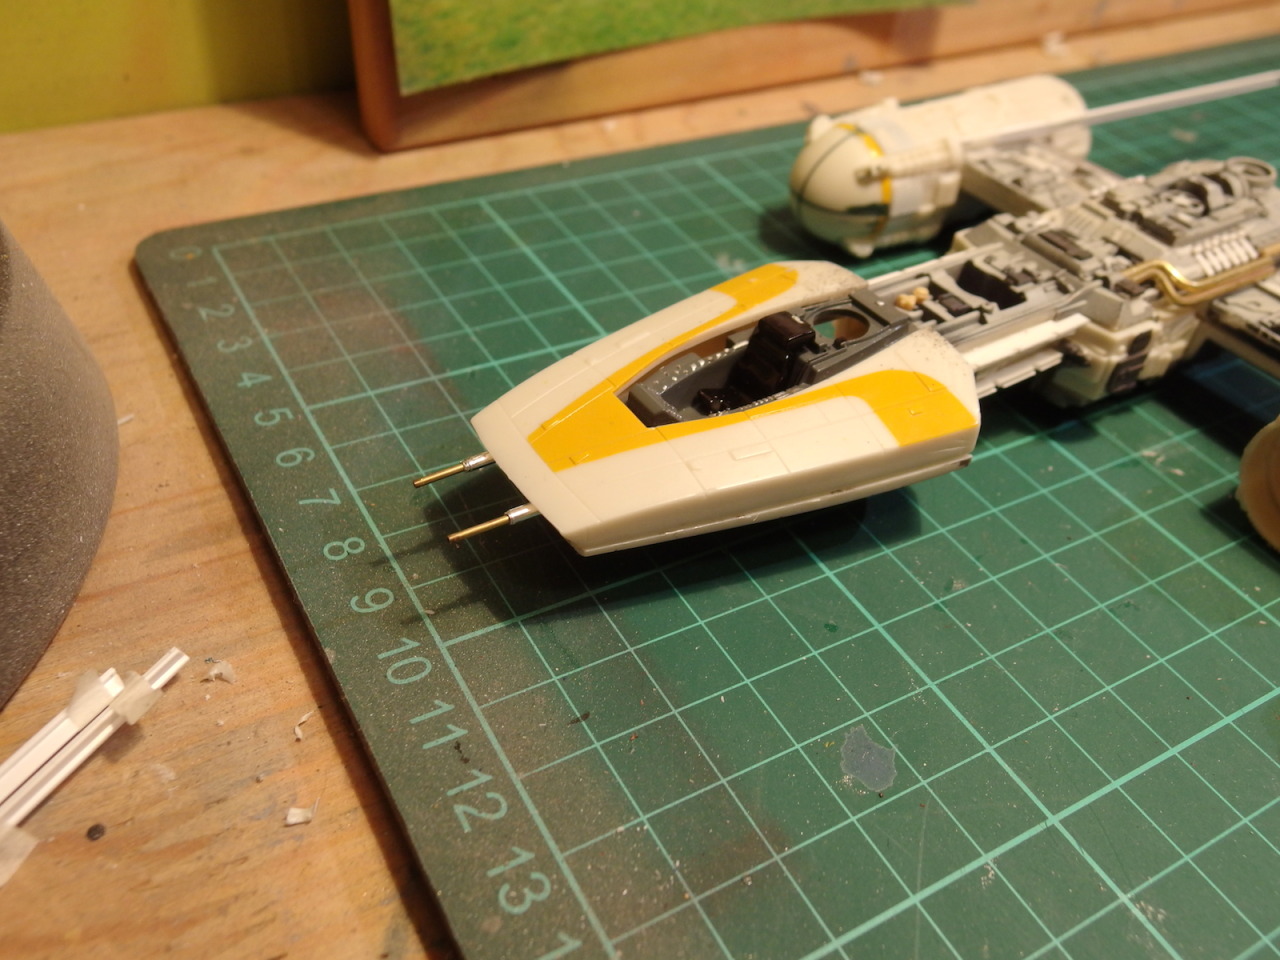
And Studio Scale modellers...ya better not look! I'm not going for 100% accuracy here, I just want a decent looking model!

tumblr_n4rbgqo4gv1sf4tb1o5_1280.jpg


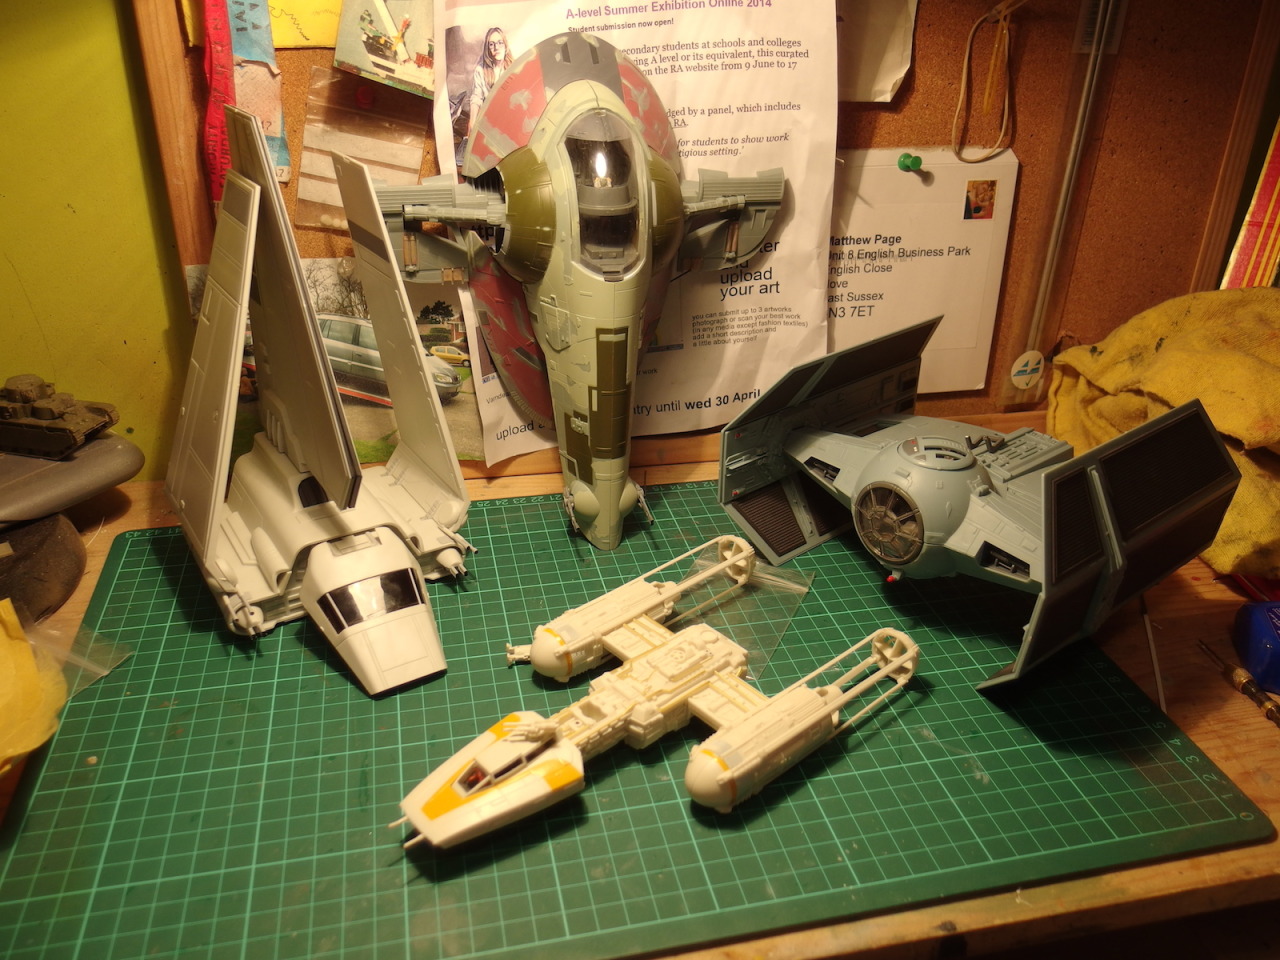
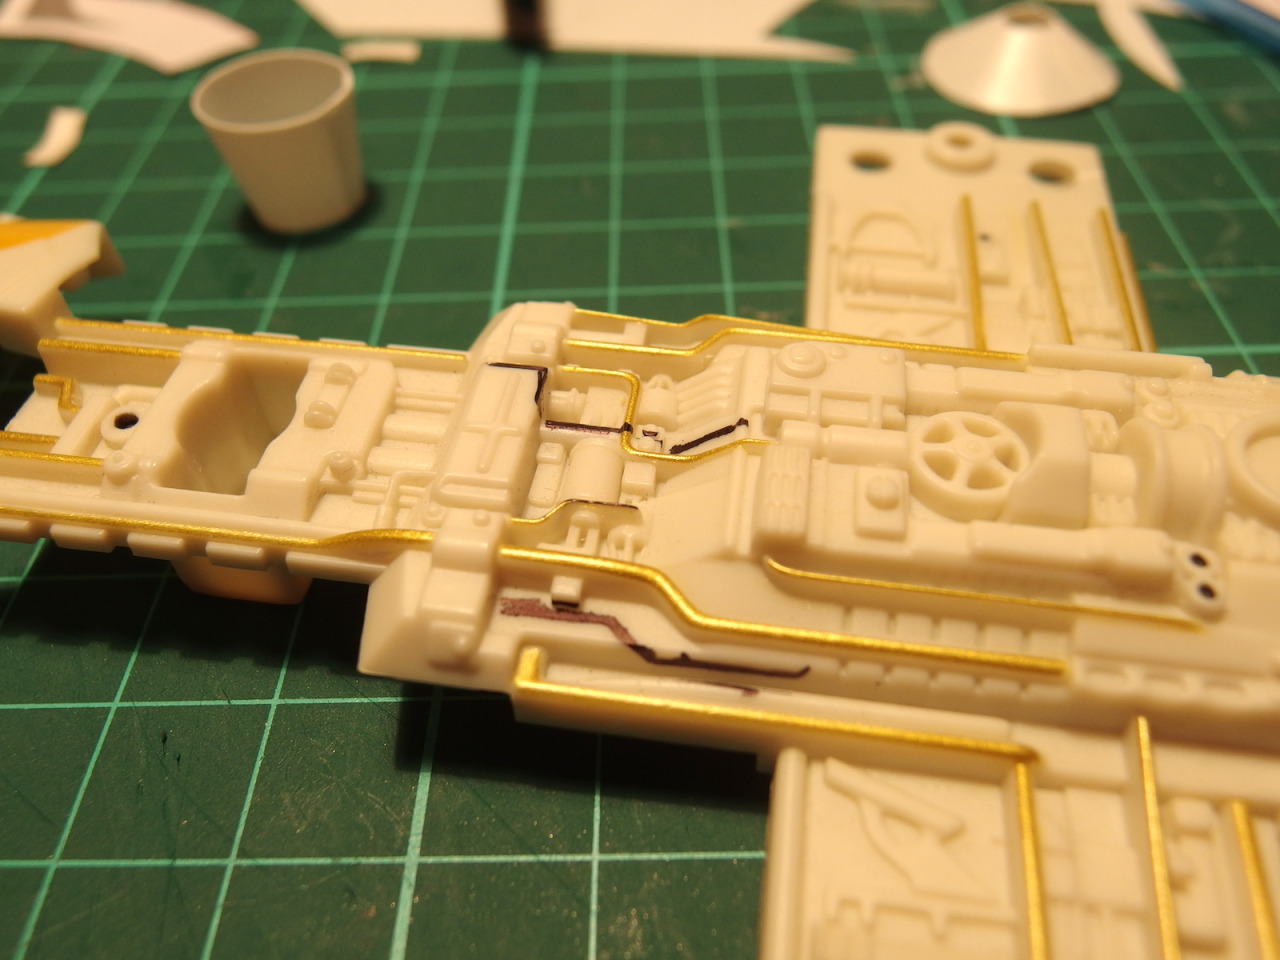
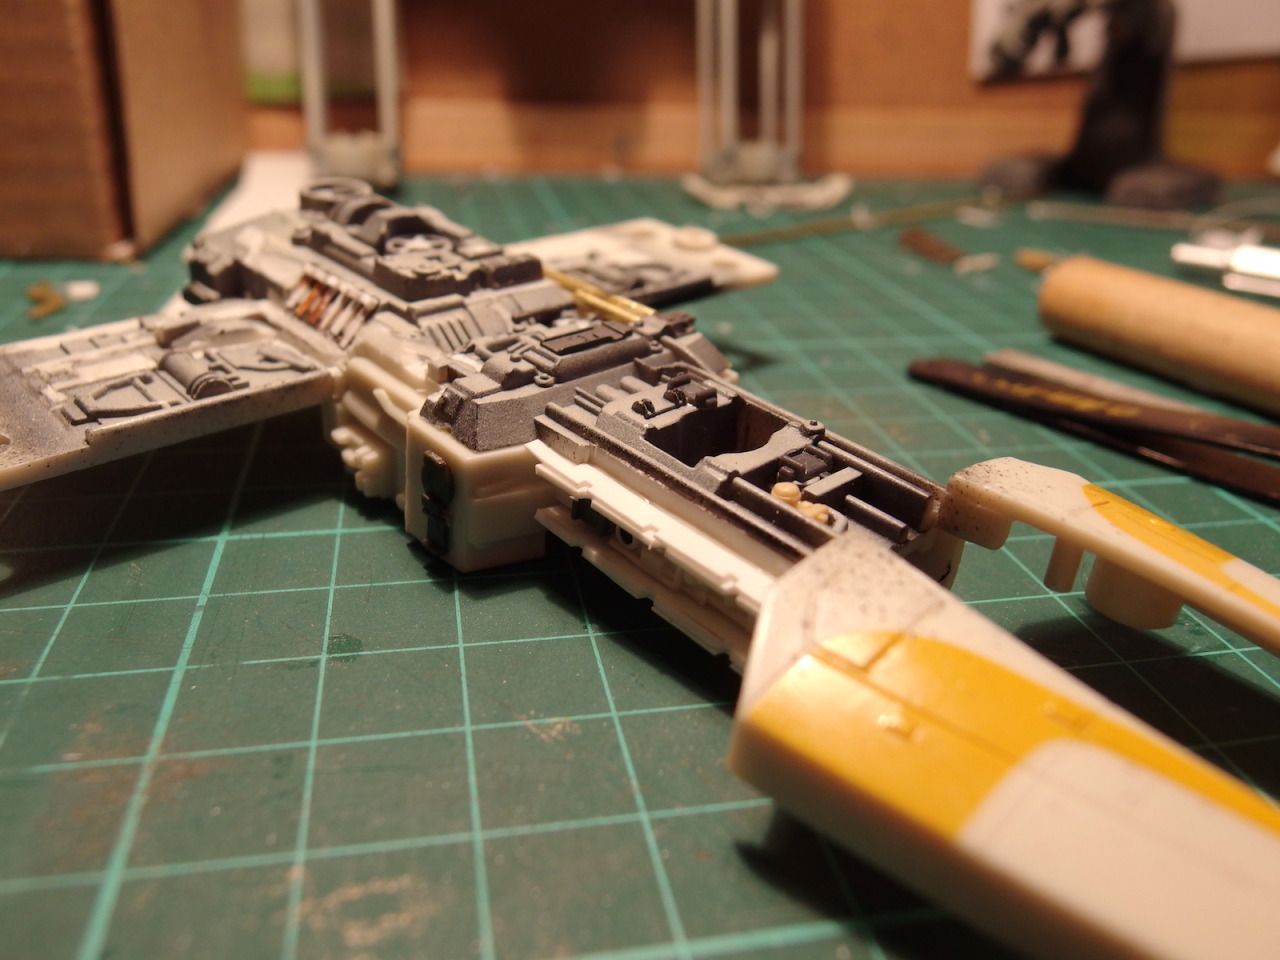
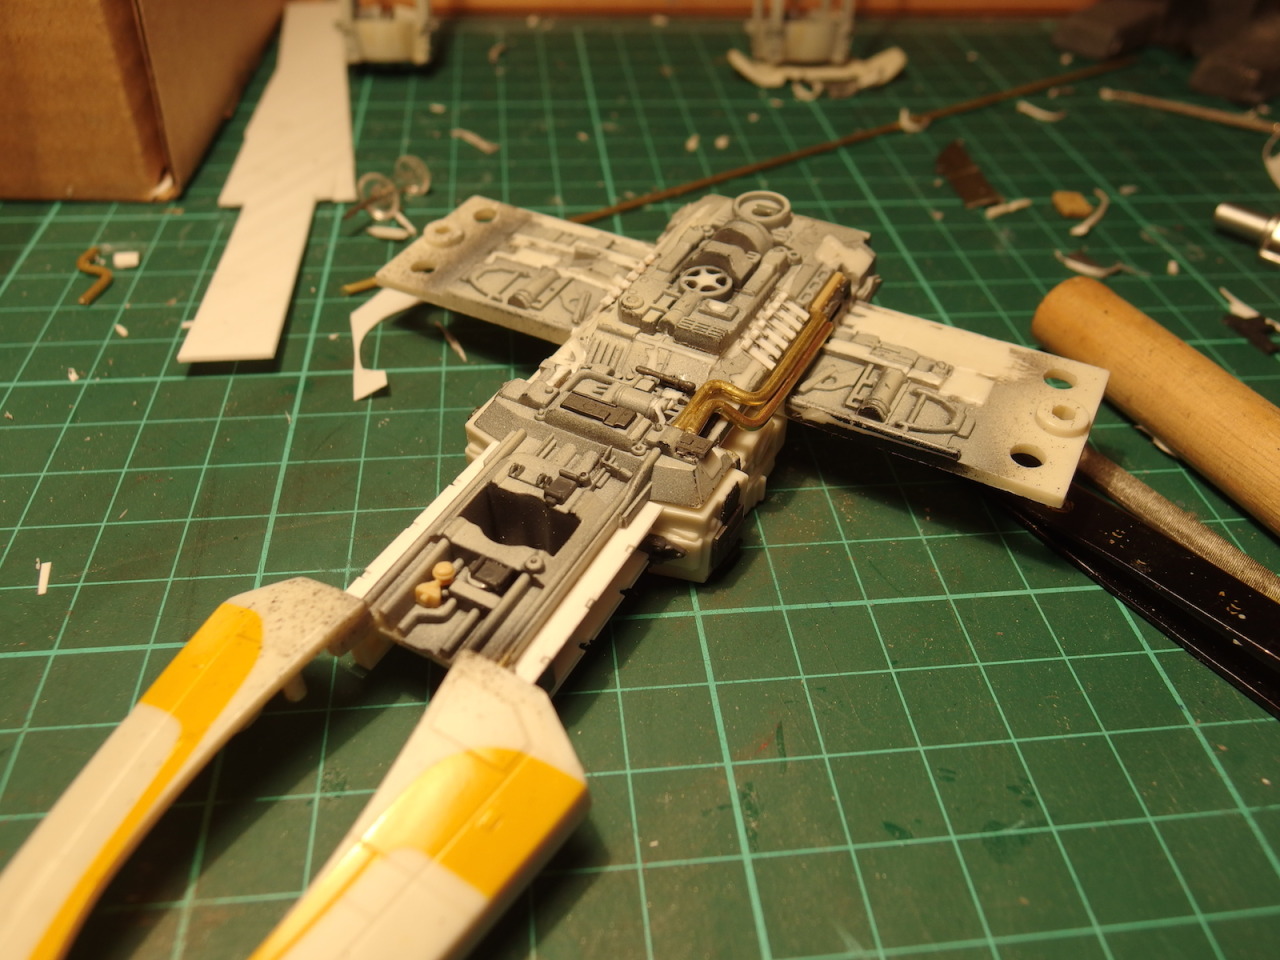
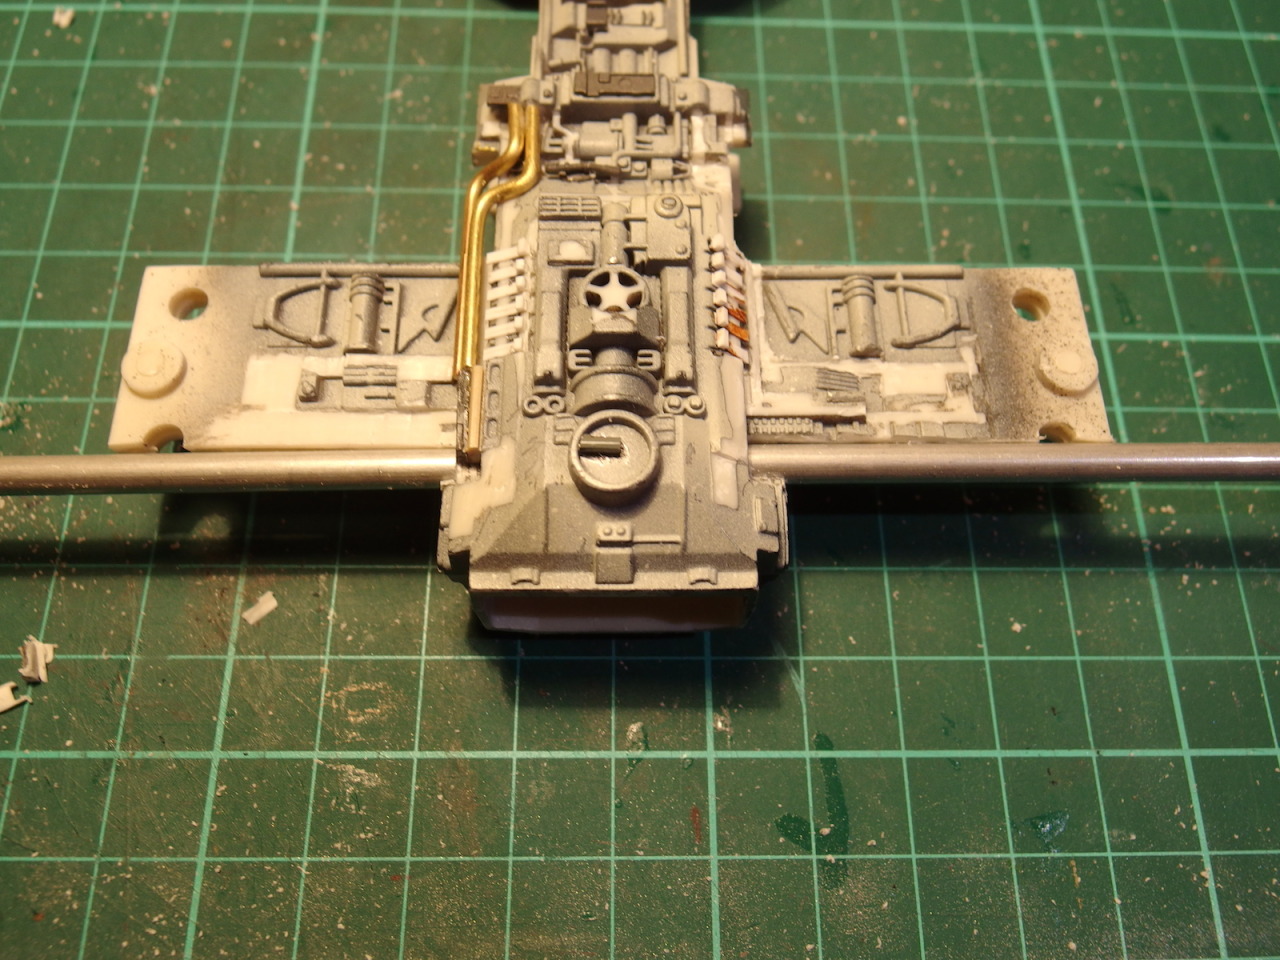
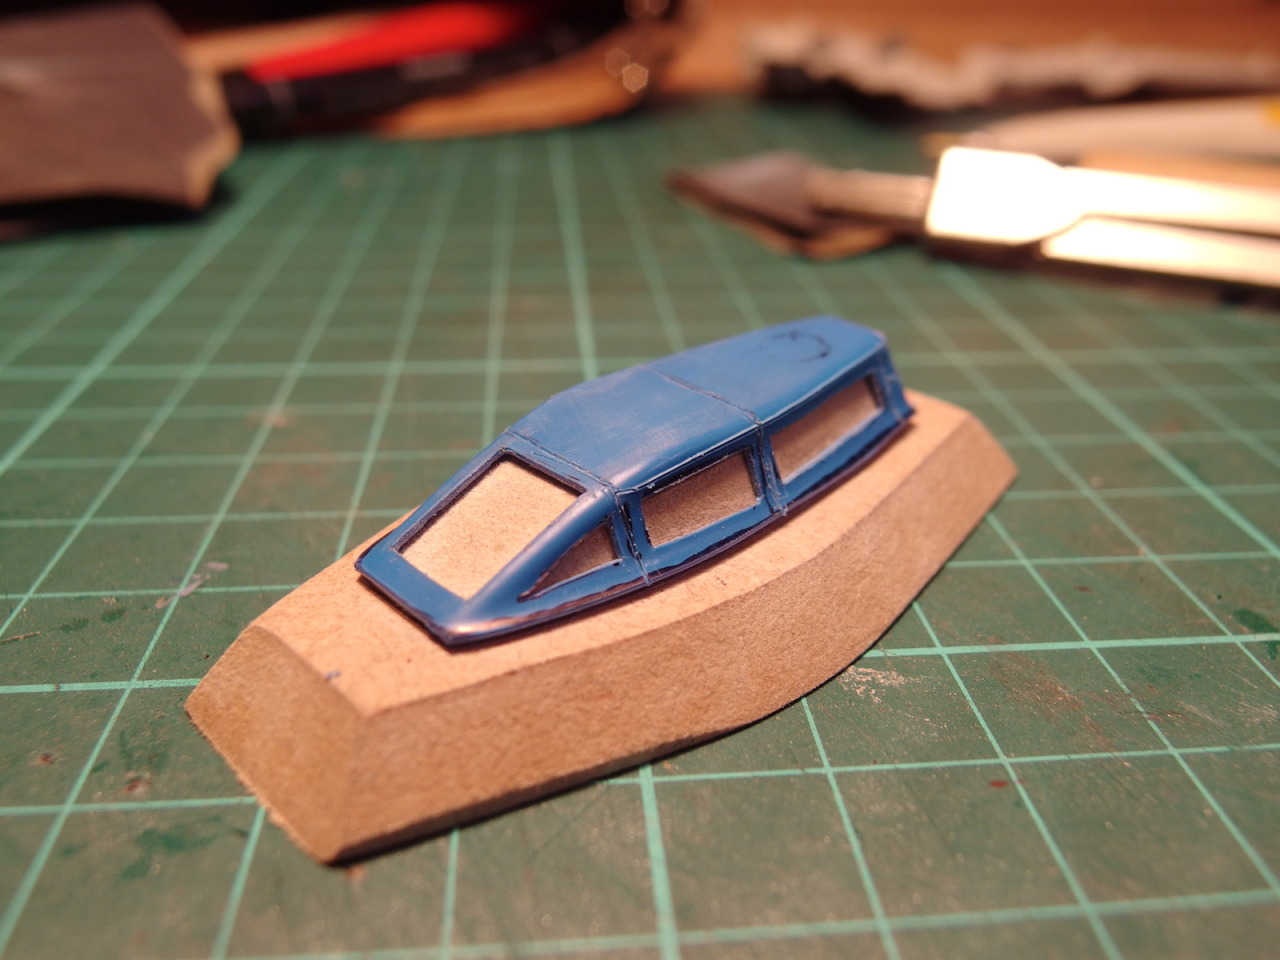
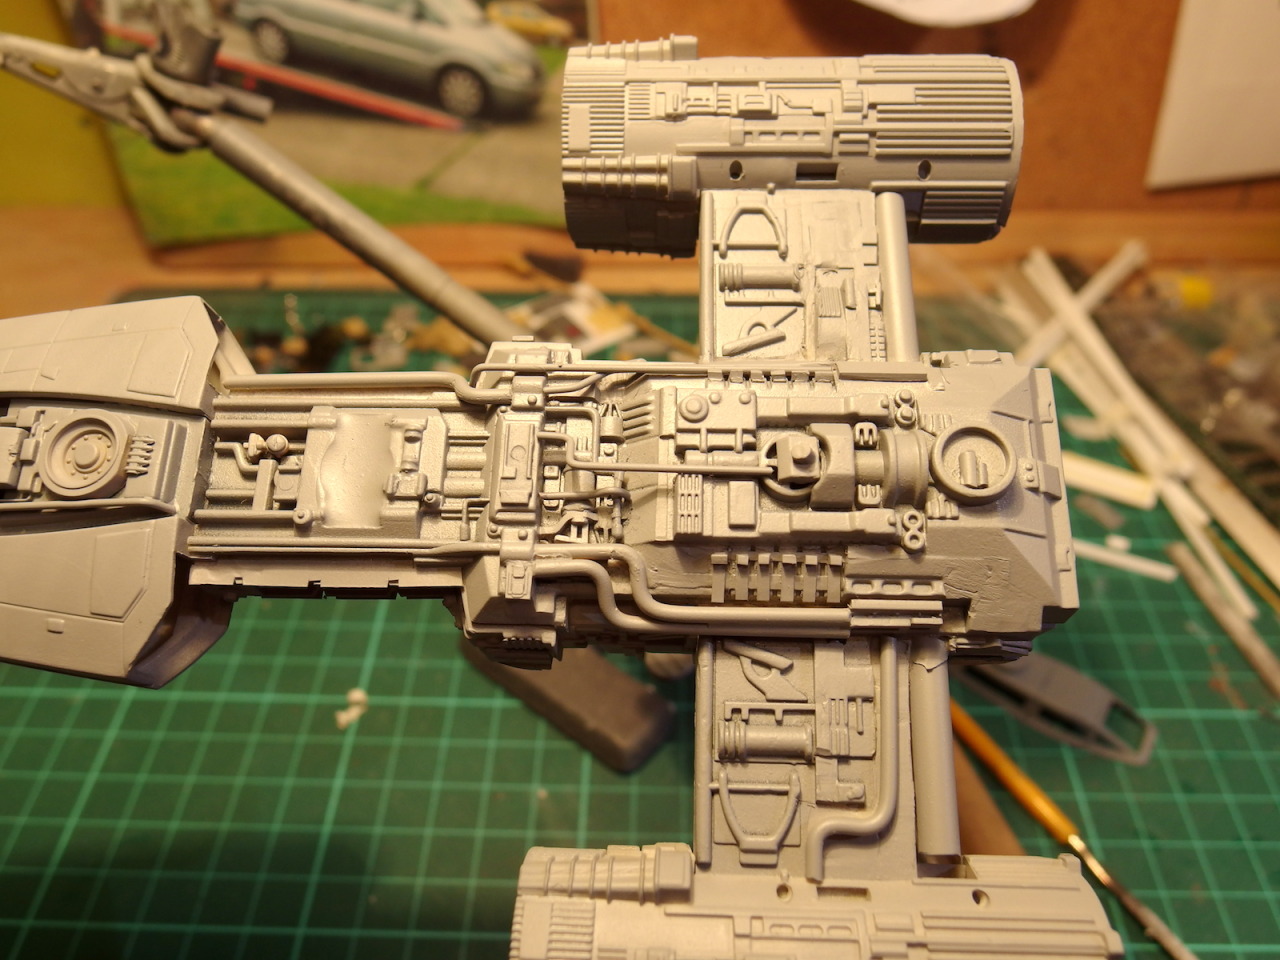
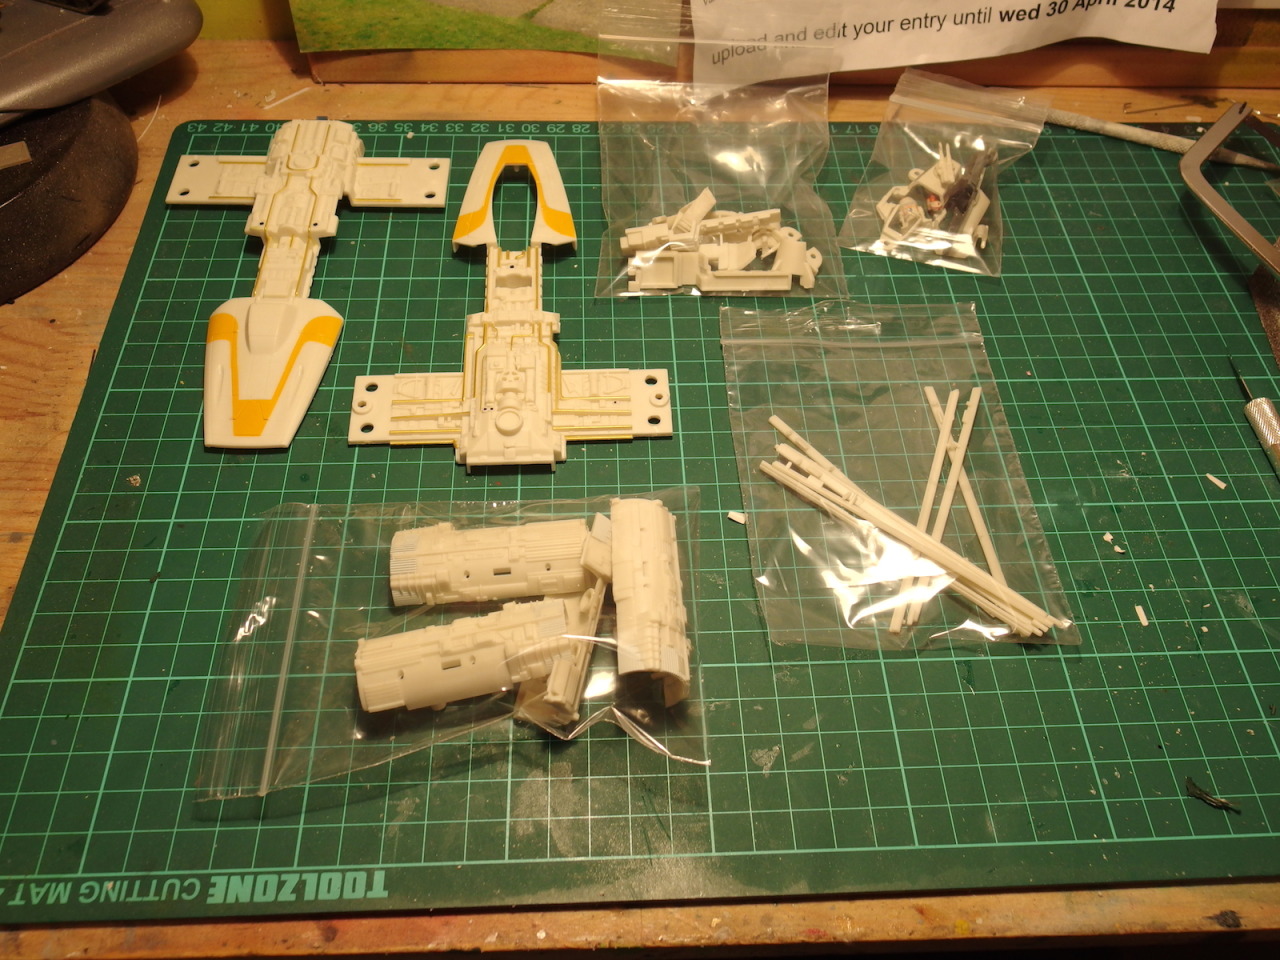
I took the whole thing apart, the Revell kits fit together rather tightly it seems

tumblr_n4rbgqo4gv1sf4tb1o4_1280.jpg


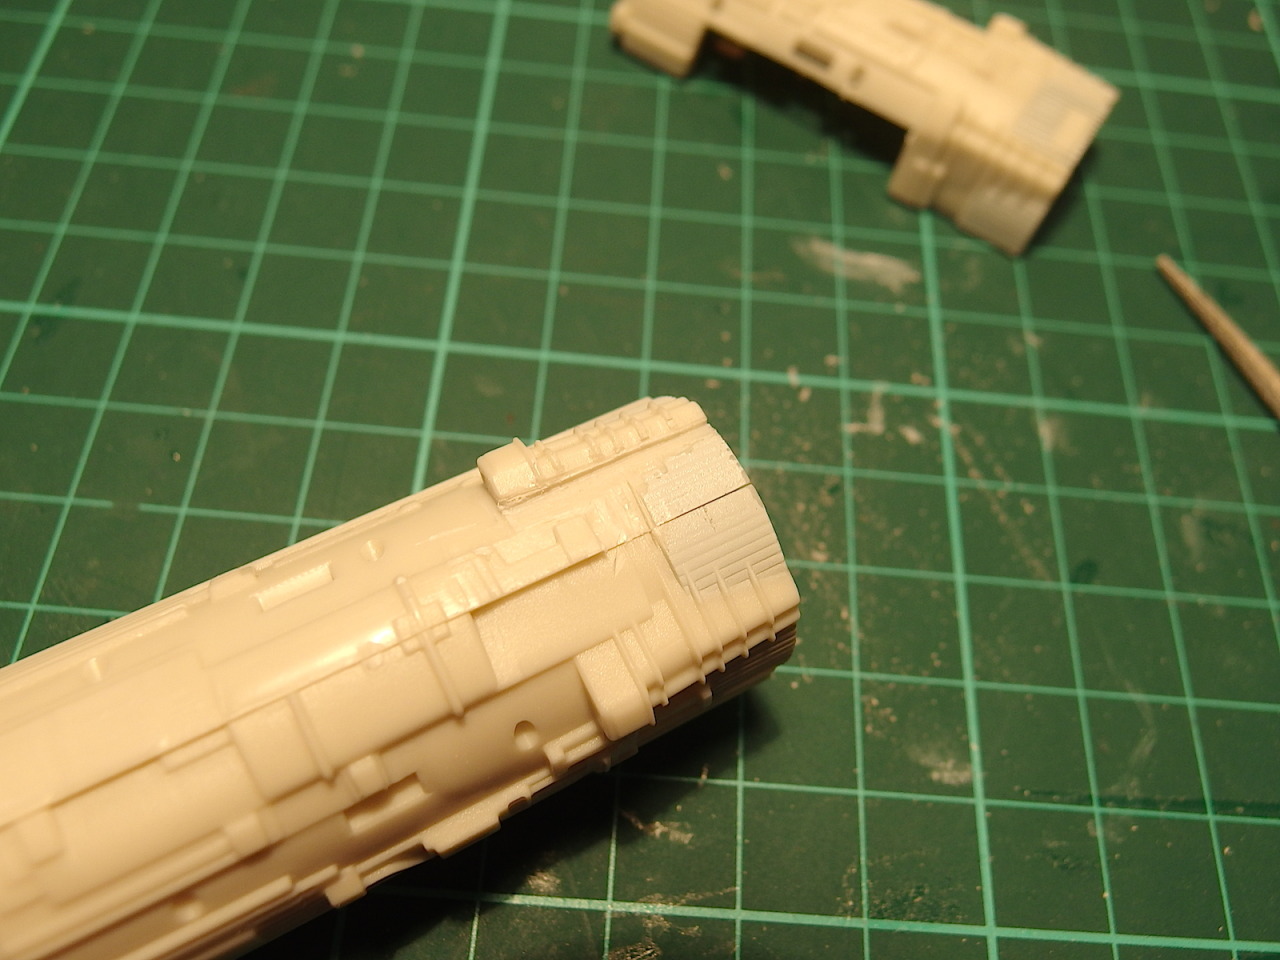
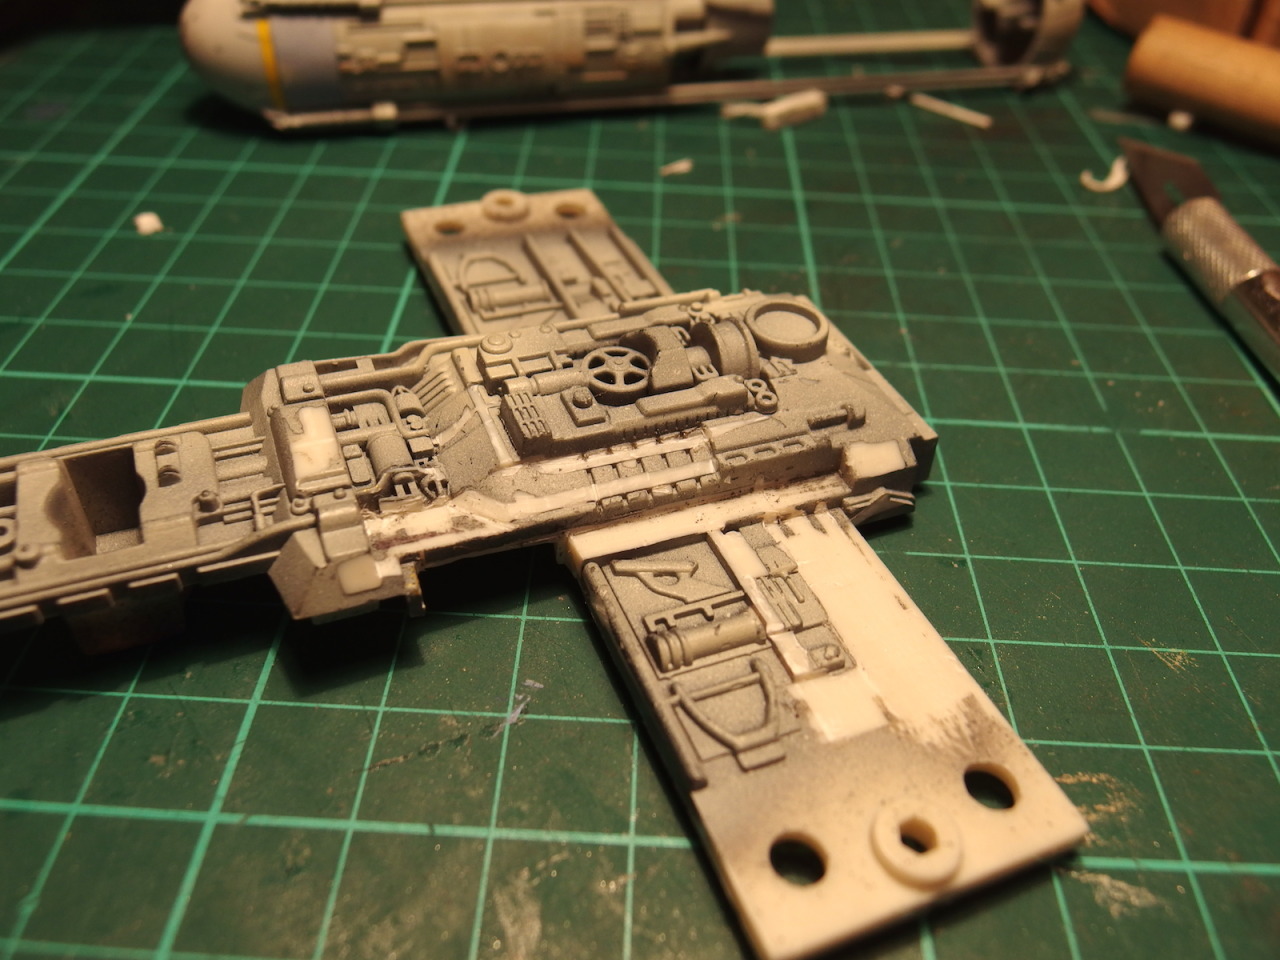
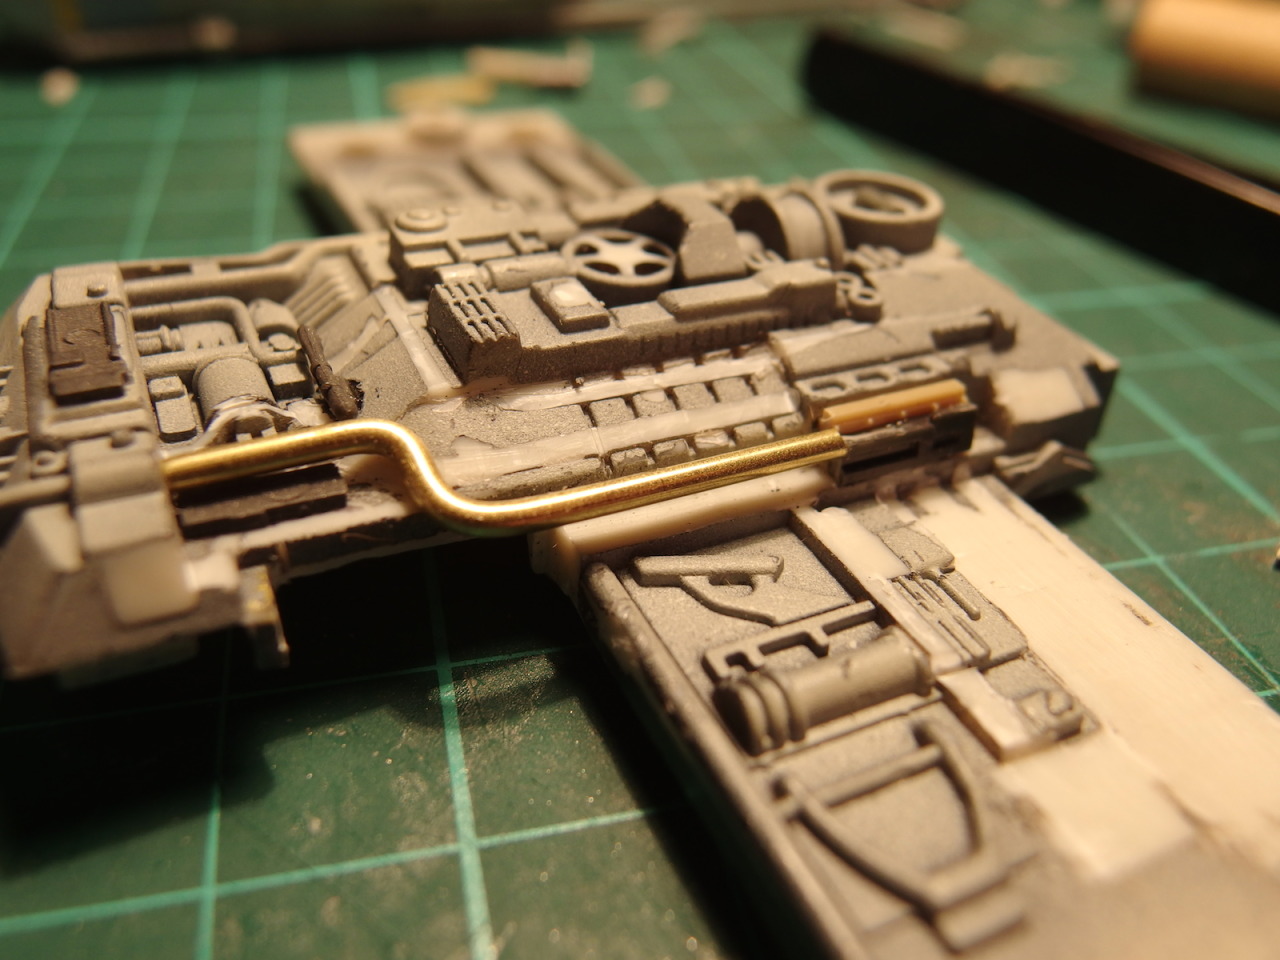
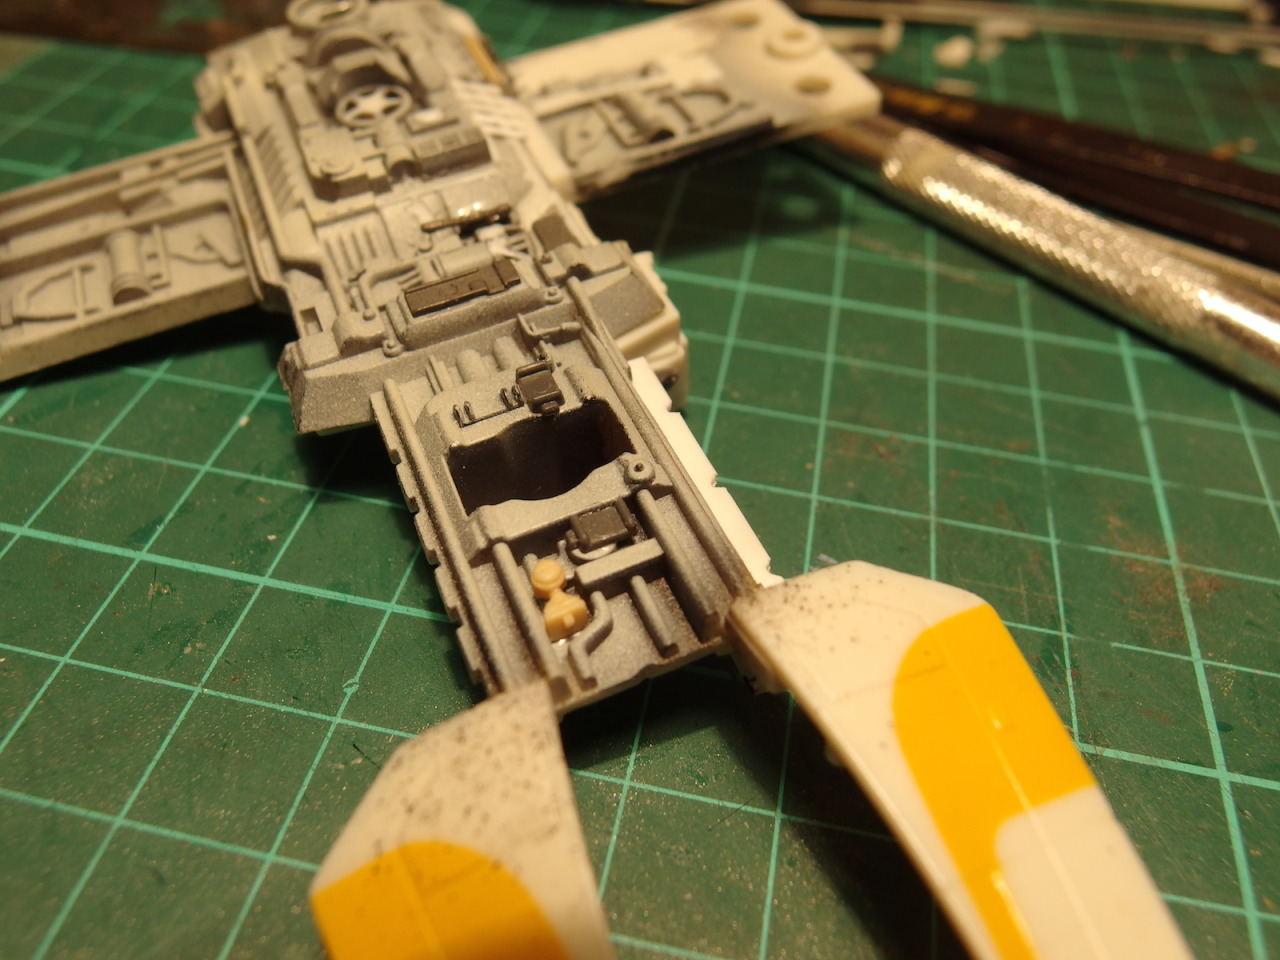
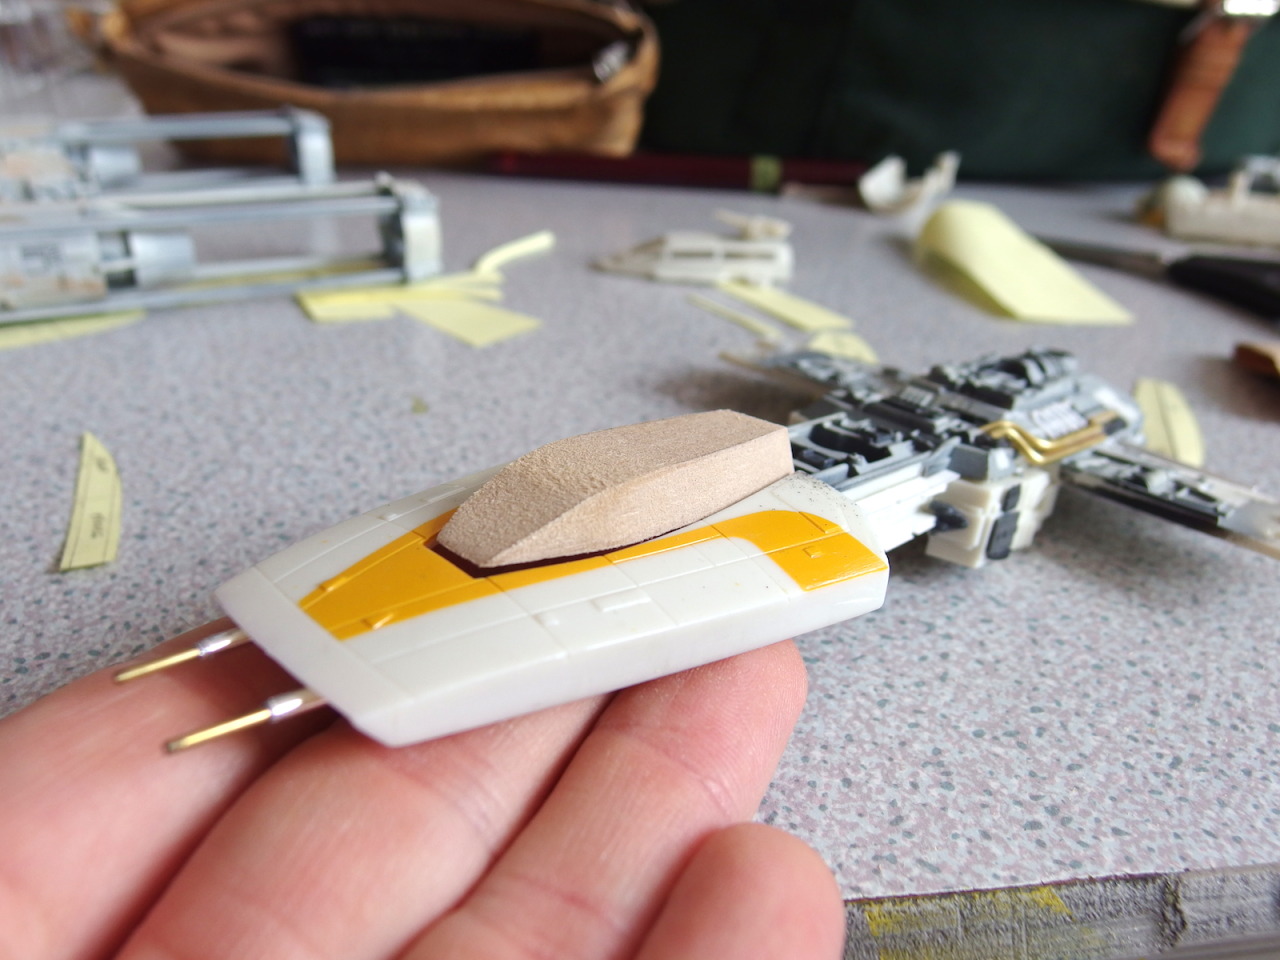
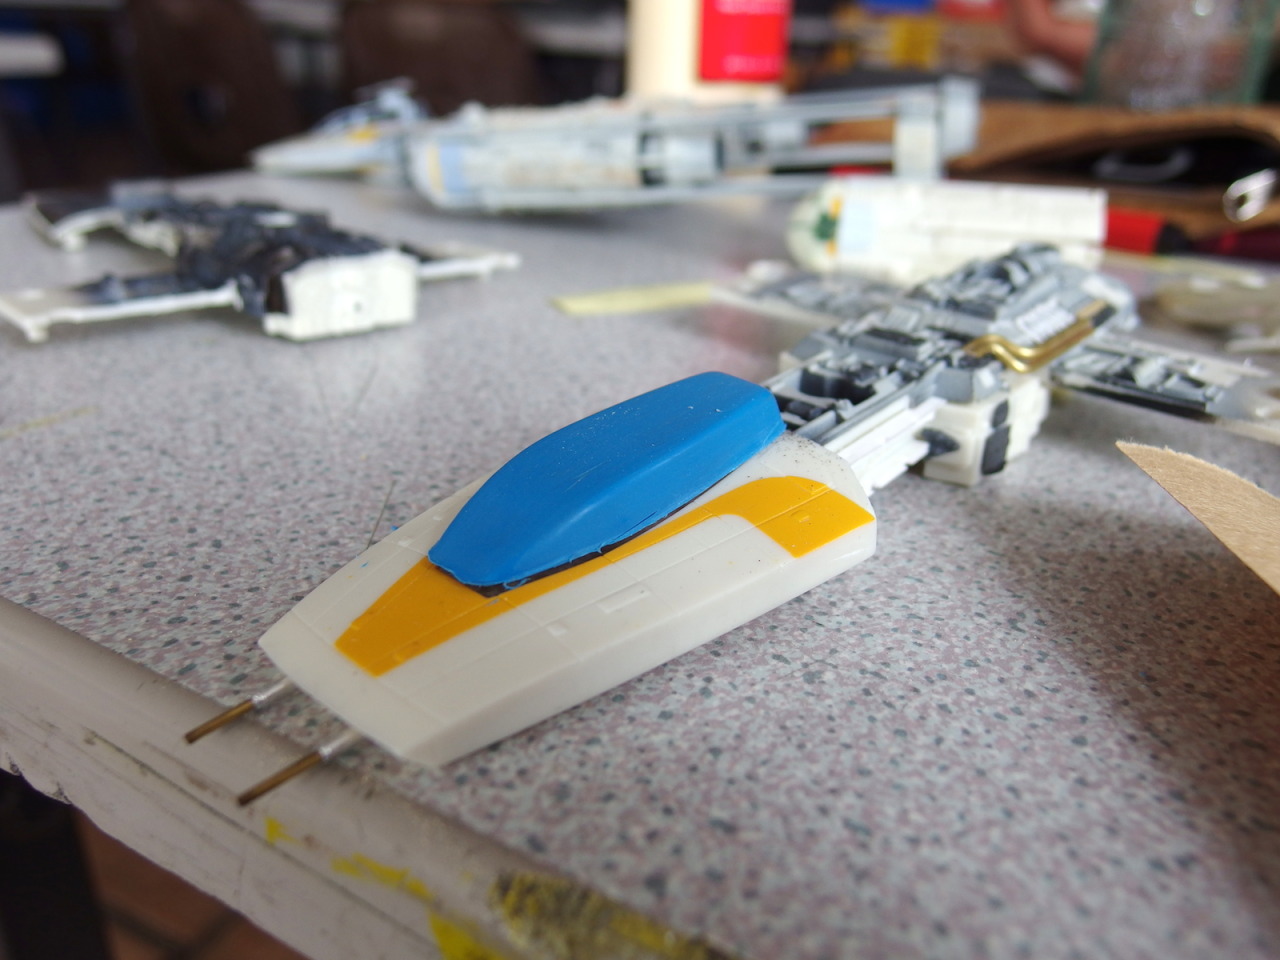
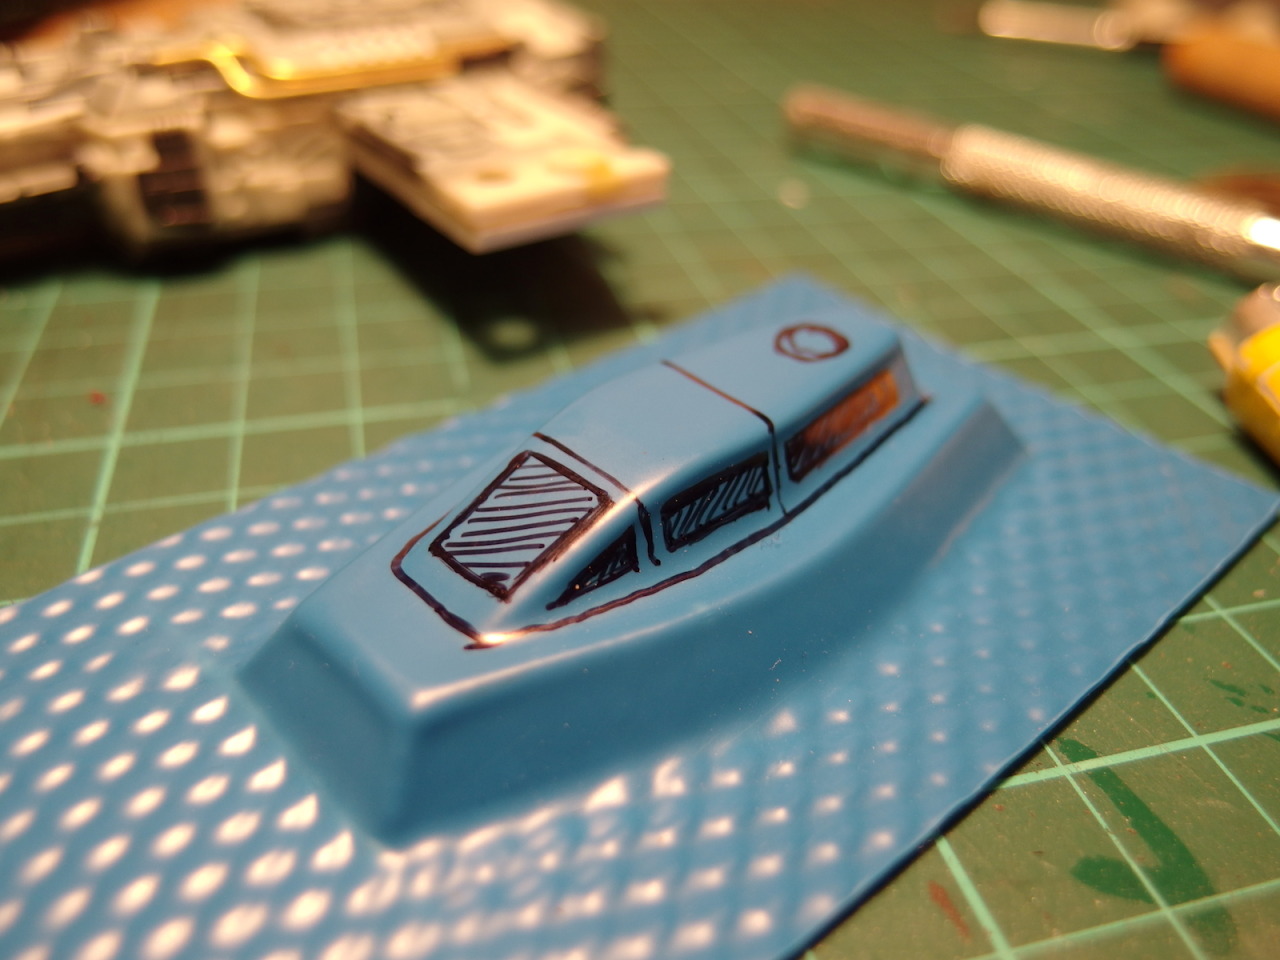
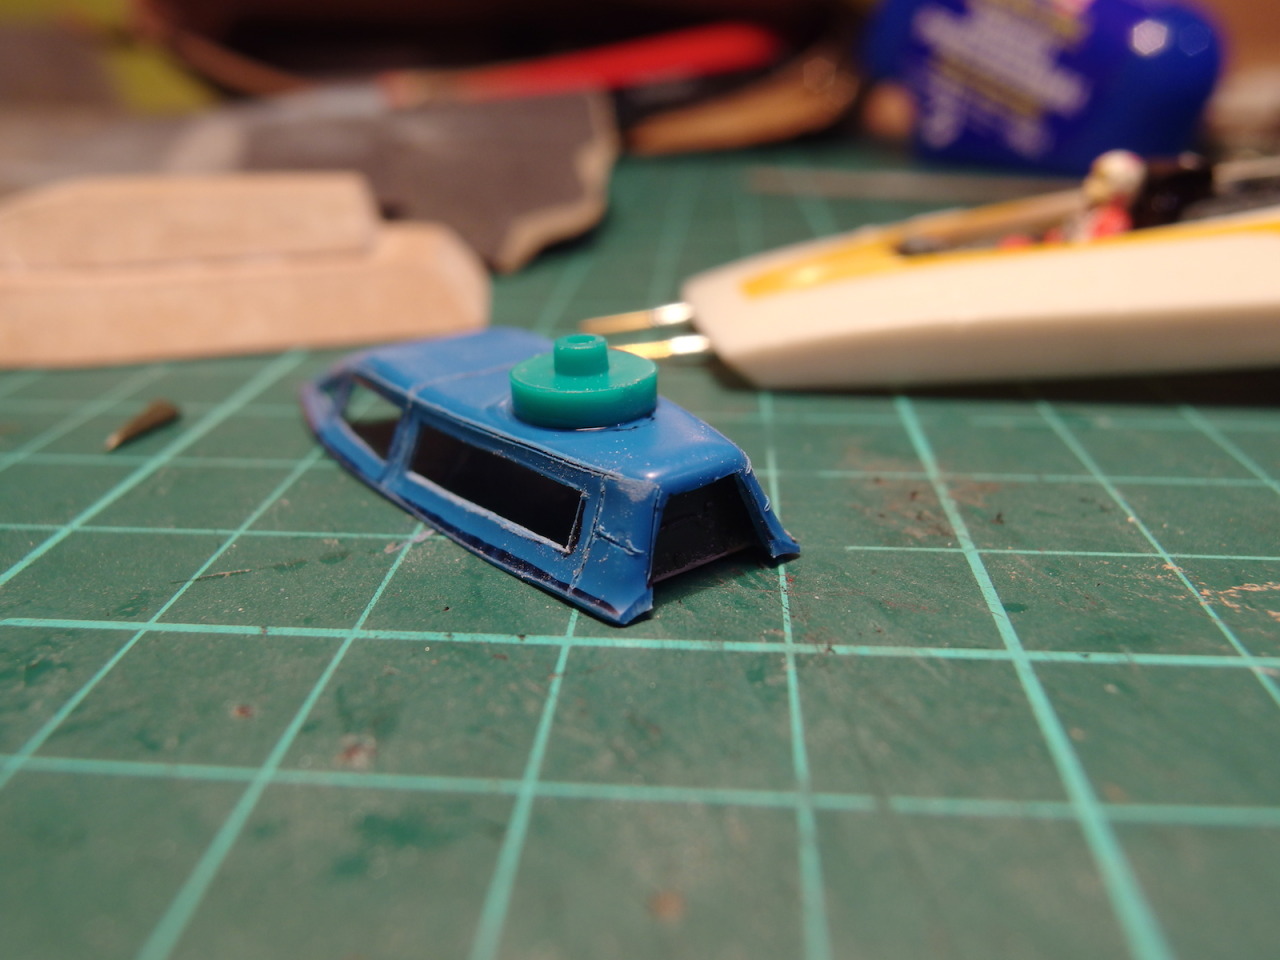
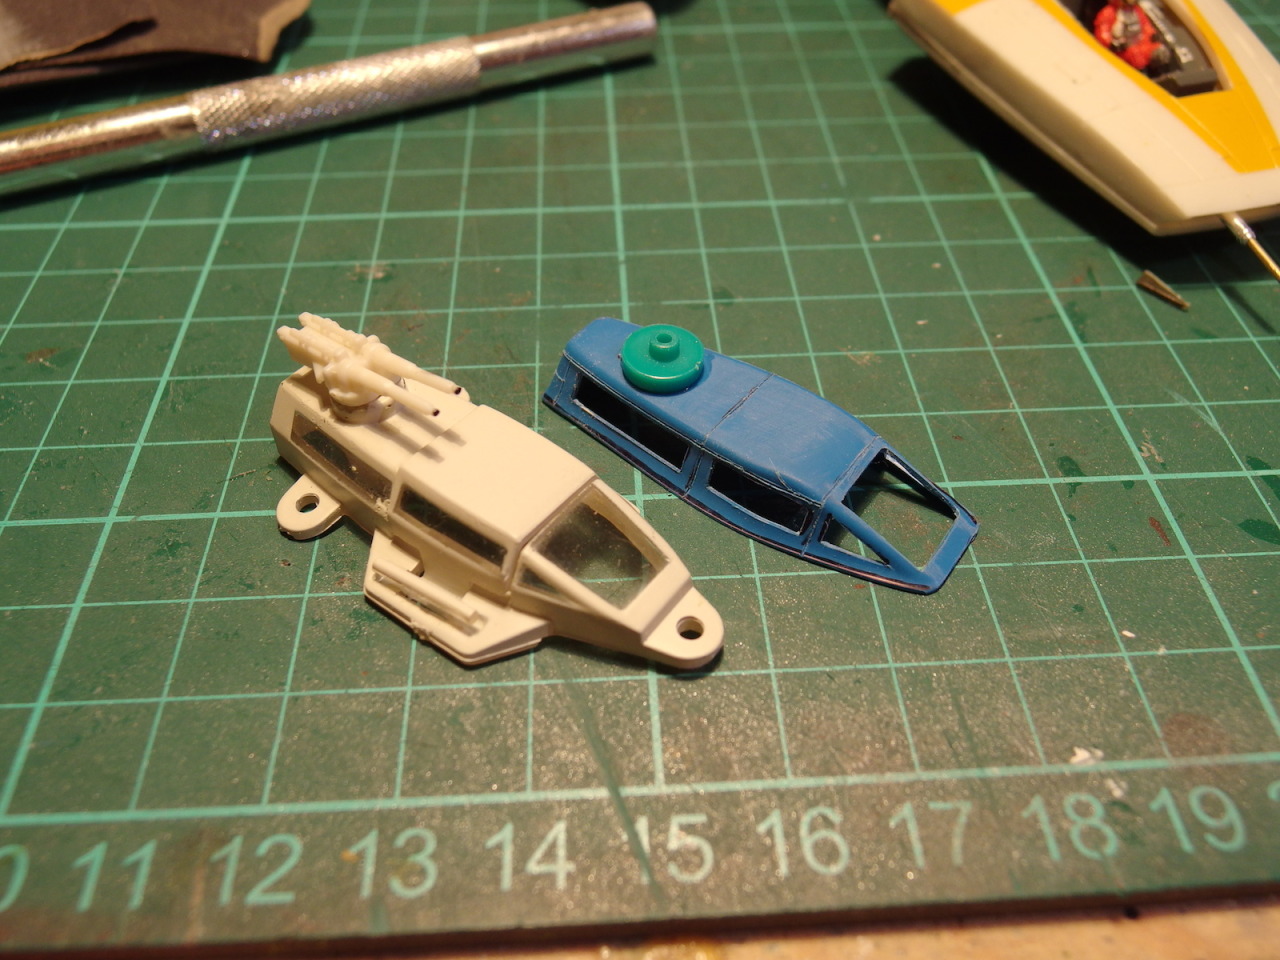
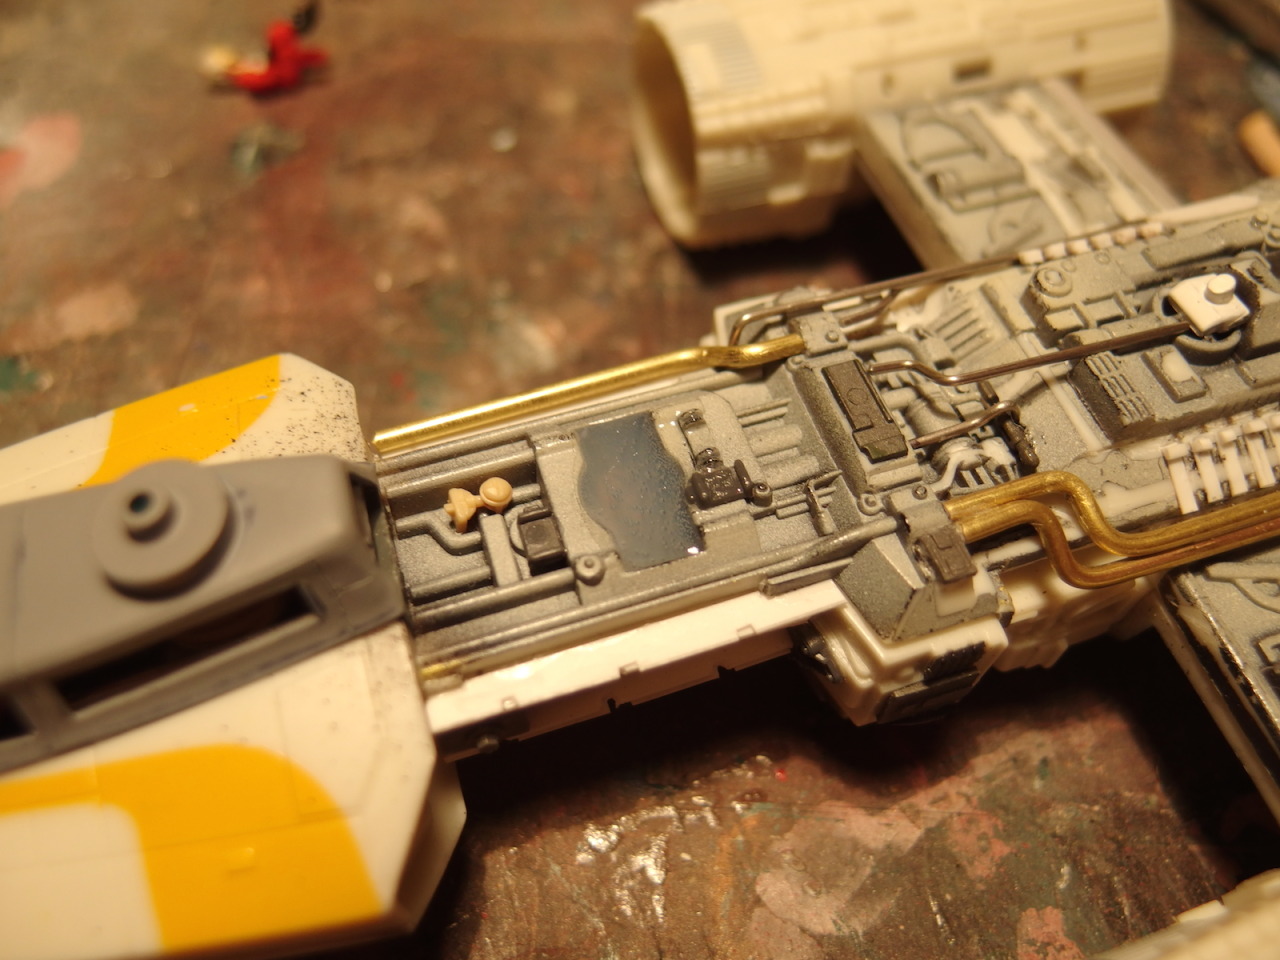
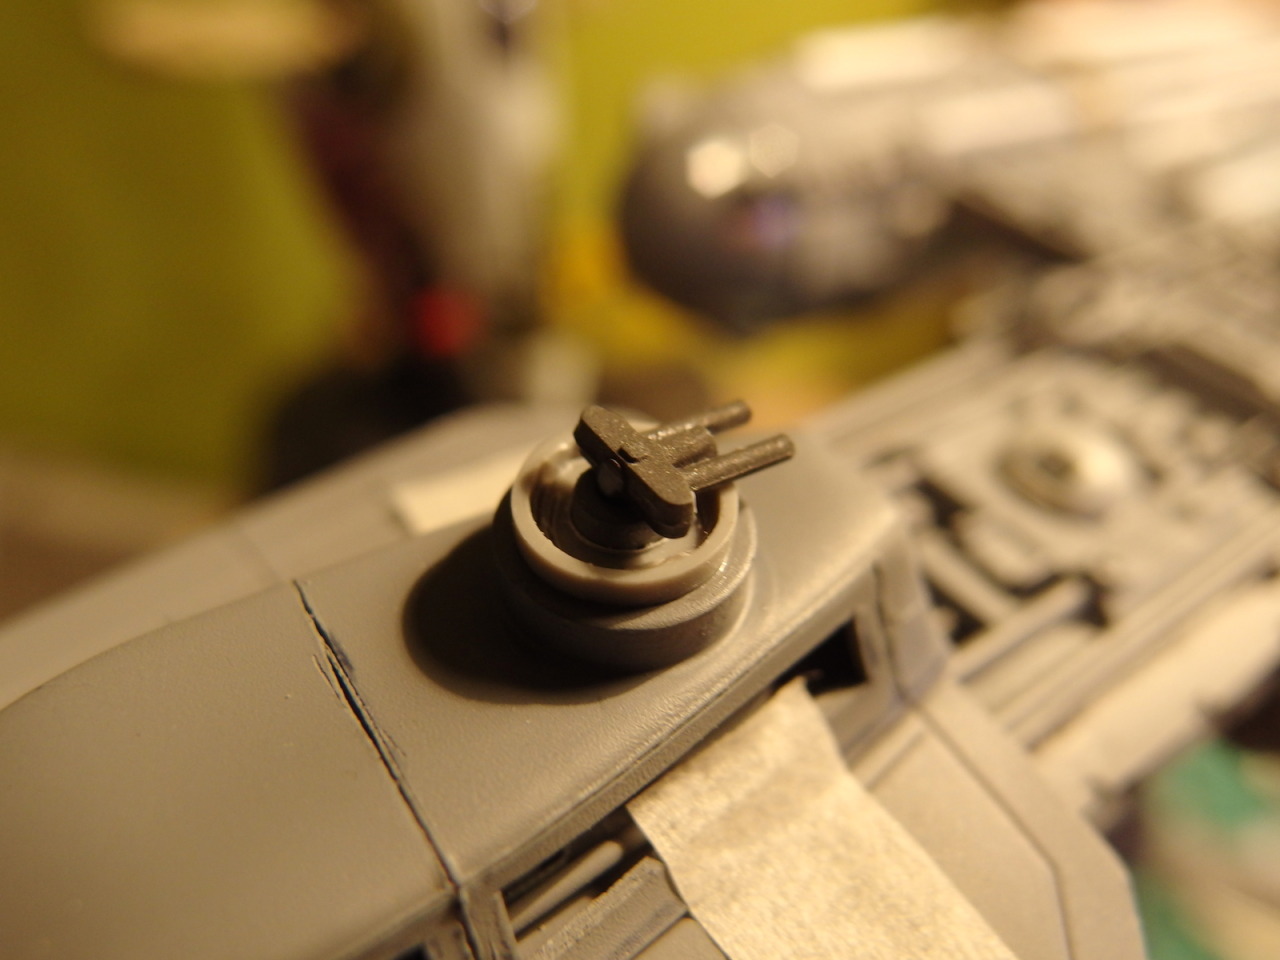
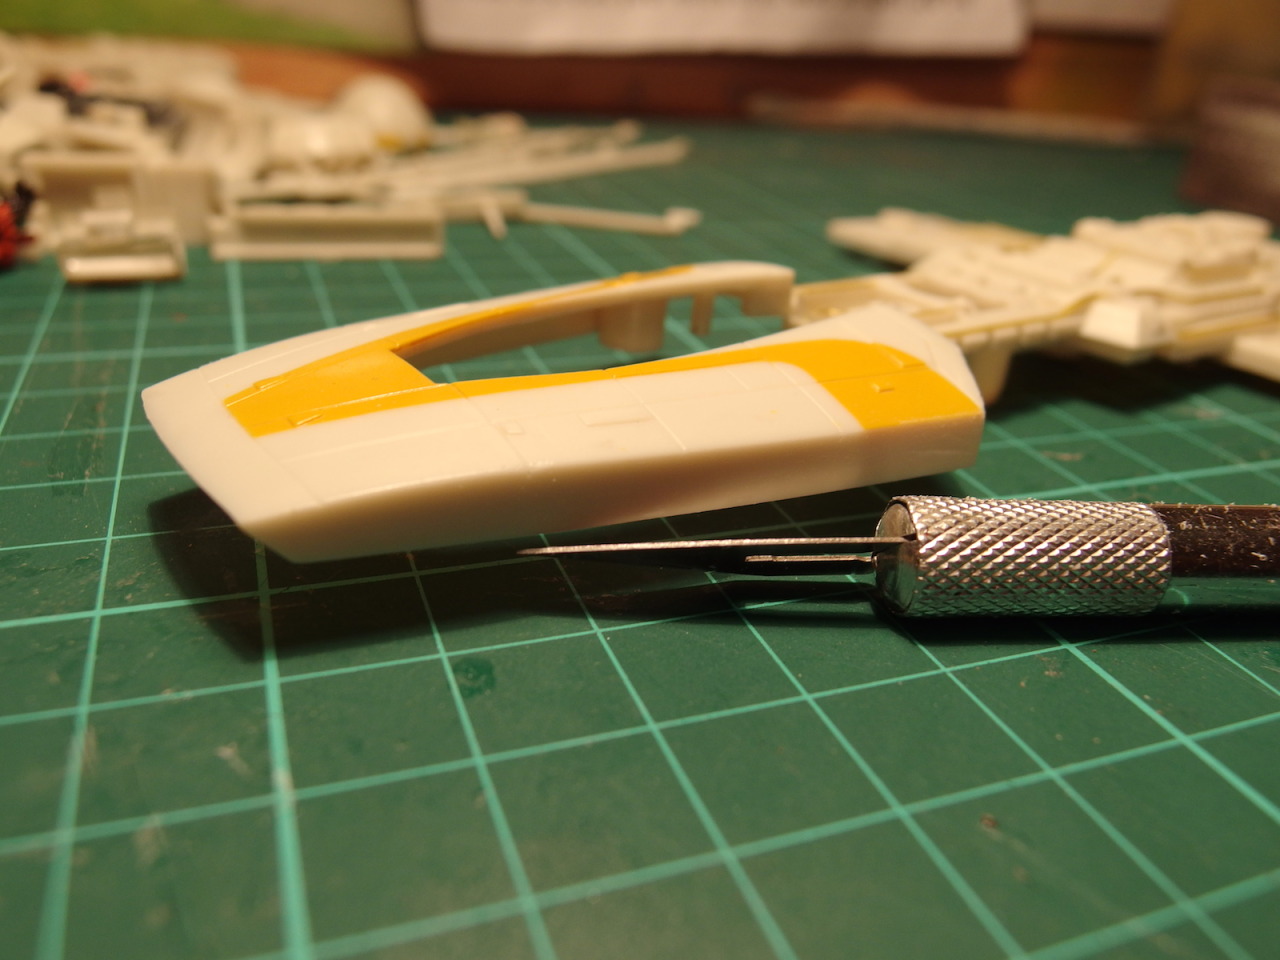
I then shaved off the huge ugly panels that were here

tumblr_n4rbgqo4gv1sf4tb1o1_1280.jpg


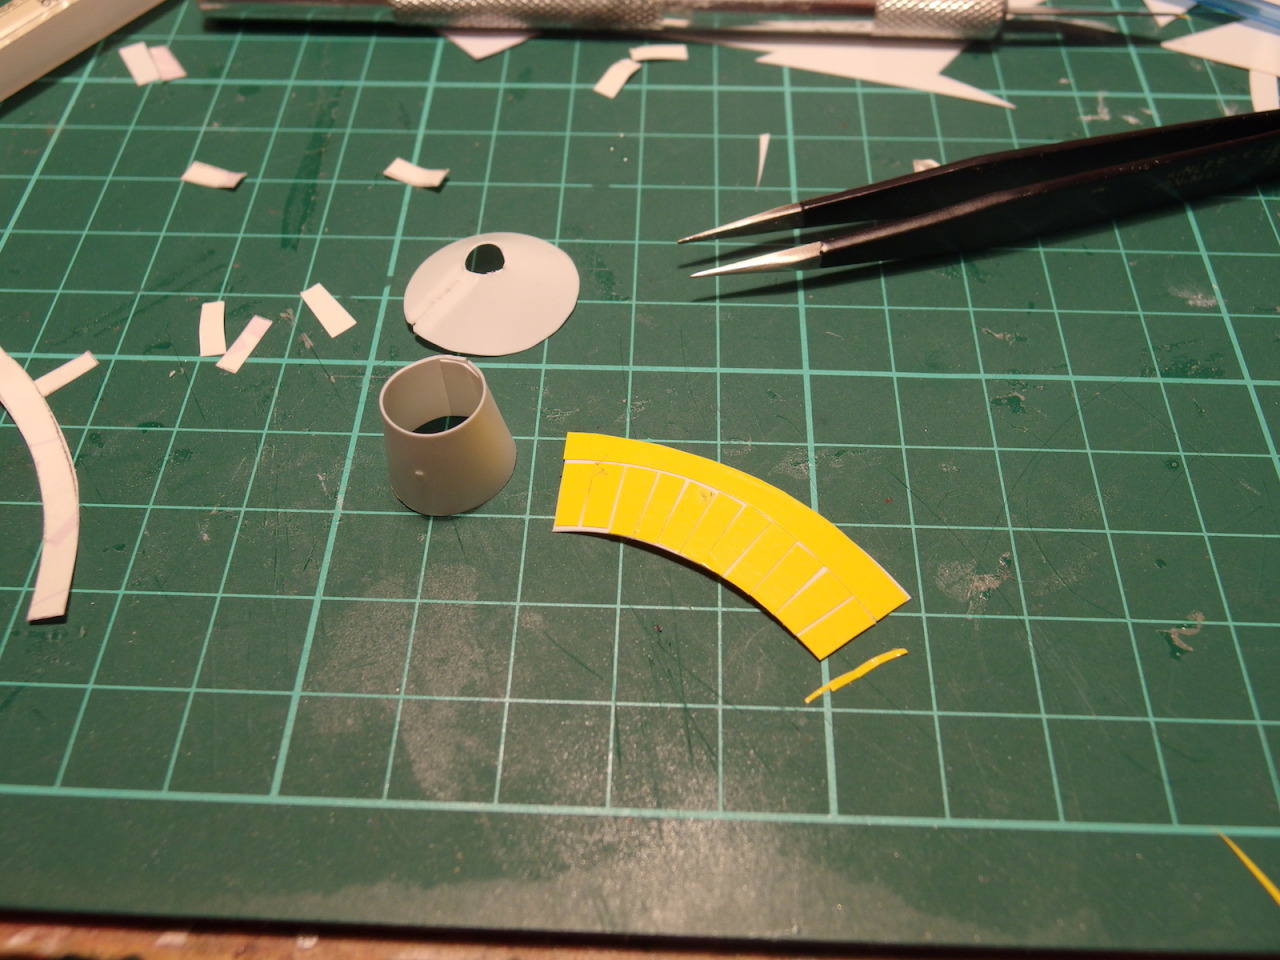
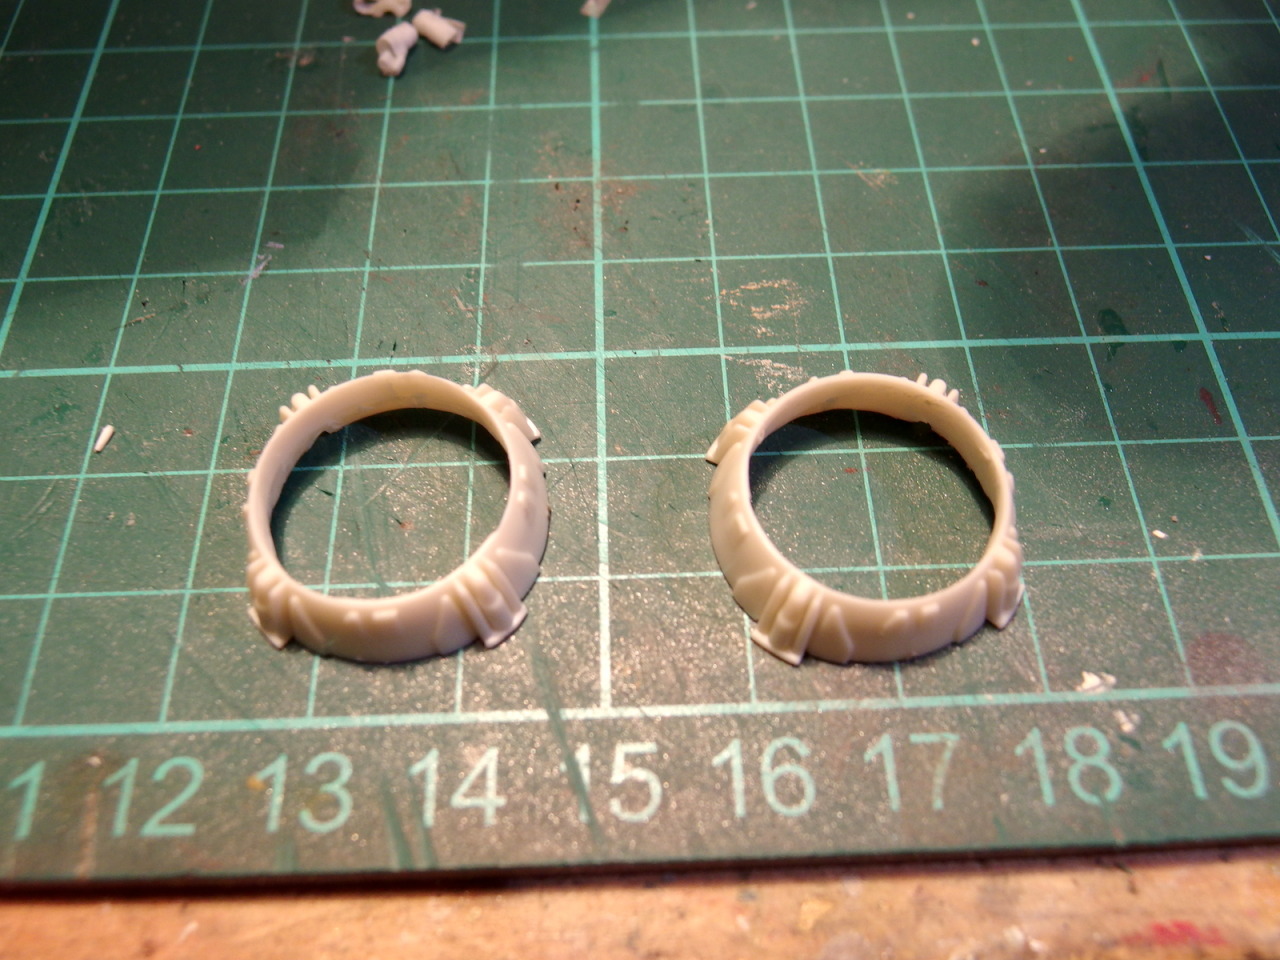
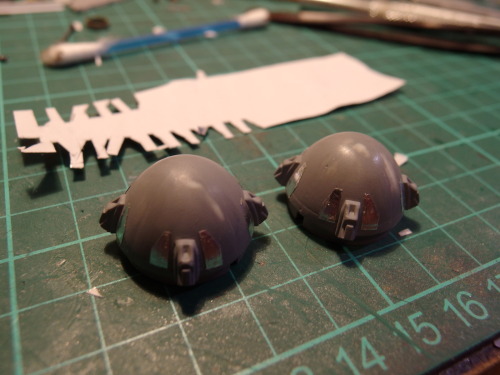
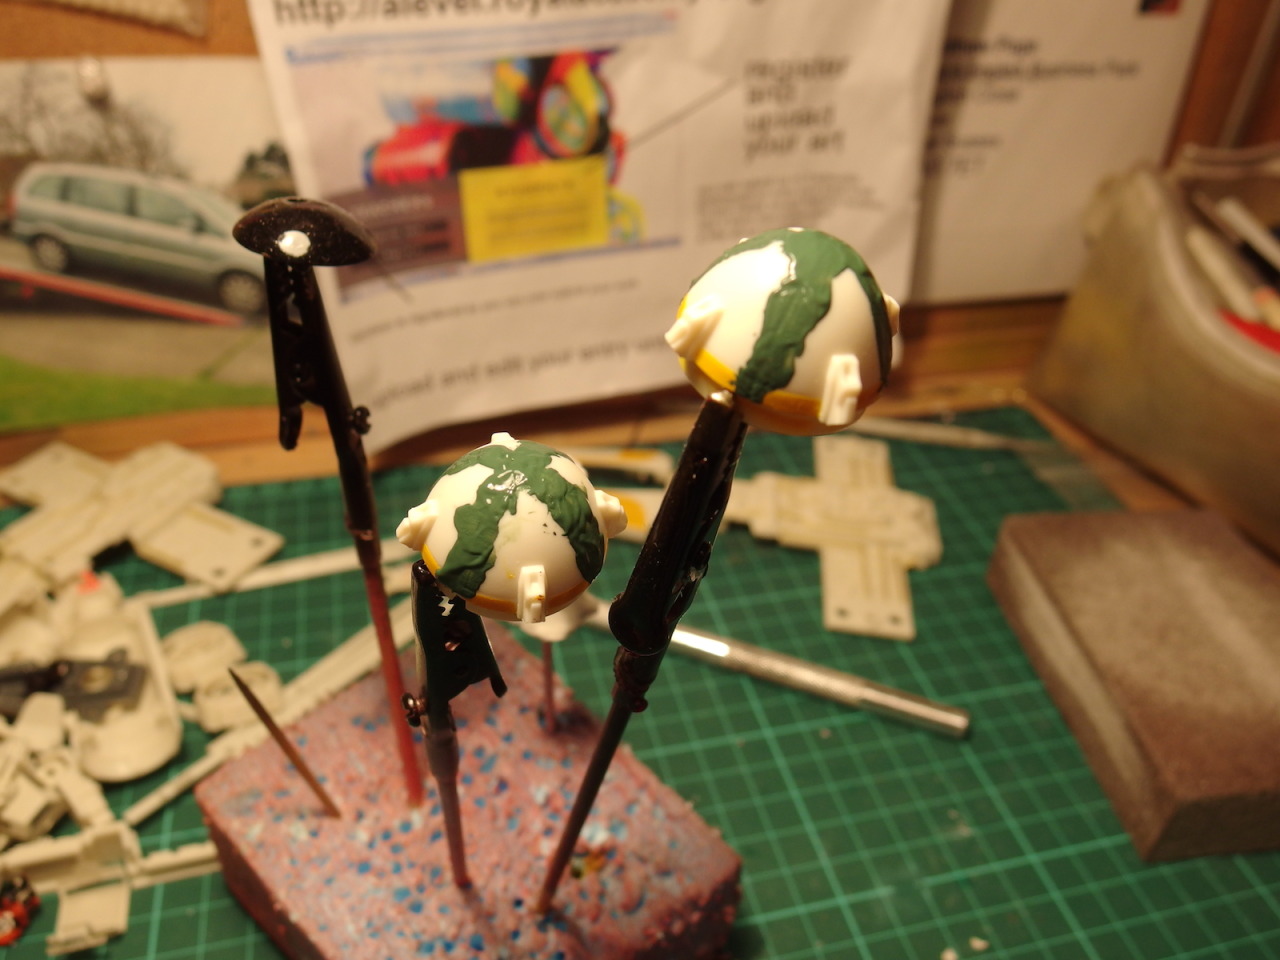
I applied a metric ton of liquid green stuff to the eggs, they have a deeply engraved cross on them which I really don't get

tumblr_n4rbgqo4gv1sf4tb1o2_1280.jpg


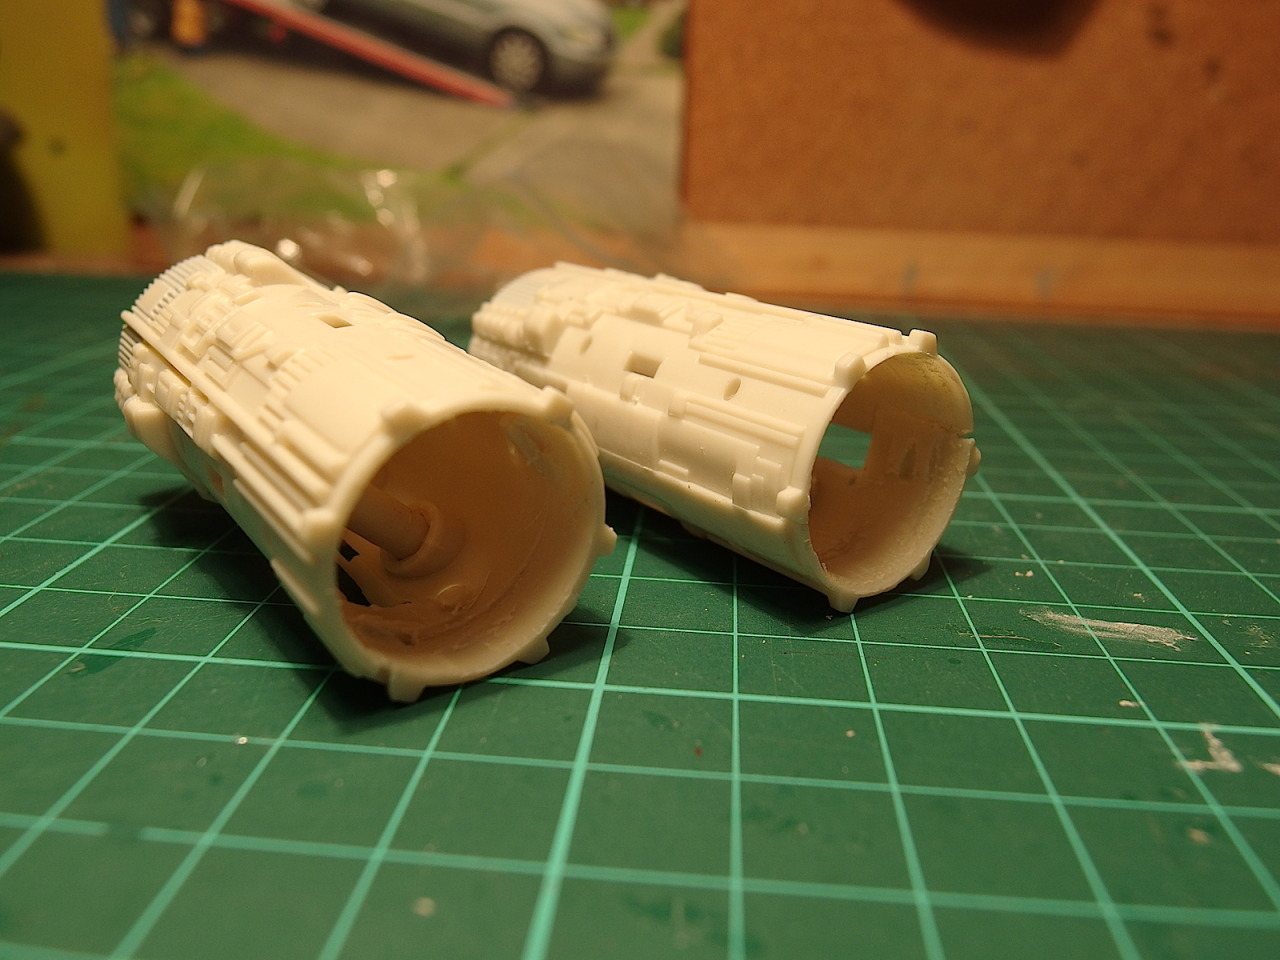
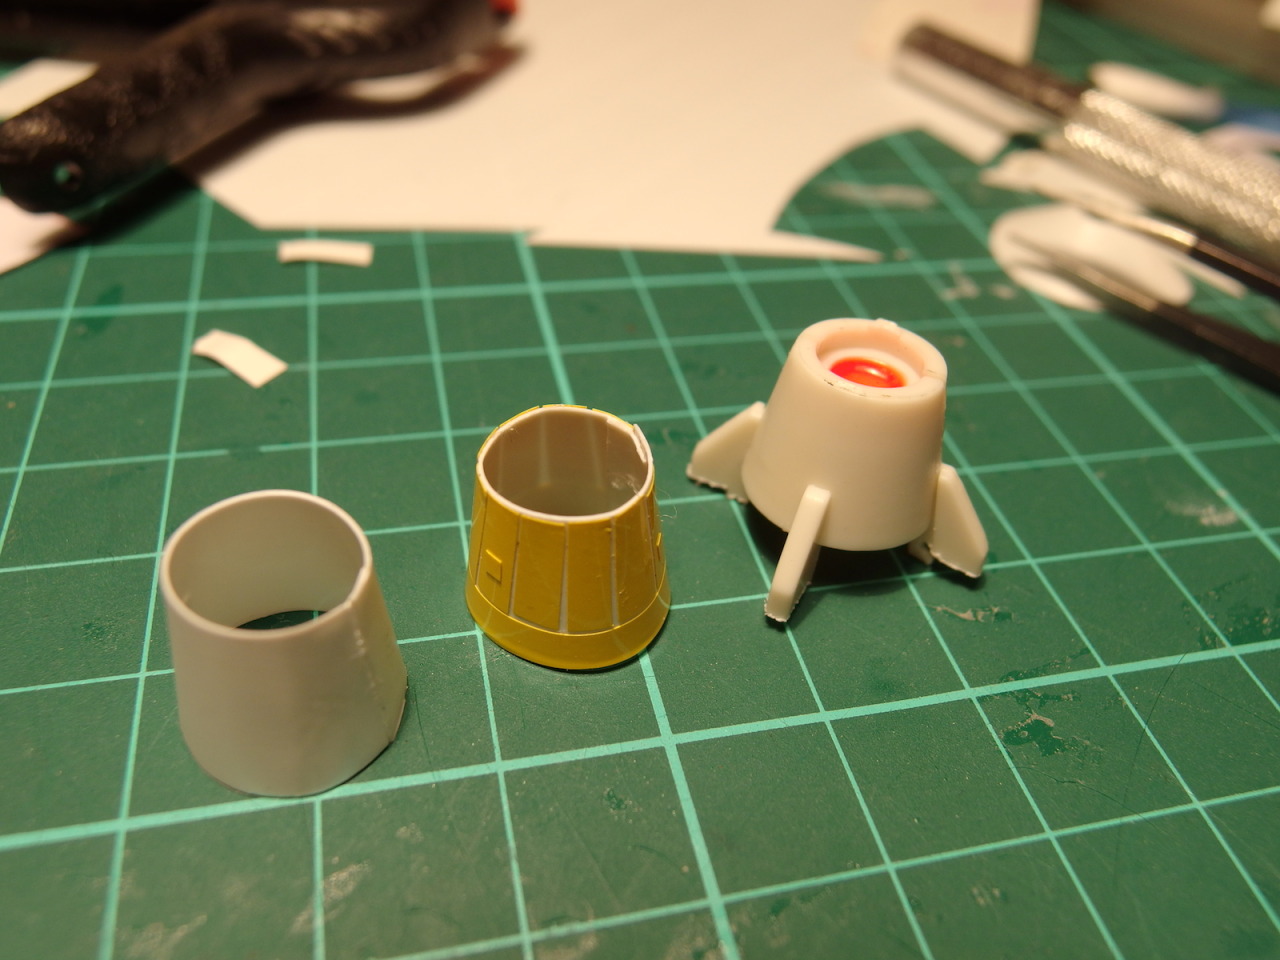
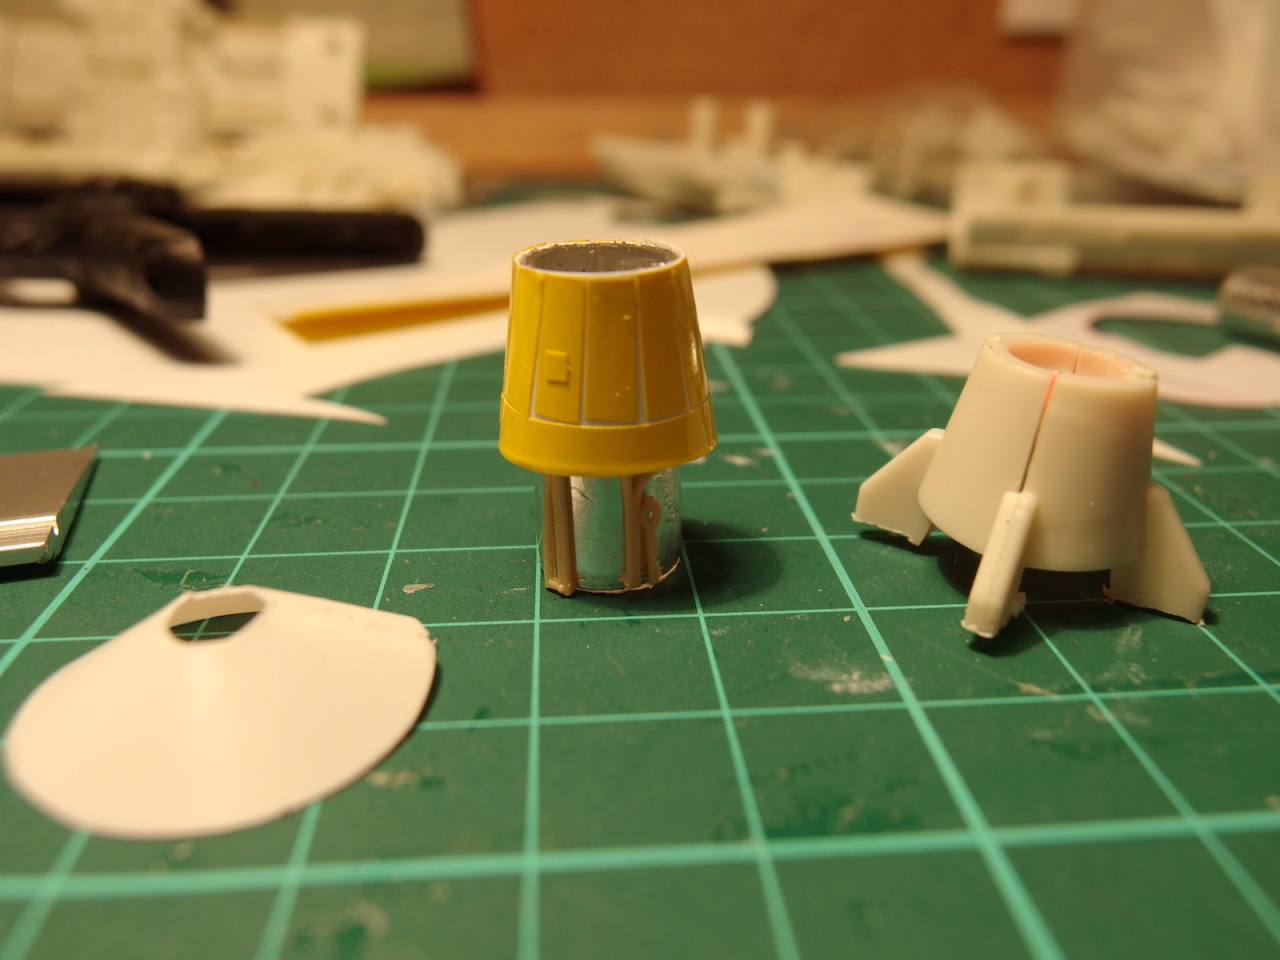
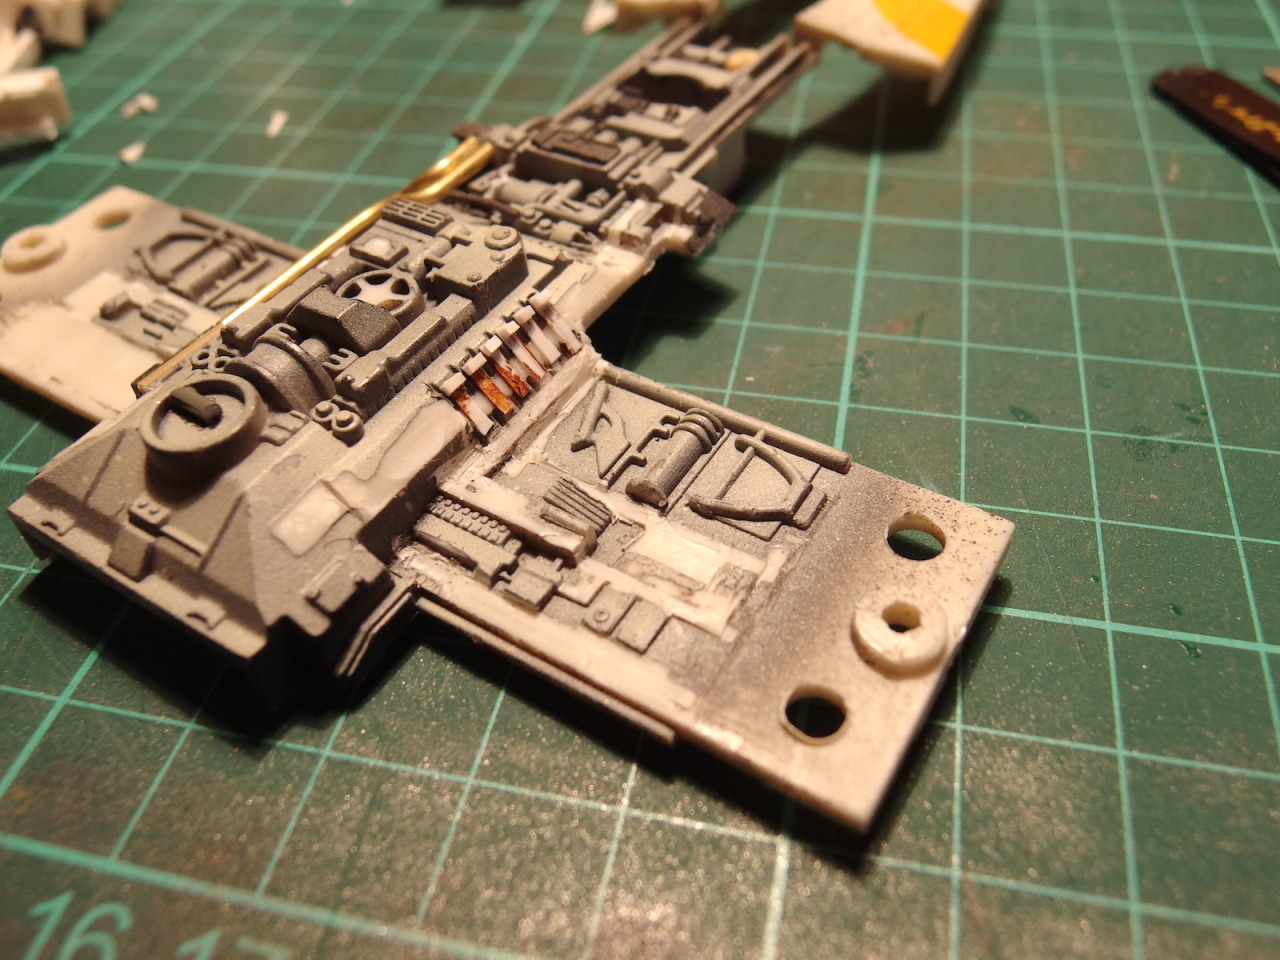
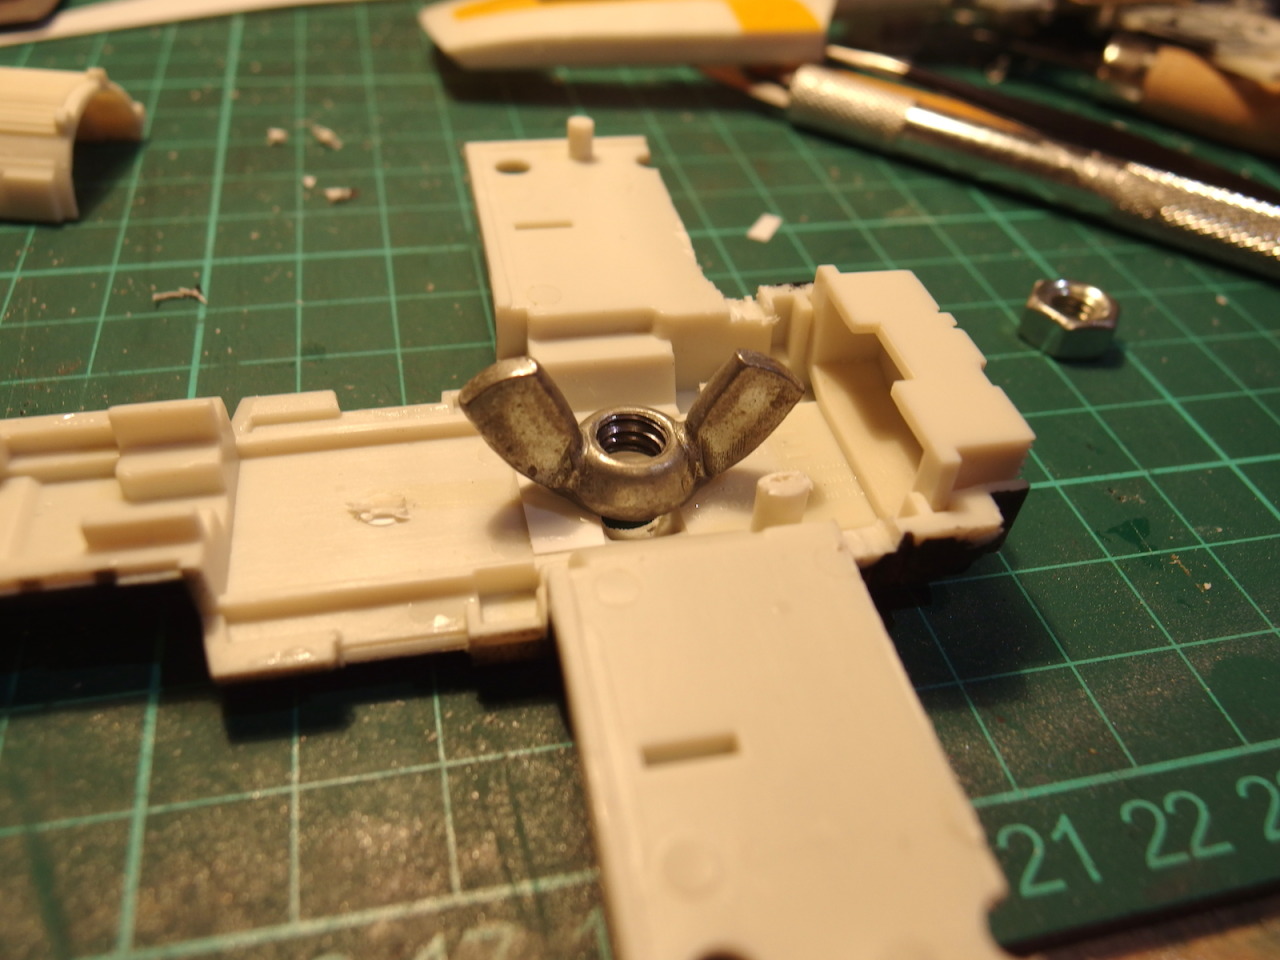
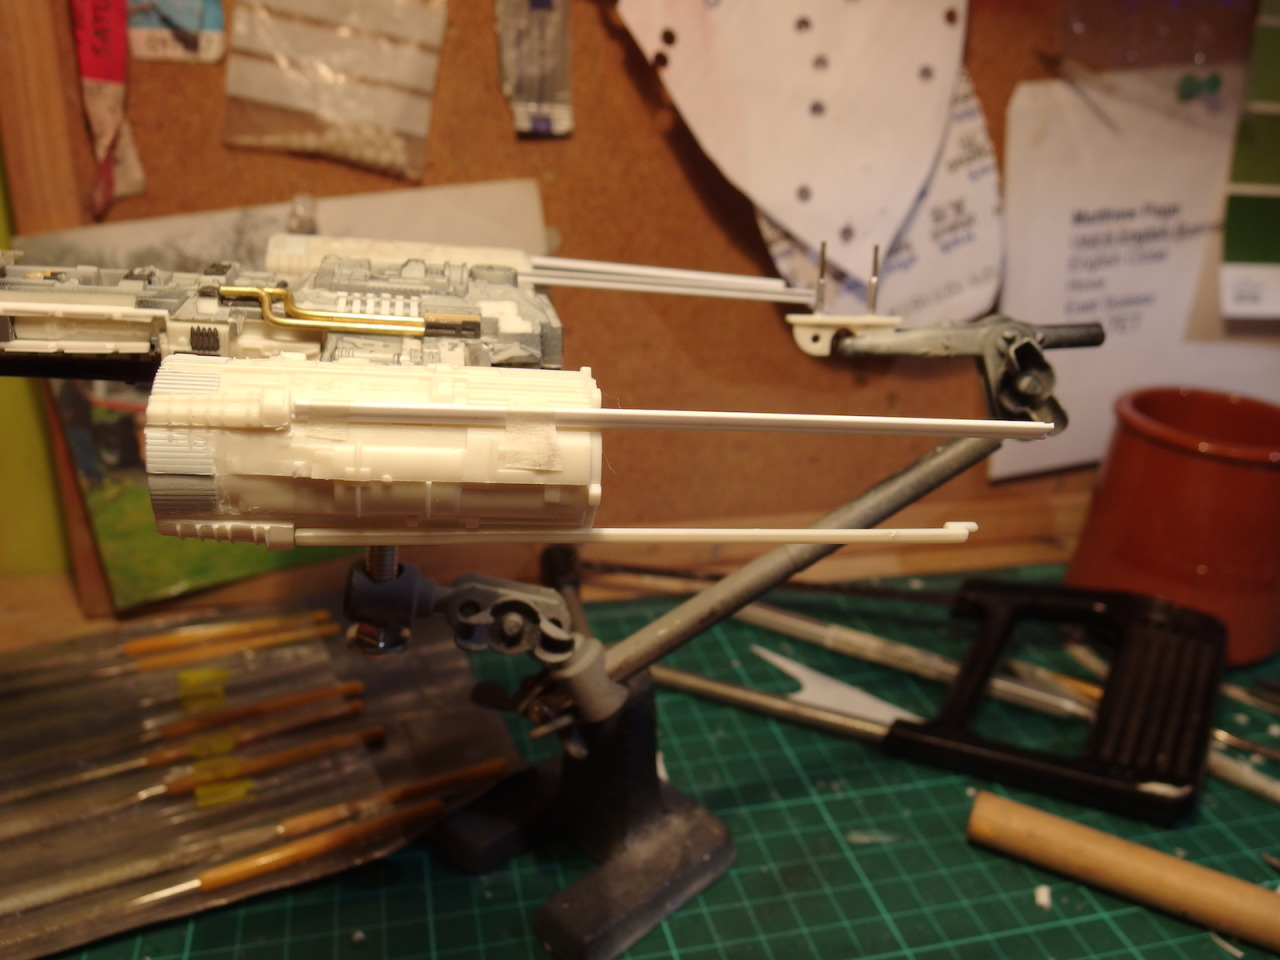
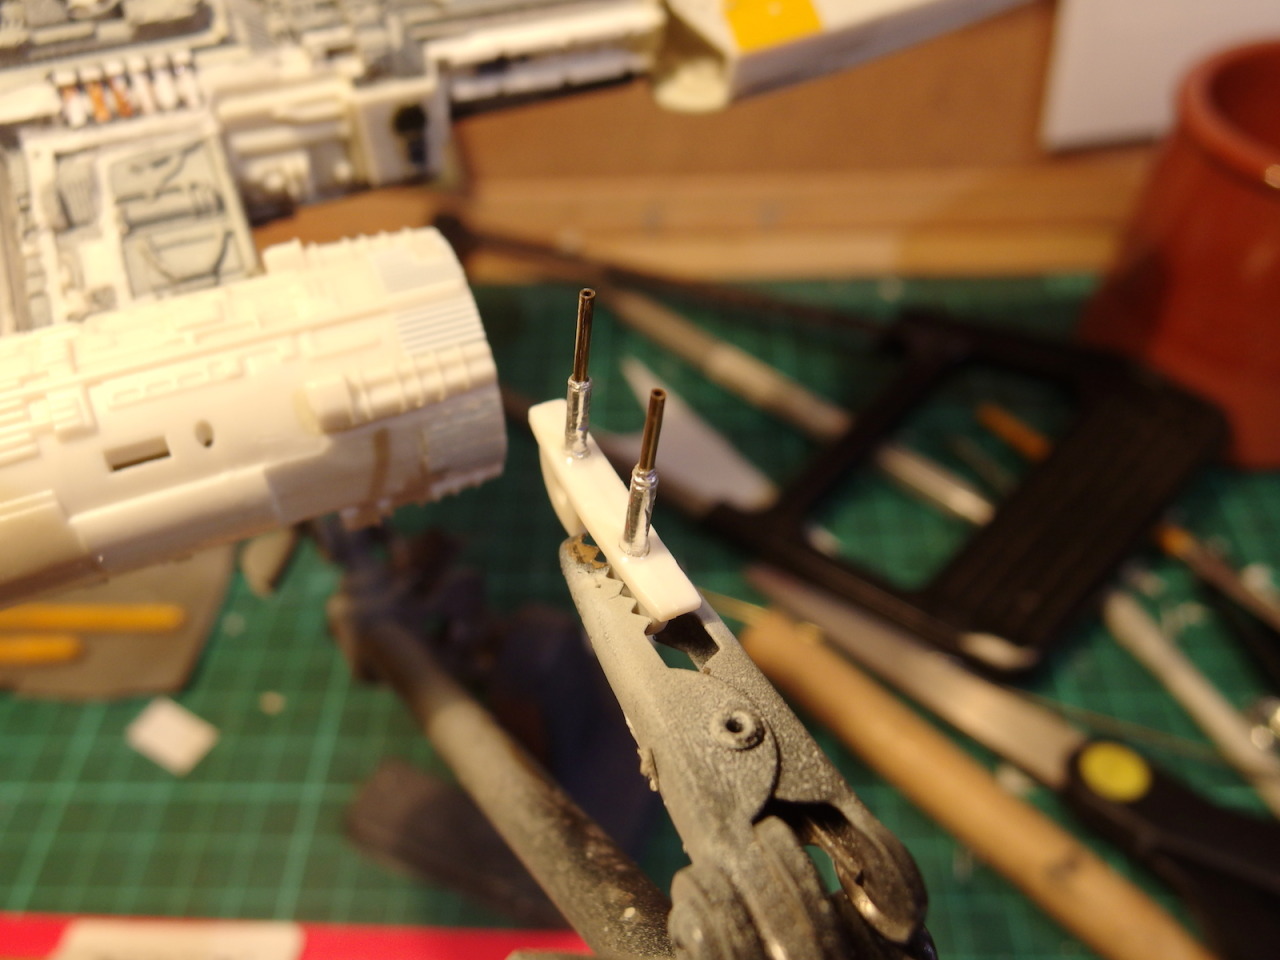
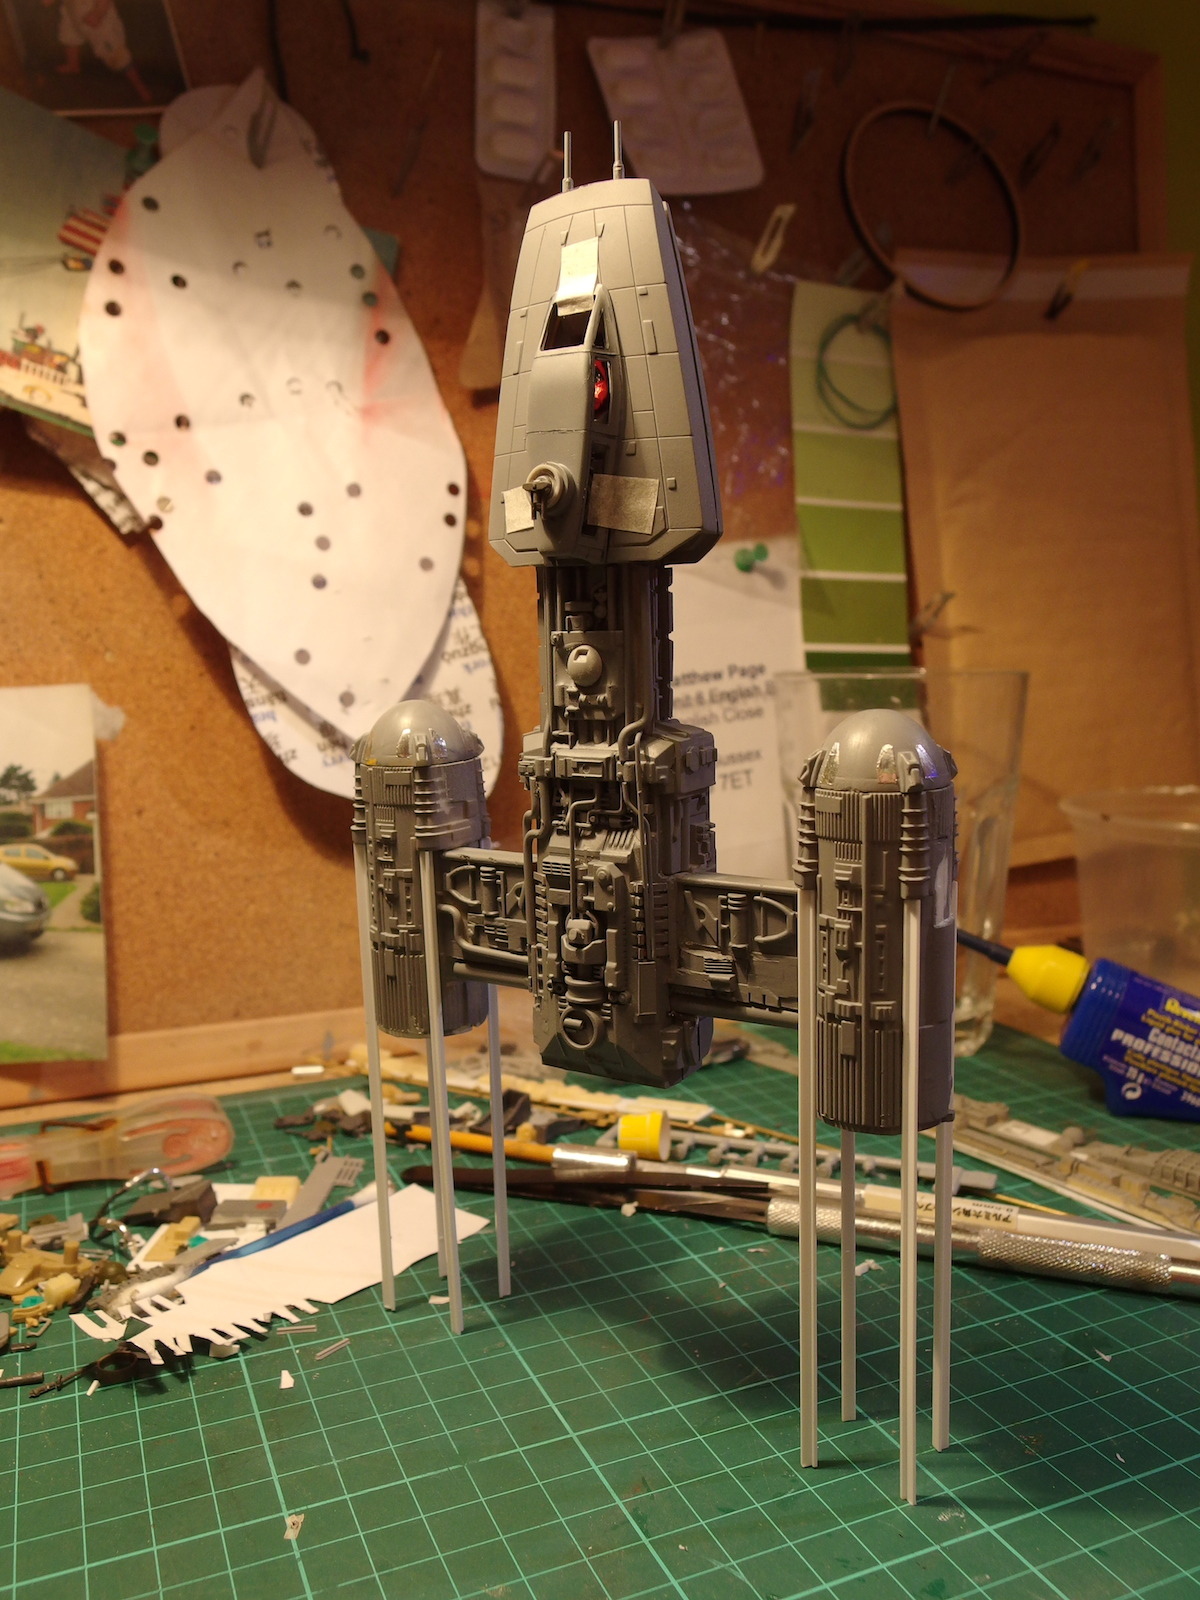
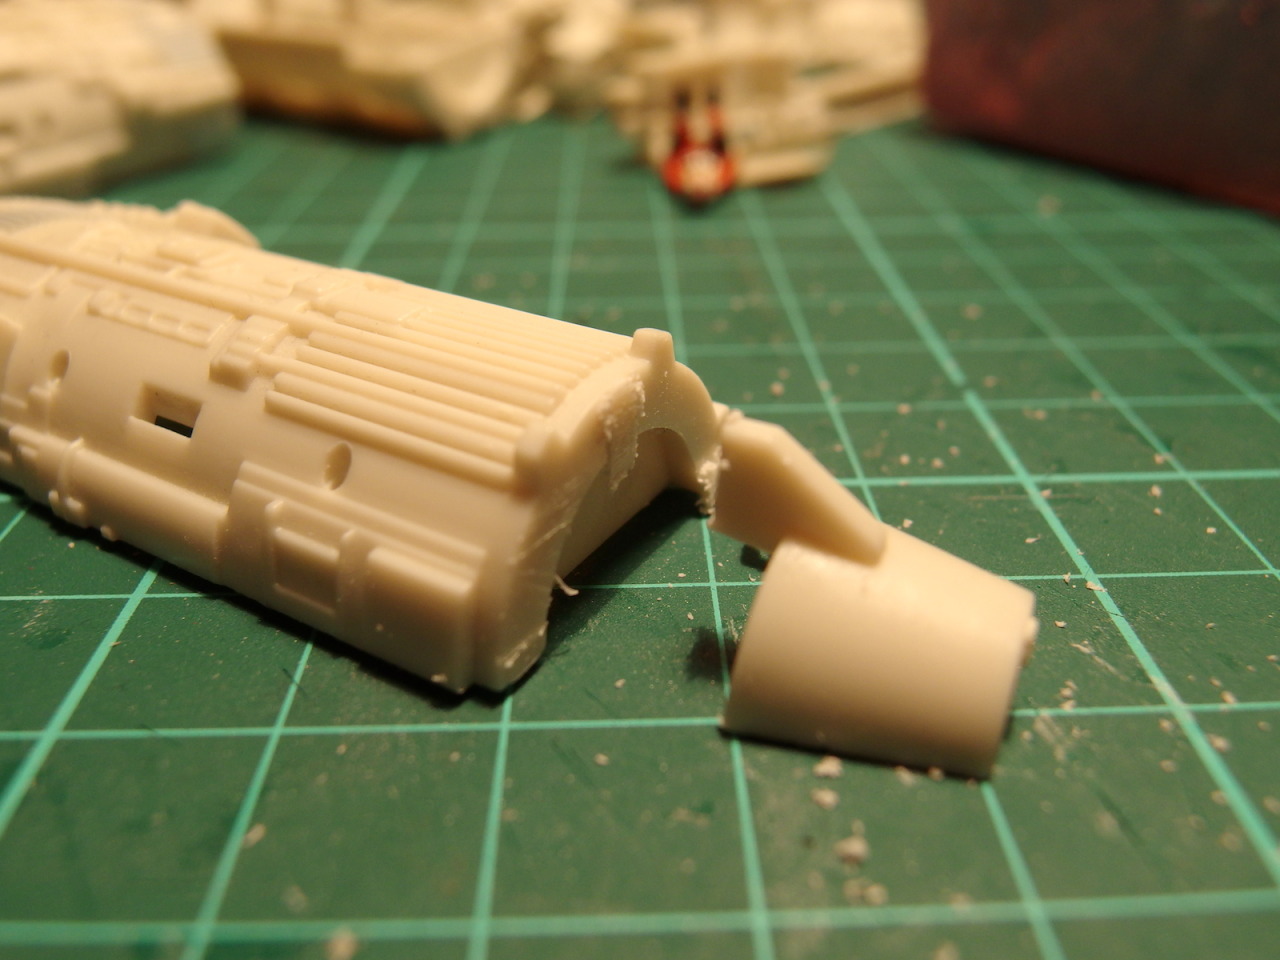
Then I cut the thrusters out, I'm going to thin these walls down to the proper thickness

tumblr_n4rbgqo4gv1sf4tb1o3_1280.jpg


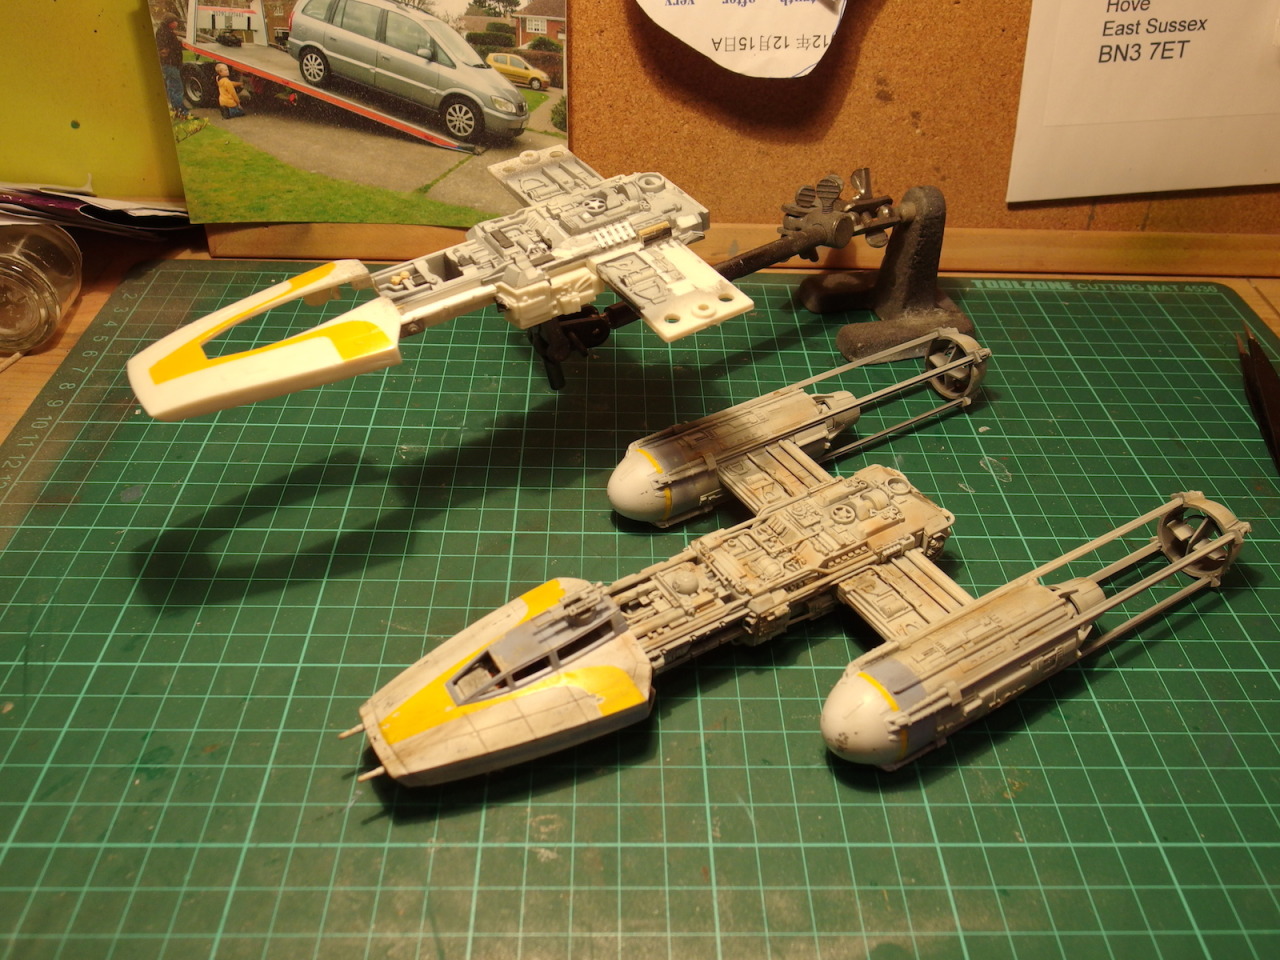
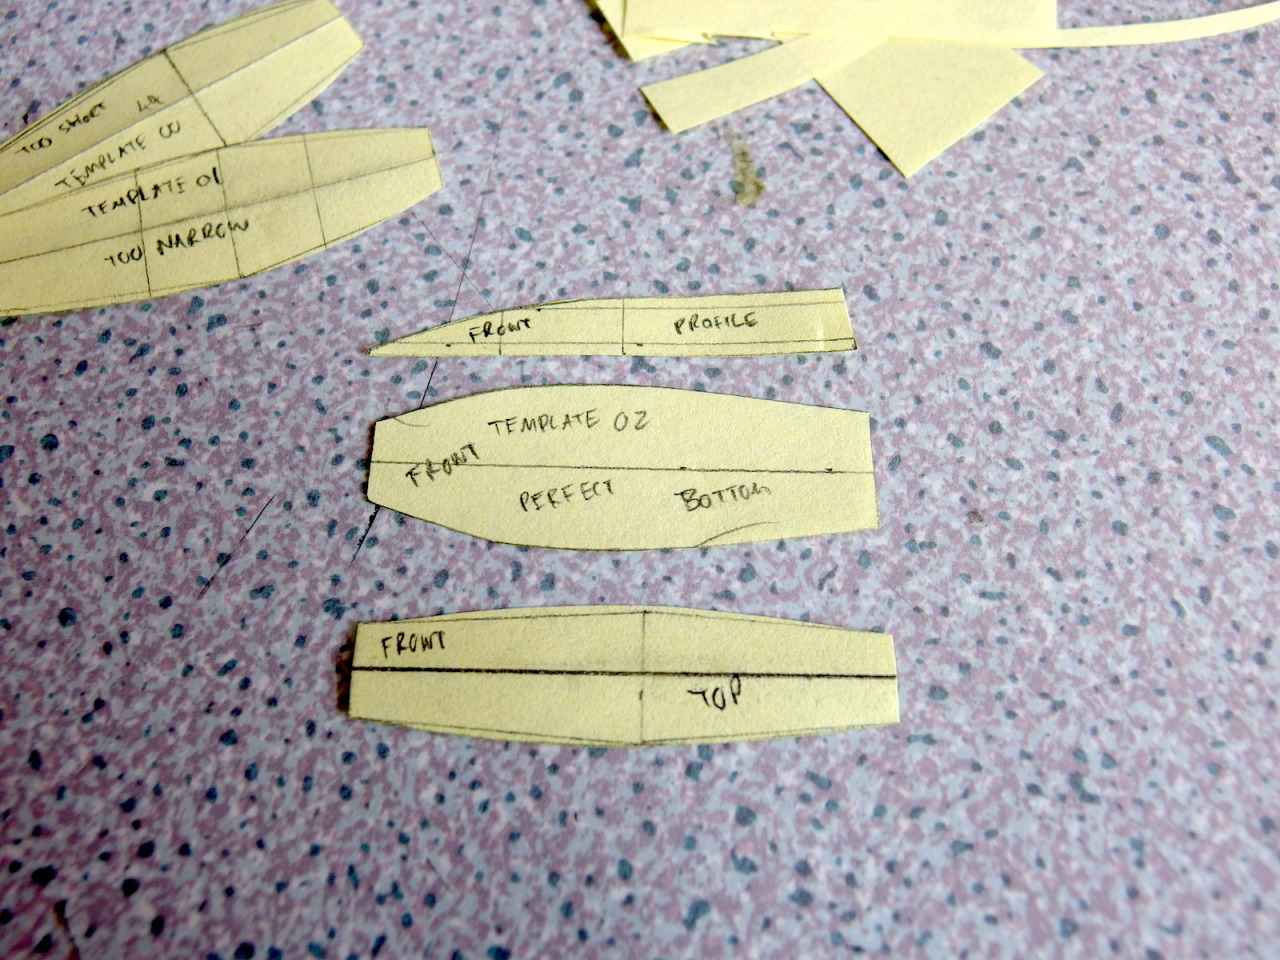
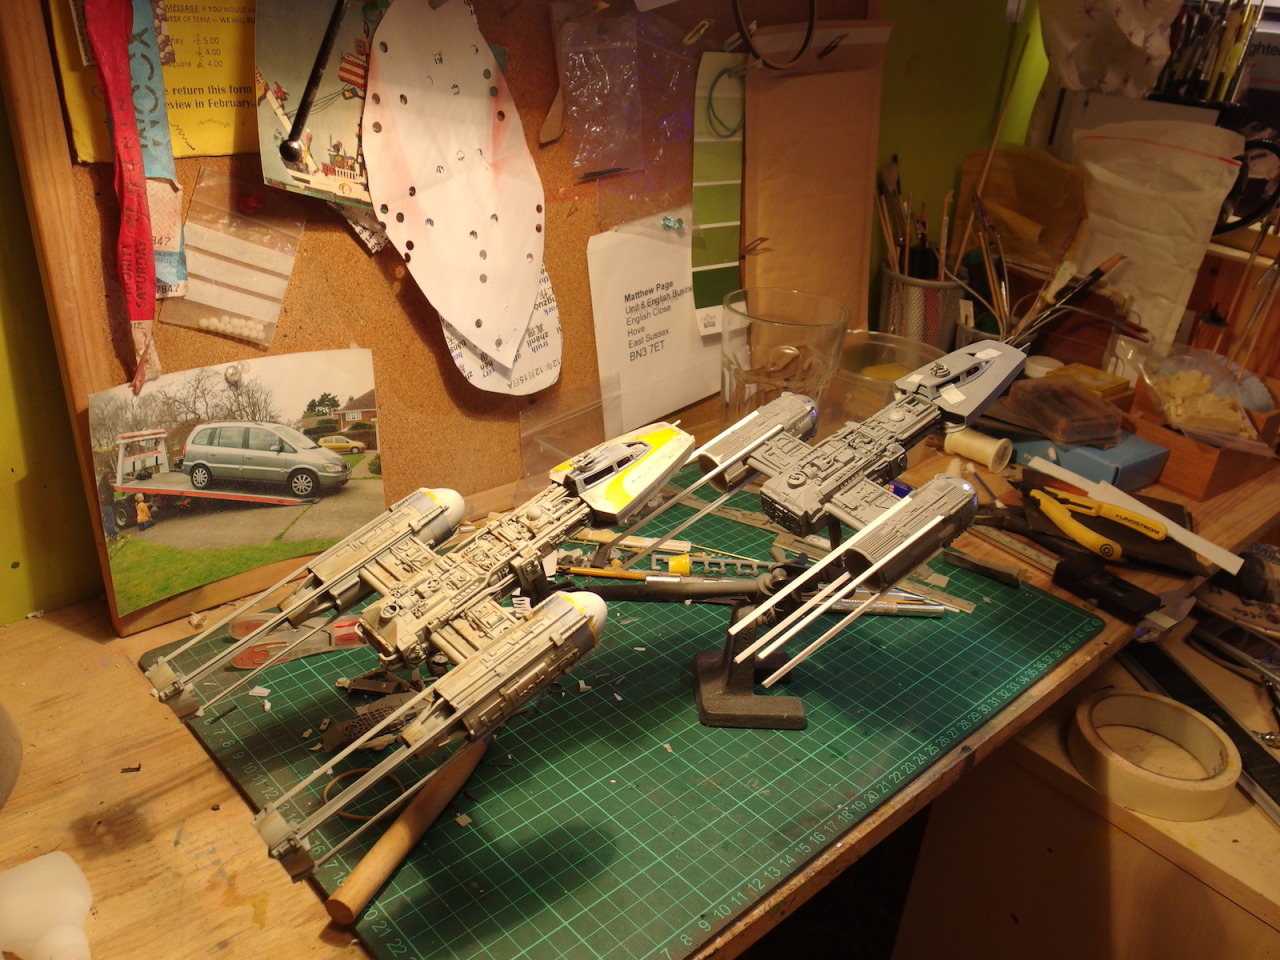
The key to a successful project is organization! Or so I tell myself

tumblr_n4rbgqo4gv1sf4tb1o6_1280.jpg


And that's me started! I'm still getting my head round the various differences of Red Jammer so any tips are most welcome
 
That desktop is way cleaner than it has any right to be lol. Looking good so far. I've never used green stuff but it looks alot like the green putty Squadron makes that i used, is it easy to work with?
 
That desktop is way cleaner than it has any right to be lol. Looking good so far. I've never used green stuff but it looks alot like the green putty Squadron makes that i used, is it easy to work with?

I always make sure to clean up after every session haha. Yeah the liquid green stuff is like a ...thick liquid I guess, maybe like custard? You just paste it on and it dries in about 20 minutes, but I usually leave it overnight before sanding. Very easy to use
 
While I was at college I thinned out the engine walls, which were previously entirely solid and very ugly

tumblr_n4wufiRdVx1sf4tb1o10_1280.jpg


I used a scalpel and files to make these piston/claw parts look correct, rather than the toylike walls they were before

tumblr_n4wufiRdVx1sf4tb1o9_1280.jpg


I started marking out the correct positions of the piping too. It's going to be a real hassle to remove the molded piping, and I'm not sure I'll bother

tumblr_n4wufiRdVx1sf4tb1o6_1280.jpg


Then I started replacement thrusters because I thought the kit ones were too unusable

tumblr_n4wufiRdVx1sf4tb1o5_1280.jpg


tumblr_n4wufiRdVx1sf4tb1o7_1280.jpg


I used a pen covered in aluminium tape for the internal thruster, I intend to light this baby so the tape will help with light blocking

tumblr_n4wufiRdVx1sf4tb1o8_1280.jpg


That's it for today though! It's shaping up alright I think
 
Today I carved off a lot of the surface details and horrible moulded pipes; I also rebuilt a few areas and added here and there. It's coming along nicely but still needs more work

tumblr_n5y0cnWLsj1sf4tb1o2_1280.jpg


As you can see I started off with the left side, almost all the pipes were taken off in the end

tumblr_n5y0cnWLsj1sf4tb1o1_1280.jpg


Testing a pipe fitting, you can see a few parts have been added already at this point

tumblr_n5y0cnWLsj1sf4tb1o3_1280.jpg


I then shaved off the moulded notches and scratched my own 8 Rad parts to go on the kit sidewall, you can see how it improves the flow off the neck

tumblr_n5y0cnWLsj1sf4tb1o4_1280.jpg


As much as some of ya hate this kit, I'm taking basic reference from the Finemolds kit, it's a good kit to have on the side to refer to with the Revell

tumblr_n5y0cnWLsj1sf4tb1o5_1280.jpg


Same sort of stuff happening on the other side, grooves replaced with styrene

tumblr_n5y0cnWLsj1sf4tb1o5_1280.jpg


tumblr_n5y0cnWLsj1sf4tb1o6_1280.jpg


tumblr_n5y0cnWLsj1sf4tb1o7_1280.jpg


Here we are at the end of today's session:

tumblr_n5y0cnWLsj1sf4tb1o8_1280.jpg


I'm feeling very happy about this so far, it's actually been quite relaxing :lol
 
Very nice. I have one of there in the closet... I love the idea of detailing it up like this.

--Alex

It's actually surprisingly accurate, a lot of simplified details but to the casual observer it looks good enough. I think once I've accurized it and evened out the proportions it should look fairly respectable, and it'll be good to see a 1:72 red jammer done imho
 
Looks great so far Haystack! I love getting old models from ebay then rebuilding them to a new glory. Most of mine smell like old basement when I get them.:lol
 
Worked a little more on this piece today. The first thing I did was cut 5mm from the wings, filed out a semi circle and fitted a 5mm aluminium tube across

tumblr_n6emlss4Pj1sf4tb1o3_1280.jpg


Then I glued (and puttied, heavily, but i forgot to take photos) an M5 wingnut in. I went with a wingnut because I thought it would give more surface area for the putty to adhere to

tumblr_n6emlss4Pj1sf4tb1o4_1280.jpg


I cut 8 new T-bar sections, I made sure they were longer than the kit ones but shorter than the Finemolds'

tumblr_n6emlss4Pj1sf4tb1o1_1280.jpg


tumblr_n6emlss4Pj1sf4tb1o2_1280.jpg


New (hollow!!) brass guns with aluminium tape wrapped around them to get the correct telescoping

tumblr_n6emlss4Pj1sf4tb1o5_1280.jpg


tumblr_n6emlss4Pj1sf4tb1o9_1280.jpg


Fiddled more with the engine configs, you can't see it here but there's 1/3 of a 20mm christmas bauble in there linked to the thrusters. It's a nice configuration despite not being accurate so I'll probably stick with it

tumblr_n6emlss4Pj1sf4tb1o7_1280.jpg


The Revell makes the Finemolds' look lanky!

tumblr_n6emlss4Pj1sf4tb1o8_1280.jpg


tumblr_n6emlss4Pj1sf4tb1o6_1280.jpg


I'll be vacuum forming a new canopy for definite, however I'm not settled on the nacelle eggs yet...can't decide if I'll be able to live with the kit parts or if I should vac-form new ones
 
Today I made vacuum formed the new cockpit

I started off with a set of measurements based off the Revell AND Finemolds cockpits

tumblr_n6k2ttwK0i1sf4tb1o9_1280.jpg


I transferred these to 6mm MDF and shaped out the new cockpit former

tumblr_n6k2ttwK0i1sf4tb1o1_1280.jpg


tumblr_n6k2ttwK0i1sf4tb1o2_1280.jpg


Once it was formed I realised how bad it looked, so I made a new former

tumblr_n6k2ttwK0i1sf4tb1o10_1280.jpg


As is always expected with vac-forming the edges are unfortunately rather dull....it's feasible I could make a female former instead but I decided I could live with this as it stands

tumblr_n6k2ttwK0i1sf4tb1o3_1280.jpg


I cut the windows out and scribed some basic panel lines

tumblr_n6k2ttwK0i1sf4tb1o4_1280.jpg


Fitted a wheel and some tank plates

tumblr_n6k2ttwK0i1sf4tb1o6_1280.jpg


In comparison to the kit cockpit, and test fitted to the model. I think it looks pretty good

tumblr_n6k2ttwK0i1sf4tb1o8_1280.jpg


tumblr_n6k2ttwK0i1sf4tb1o5_1280.jpg


tumblr_n6k2ttwK0i1sf4tb1o7_1280.jpg
 
The pocket one? Eh I finished it but I didn't think it was worth updating a thread for. I'm probably going to end up taking it apart and making a new thingy with it

I'd love to see your finished one as an inspiration. Your thread motivated me to buy the kit for me, too. And a second one...
 
I'd love to see your finished one as an inspiration. Your thread motivated me to buy the kit for me, too. And a second one...

In the end I let my youngest brother finish it off. I had a picture but I can't find it now...anyway I haven't decided what to do with it yet. It's a neato lil' kit!
 
The new cockpit canopy works nicely. I like the Revell kit except for the fact that its canopy seems a little bit "chop topped" in its proportions. Very nice job so far and a perfect example that ANY kit can be made to look great with a bit of TLC.
 
The new cockpit canopy works nicely. I like the Revell kit except for the fact that its canopy seems a little bit "chop topped" in its proportions. Very nice job so far and a perfect example that ANY kit can be made to look great with a bit of TLC.

The main reason I didn't use the Revell canopy is the glass, the second reason was how chunky it is. I wanted something with finer detail, more like the studio model, I'll admit I'm quite pleased with the new formed cockpit :D
 
I've been working on and off on this lil' kit. Today I cut out the X-frames from the engine end things

tumblr_n70r2bn9HB1sf4tb1o1_1280.jpg


Then thinned them out a little

tumblr_n70r2bn9HB1sf4tb1o2_1280.jpg


I filled up the astromech droid socket with resin

tumblr_n70r2bn9HB1sf4tb1o3_1280.jpg


And did more of the pipework

tumblr_n70r2bn9HB1sf4tb1o4_1280.jpg


Then stuck it under primer to see how things are going

tumblr_n70r2bn9HB1sf4tb1o5_1280.jpg


tumblr_n70r2bn9HB1sf4tb1o6_1280.jpg


tumblr_n70r2bn9HB1sf4tb1o7_1280.jpg


tumblr_n70r2bn9HB1sf4tb1o8_1280.jpg


tumblr_n70r2bn9HB1sf4tb1o9_1280.jpg


Looking alright so far IMHO
 
I finished smoothing the nacelle eggs, and used aluminium tape to make the panels. I would've used vinyl but the tape was closer to me hahaha

tumblr_n72g7gGiv91sf4tb1o1_500.jpg


I added a thin panzer wheel on top of the existing wheel and then created the chopped off gun things. I might go back on this but I think it works

tumblr_n72g7gGiv91sf4tb1o2_1280.jpg


Glued the T-bars into place

tumblr_n72g7gGiv91sf4tb1o3_1280.jpg


You may notice I added the not-R2 head, again another Panzer piece

tumblr_n72g7gGiv91sf4tb1o4_1280.jpg


The differences between the Revell and Finemolds' aren't TOO discernable now, detail on the Revell is looking up to scratch :thumbsup

tumblr_n72g7gGiv91sf4tb1o5_1280.jpg


Expect more!
 
Last edited:
This thread is more than 9 years old.

Your message may be considered spam for the following reasons:

  1. This thread hasn't been active in some time. A new post in this thread might not contribute constructively to this discussion after so long.
If you wish to reply despite these issues, check the box below before replying.
Be aware that malicious compliance may result in more severe penalties.
Back
Top