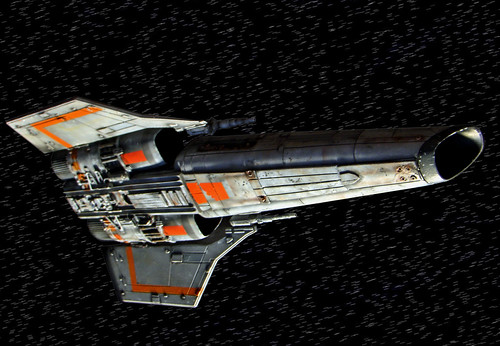
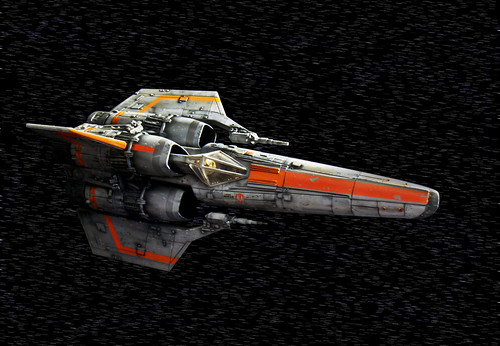
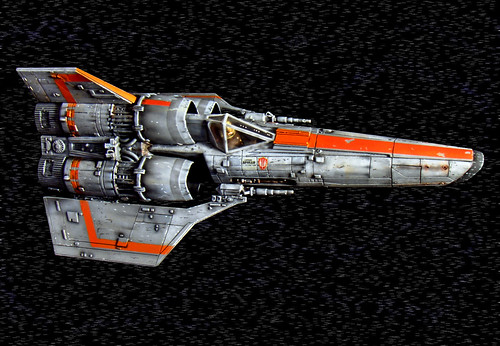
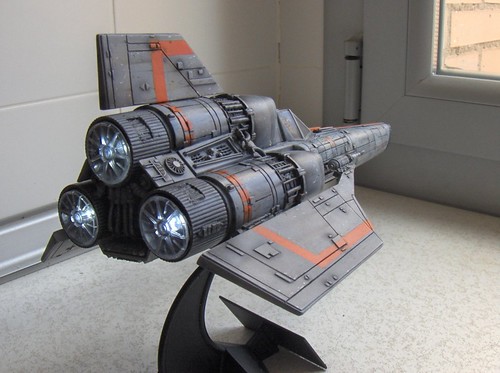
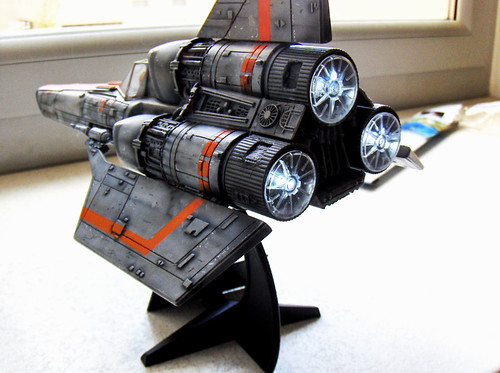
Hi friends, this is one of our last projects, finished not much time ago: a Galactica's Colonial Viper.
We would like to share with you our making of, always trying to be helpful to anyone interested in this model in particular.
As always, we'd appreciate very much any contribution.
Cheers!!!
BUILDING
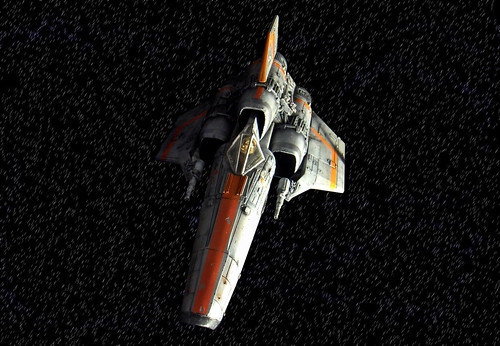
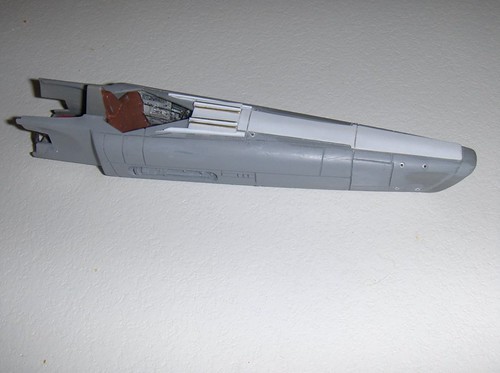
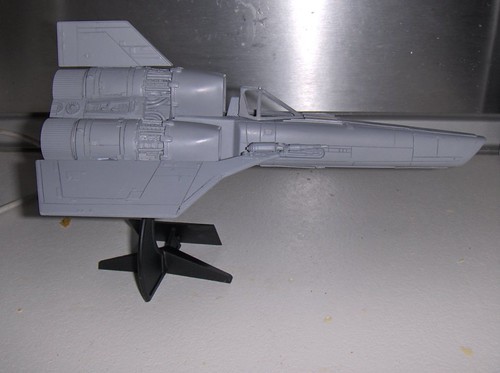
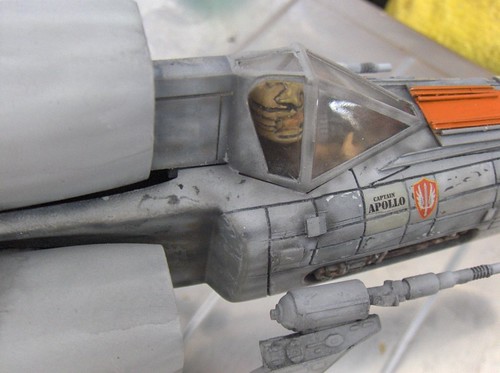
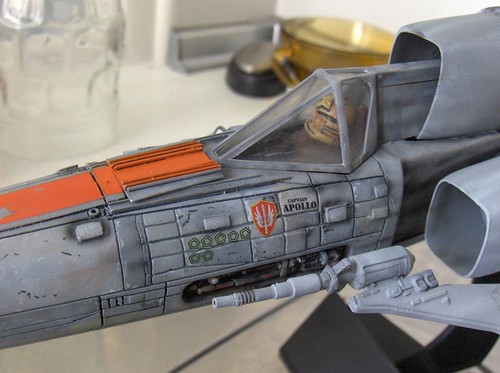
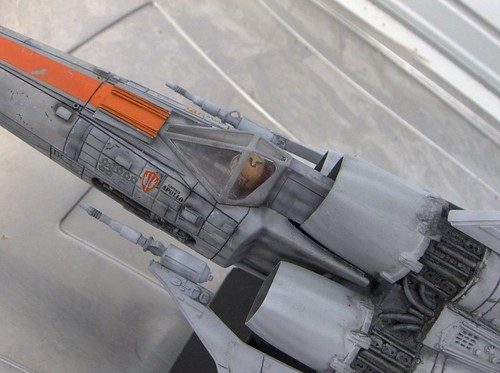
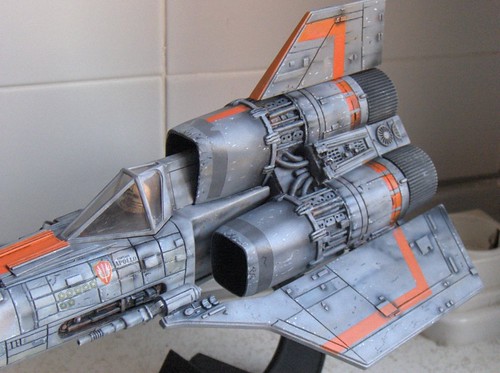
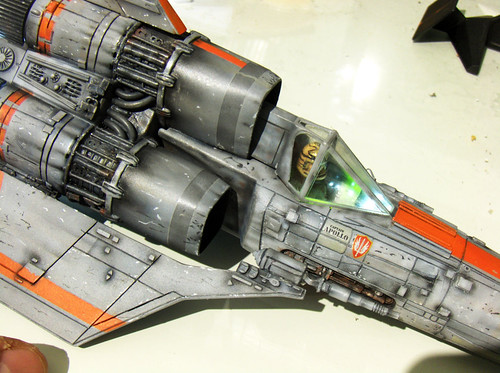
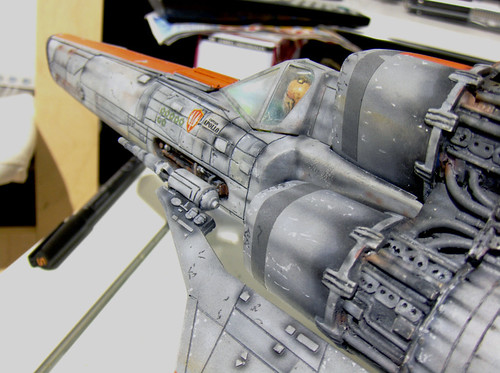
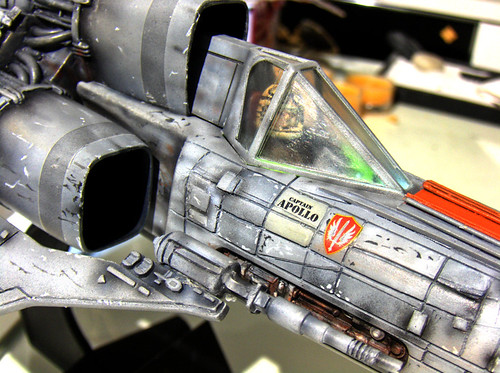
Due to its lack of details, the first thing we ought to do with this model would be to re-panel. The electric structure has to be installed before building the model. In this cases, only once the model has been built and sealed, it will be painted. Although the original model comes with an opaque cockpit, we’ve decided to cut the plastic in the areas where we believed to contain glass, so that the inside of the cabin (including the pilot) remain visible.
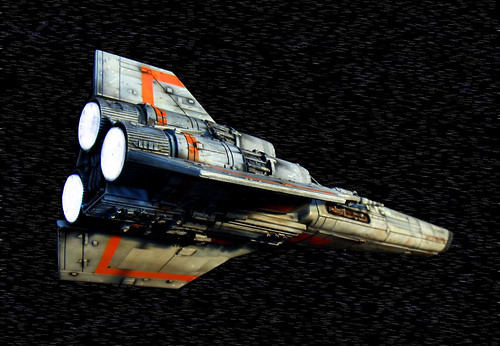
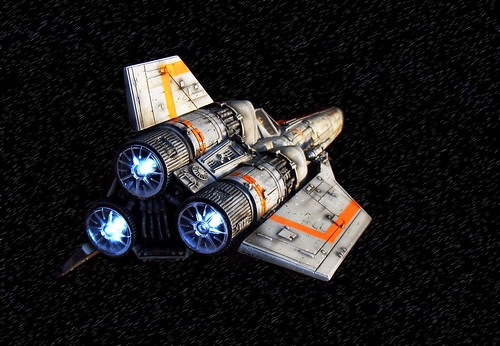
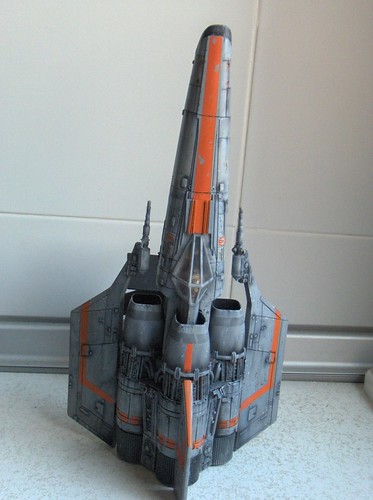
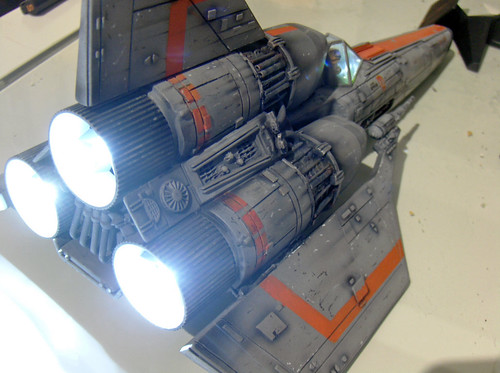
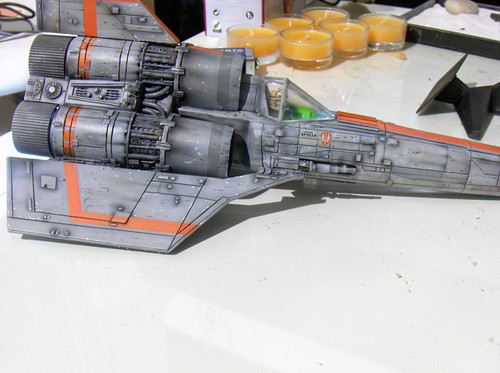
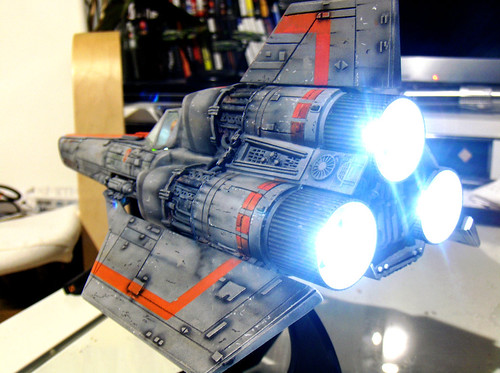
For the rockets, we’ve used white LEDs and, for the cabin, different coloured ones. The central part of the engines has been rebuilt with copper tubes and styrene layers. On the top parts of the model, a stylene layer has been cut, covering the junction of both pieces, as seen in the original TV series model.
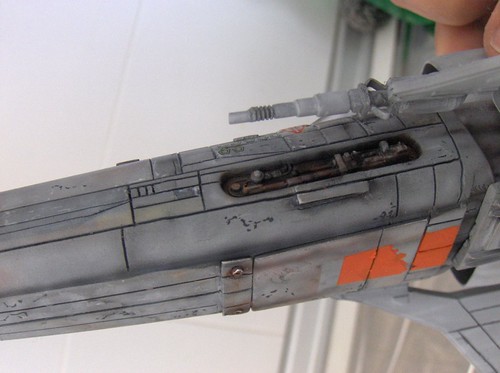
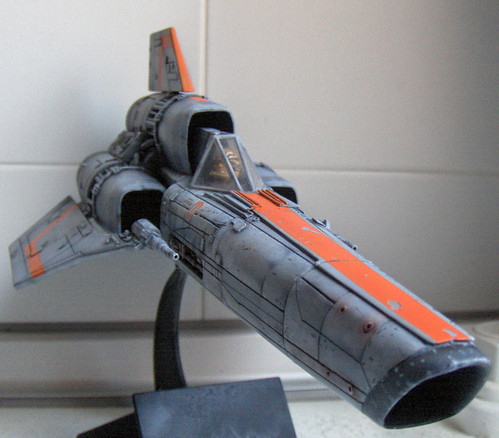
Junctions have dissapeared under the central piece, cannons have been completely rebuilt by adding, amongst other things, small-section copper tubes on the extreme, to give it an empty look.
The lower section (rockets) has been rebuilt as well. Its central area required a complete erasing of details to add every tubes after.
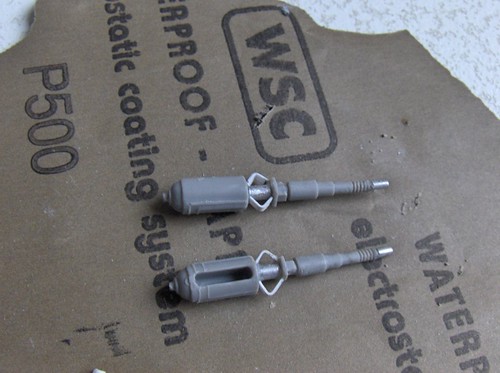
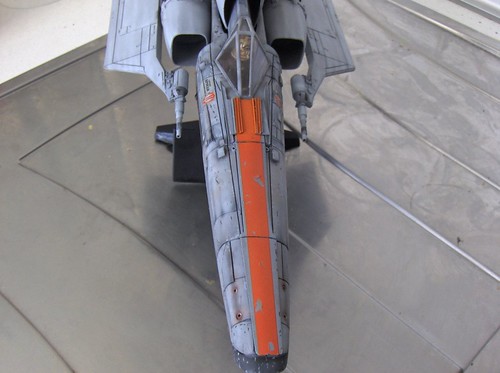
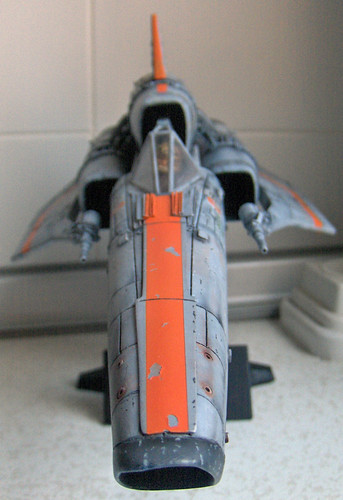
It’s convenient to replace the turbo rear engines with metallic tubes. For the air exits of the front part we’ve drilled holes, and added a little piece taken from a metal tube. Once included in the structure, it has to be sanded with a medium-rough sandpaper and, for final touched, with a soft-soaked sandpaper.
PAINTING
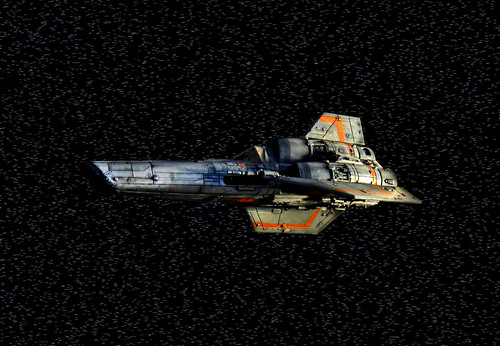
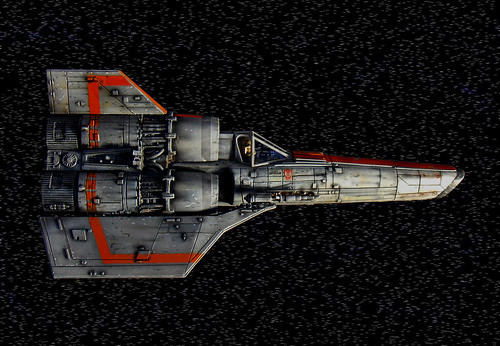
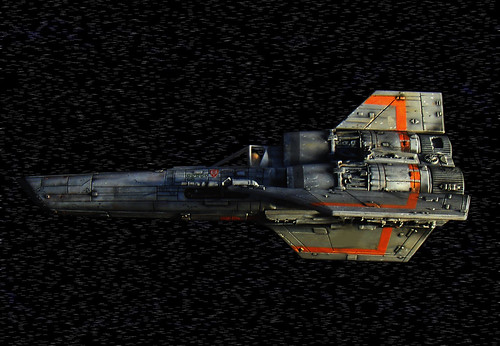
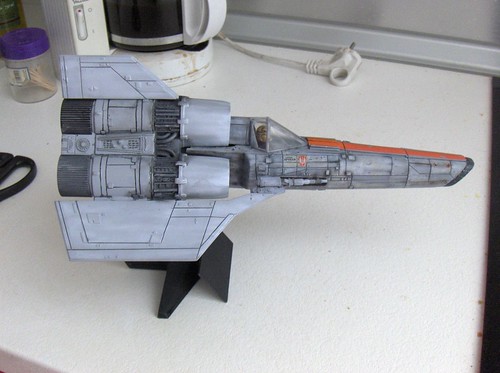
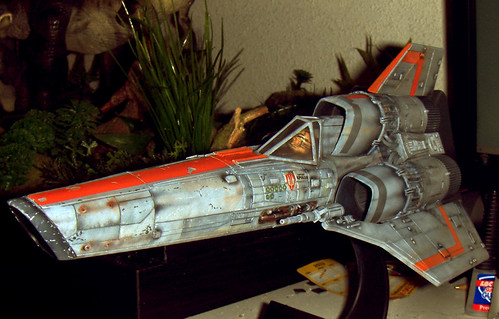
For the firs coat of primer we’ll use a grey colour for all the model surface. For painting we´ll use a fog-grey as the main colour, which will be lightened or darkened to simulate a rust sensation (always using airbrush).
Whats interesting about Viper kits is that they appear used and worn down, due to an intense fighting, but never too used because they’re supposed to have been taking to the garage regularly
 so they have to have tiny rust touches.
Painting highlights: colour balance, contrast subtlety and a lot of chromatic details, in search of realism.
While painting we have to insert tiny dirt marks on every panel of the model, looking for regularity, in order to achieve some contrast. Something that gives excelent results, specially on square and rectangular pieces, is to disguise the plate and add smoothly a mix of navy blue and black along the plates. Once the mask has been retrieved, we should notice the dirt marks that are naturally stucked in junctions.
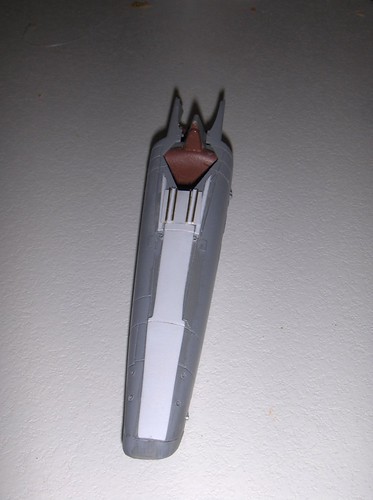
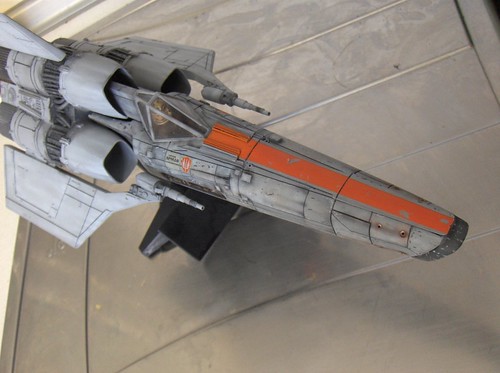
Freaky MovieKits touch: we’ve decided to create this model with the pilots head looking to one side, because it gives a more dynamic sensation.
This is the philosophy we are applying to this model.
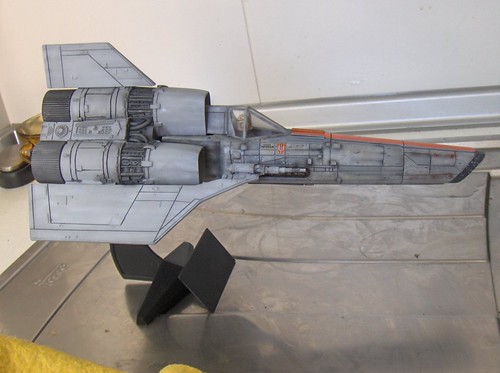
For the orange marks, we can use the original model vynils. It would be ideal to paint them. For our Viper we are using a mix of cadmium orange and brown/red (90%-10%). Before applying this colour, we will spread liquid mask all over the surface. Once painted (with model mask), we’ll have a naturally made damages.
Rust and dirt should be always distributed in small quantitives in a selective way, and the different colour touches smoothly applied.
To achieve the tiny paint damages in this selective kind ( distributed on several small groups) we are using two colours: a very dark grey using a very sharped toothpick, and the opposite: a very clear grey on different points. That gives the sensation of where the Viper is becoming to rust, but not completely rusted yet.


We would like to share with you our making of, always trying to be helpful to anyone interested in this model in particular.
As always, we'd appreciate very much any contribution.
Cheers!!!
BUILDING
Due to its lack of details, the first thing we ought to do with this model would be to re-panel. The electric structure has to be installed before building the model. In this cases, only once the model has been built and sealed, it will be painted. Although the original model comes with an opaque cockpit, we’ve decided to cut the plastic in the areas where we believed to contain glass, so that the inside of the cabin (including the pilot) remain visible.
For the rockets, we’ve used white LEDs and, for the cabin, different coloured ones. The central part of the engines has been rebuilt with copper tubes and styrene layers. On the top parts of the model, a stylene layer has been cut, covering the junction of both pieces, as seen in the original TV series model.
Junctions have dissapeared under the central piece, cannons have been completely rebuilt by adding, amongst other things, small-section copper tubes on the extreme, to give it an empty look.
The lower section (rockets) has been rebuilt as well. Its central area required a complete erasing of details to add every tubes after.
It’s convenient to replace the turbo rear engines with metallic tubes. For the air exits of the front part we’ve drilled holes, and added a little piece taken from a metal tube. Once included in the structure, it has to be sanded with a medium-rough sandpaper and, for final touched, with a soft-soaked sandpaper.
PAINTING
For the firs coat of primer we’ll use a grey colour for all the model surface. For painting we´ll use a fog-grey as the main colour, which will be lightened or darkened to simulate a rust sensation (always using airbrush).
Whats interesting about Viper kits is that they appear used and worn down, due to an intense fighting, but never too used because they’re supposed to have been taking to the garage regularly
Painting highlights: colour balance, contrast subtlety and a lot of chromatic details, in search of realism.
While painting we have to insert tiny dirt marks on every panel of the model, looking for regularity, in order to achieve some contrast. Something that gives excelent results, specially on square and rectangular pieces, is to disguise the plate and add smoothly a mix of navy blue and black along the plates. Once the mask has been retrieved, we should notice the dirt marks that are naturally stucked in junctions.
Freaky MovieKits touch: we’ve decided to create this model with the pilots head looking to one side, because it gives a more dynamic sensation.
This is the philosophy we are applying to this model.
For the orange marks, we can use the original model vynils. It would be ideal to paint them. For our Viper we are using a mix of cadmium orange and brown/red (90%-10%). Before applying this colour, we will spread liquid mask all over the surface. Once painted (with model mask), we’ll have a naturally made damages.
Rust and dirt should be always distributed in small quantitives in a selective way, and the different colour touches smoothly applied.
To achieve the tiny paint damages in this selective kind ( distributed on several small groups) we are using two colours: a very dark grey using a very sharped toothpick, and the opposite: a very clear grey on different points. That gives the sensation of where the Viper is becoming to rust, but not completely rusted yet.
Last edited:
") :thumbsup
:thumbsup