Building a YT1760

Darth Penguin

Active Member
Hi All
It has been a while since I have been doing any model making - a new baby does that!
But things have calmed down and I have a new project on the go.
Scratch building a YT1760.
I chose this because
a) I wanted to try a cool star wars build
b) I did not want to have to recreate the falcon (too many greeblies etc)
c) I wanted something that would take a long time to build because I cant use my spray equipment as the compressor is next door to the baby's room!

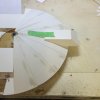
To start with I downloaded some plans from the web and decided on a size. The main body will be 300mm in diameter. I photocopied and enlarged the plans to match that size.
IMG_0639.JPG
I the got some HIPS from a local company, they also had a CNC machine and cut out some basic shapes for me, what a great way to save some time!
IMG_0642.JPGIMG_0640.JPG
I then started the tedious process of placing the formers on the donut shaped peices.
IMG_0660.JPG
That is the top, the bottom was also cut to shape and the formers glued on. I then covered the formers and used lots of filler!!!
IMG_0661.JPG
More to follow, but it will be a slow build as I can only work on it when the baby is asleep!!
Comments and advice most welcome.
 
I will follow with great interest... I had a similar project in mind for a future date... I will enjoy seeing how you solve this one.

--Alex
 
Hi All
Thanks for the kind comments.
Here is an update.
I have built an MDF core for the YT. I used some 3/8 threaded rod and nuts etc to make a base. The shape is a bit rough, but it is only to give the ship some core stability. I figure it will be easier to build this thing if I can have it on the stand.
IMG_0662.JPGIMG_0663.JPG
I was also able to glue the bottom onto the core this morning. I can almost see the shape starting to form!
Thats all for now, more will follow when the baby is asleep!
IMG_0664.JPG
 
Really cool project. I'm always amazed seeing how you scratch builders create these shapes, like that convex hull. This process is really amazing to watch.
 
So a quick update.
Spent tonight making the box thing for the front end (I really should come up with fancy sounding names for these bits).
It needs armour plate and greeblies, but I am happy with the shape of it.
IMG_0674.JPGIMG_0672.JPG
 
Very quick update - not a massive amount of progress but I did make a start on the tail section. This is going to be the entry ramp that is on the side of the falcon, but on the rear of this one.
It does not look like much yet but the basic shape is getting there.
IMG_0686.JPG
Hopefully I will get more done tonight.
 
Once again, progress is slow, but it is progress. I have been concentrating on the underside. I got around to adding a second layer to the convex surface. I needed to do this as I was close to going through the 0.5mm plastic when I sanded the single layer, so a second went on. The really nice bit was not needing to measure the wedges accurately - saved a lot of time. I filled and sanded that and I am pleased with the result. Once the armour plate goes on I think it will look pretty good.
I also started adding the basic box shapes to the rear of the underside. Still a bit to do, but it is getting there - slowly.

IMG_0695.JPGIMG_0696.JPG
Cheers for all the comments so far!
 
So I started work on the engines today - I felt like trying something other than conxex panelling!
I have got hold of a few different diameters of pvc pipe and fittings along with some polycarbonate tube.
I laminated the polycarbonate tube with 0.2mm styrene - this will be the outside of the engine and the styrene will allow me to detail it and greeblie it up.
For the insides I used a combination of the pvc tubing with spacers made from styrene. I took a photo of the insides in the remainder of the polycarbonate tube to show what I did.
Hope you like!
IMG_0716.JPGIMG_0715.JPGIMG_0714.JPGIMG_0713.JPG
 
I made a bit of (slow) progress over the past few days. I have worked out how I want the front of the engines to look and also got the convex panelling on the upper side of the ship underway. There is going to be a lot of sanding needed - might leave that for a while!
Take care everyone.
IMG_0719.JPGIMG_0720.JPGIMG_0724.JPG
 
This thread is more than 9 years old.

Your message may be considered spam for the following reasons:

  1. This thread hasn't been active in some time. A new post in this thread might not contribute constructively to this discussion after so long.
If you wish to reply despite these issues, check the box below before replying.
Be aware that malicious compliance may result in more severe penalties.
Back
Top