Hey Guys.
I just completed this , yet my umpteenth Moebius 1/35 Jupiter 2 build ups. The specs on this are it had to be the late third season build(I couldn't add my additional ceiling beams and center brace), painted per the actual set/miniature, full lighting package, my working hatches(Both exterior airlock and interior air-lock hatches).
I also used Photo etch parts from Paragrafx and fedoranation along with scratch built parts to enhance the model. I was directed to make the landing gear in it's deployed position. I used the Moebius Models Lighting kit for this build, as I have on several others in the past.
The entire model was Air Brushed using My IWATA system, to get the desired results.
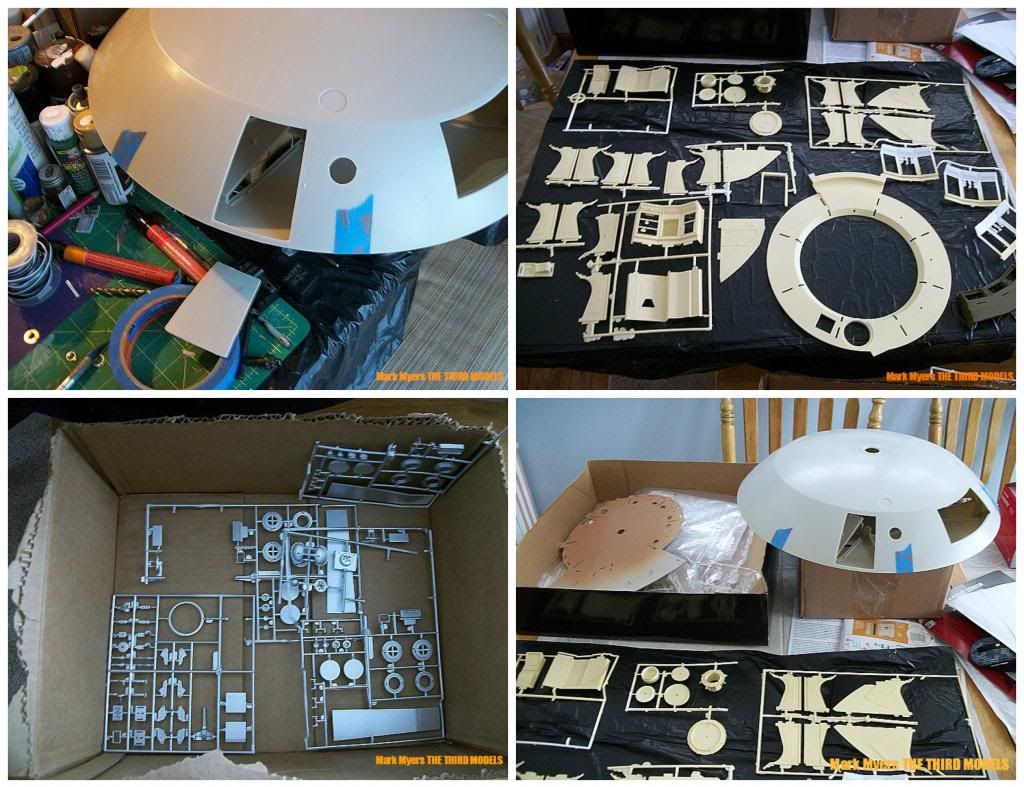
Here the parts are being painted and getting ready to be painted. You can see I removed the Molded in exterior hatch from the upper hull...
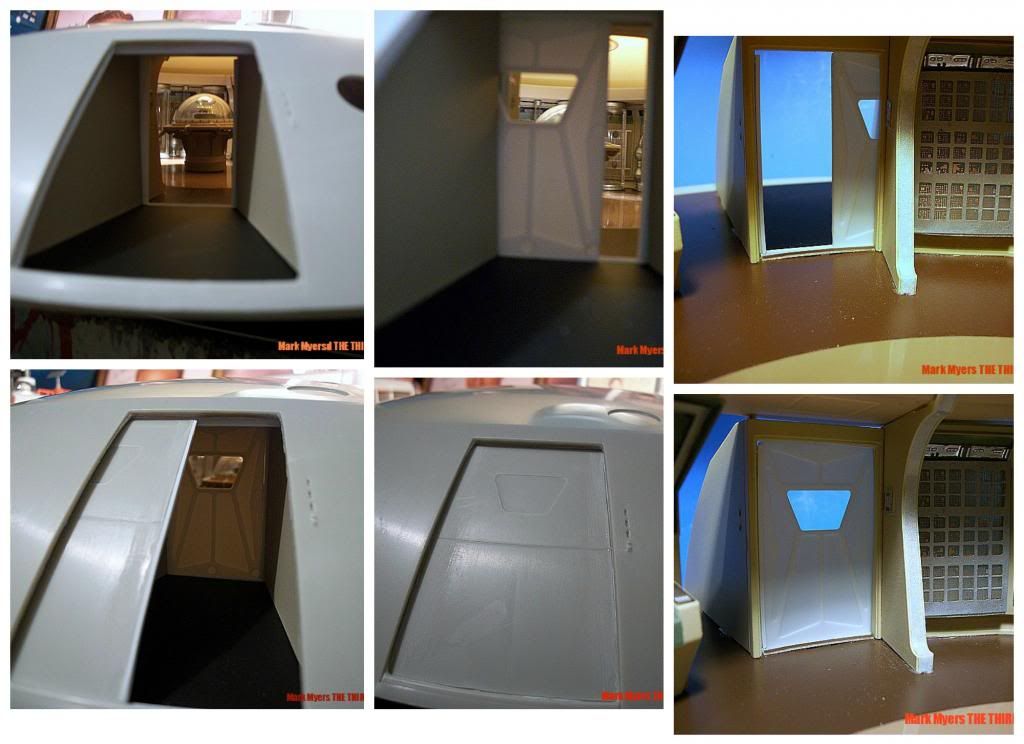
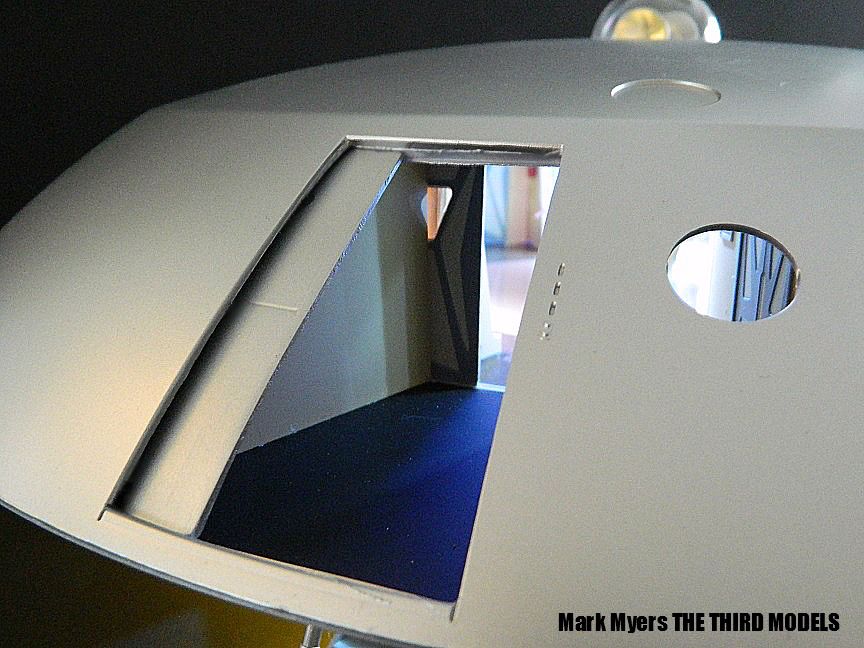
Here you can see the re built exterior hatch as well as the Inner interior hatch with the ability to slide open and closed. This feature allows for interior viewing without having to remove the upper hull and remain accurate to the actual set/ miniature. The removable of the hatch requires care as a slip of the knife will result in a damaged upper hull. Rebuilding of the exterior hatch is also required .
- - - Updated - - -
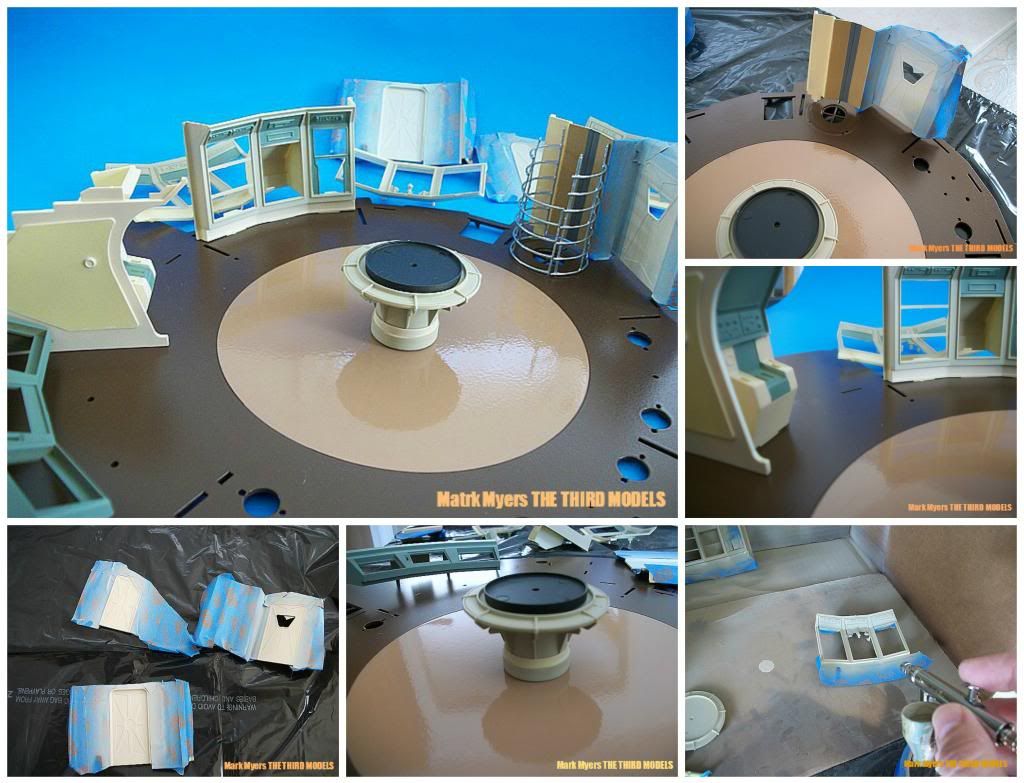
Here we see the basic construction and test fitting of the interior assemblies. The Walls and Parts have been Air Brushed their appropriate colors...
- - - Updated - - -
Here is a Picture of the in progress shots of the freezing wall. Photo Etched details and decals applied..
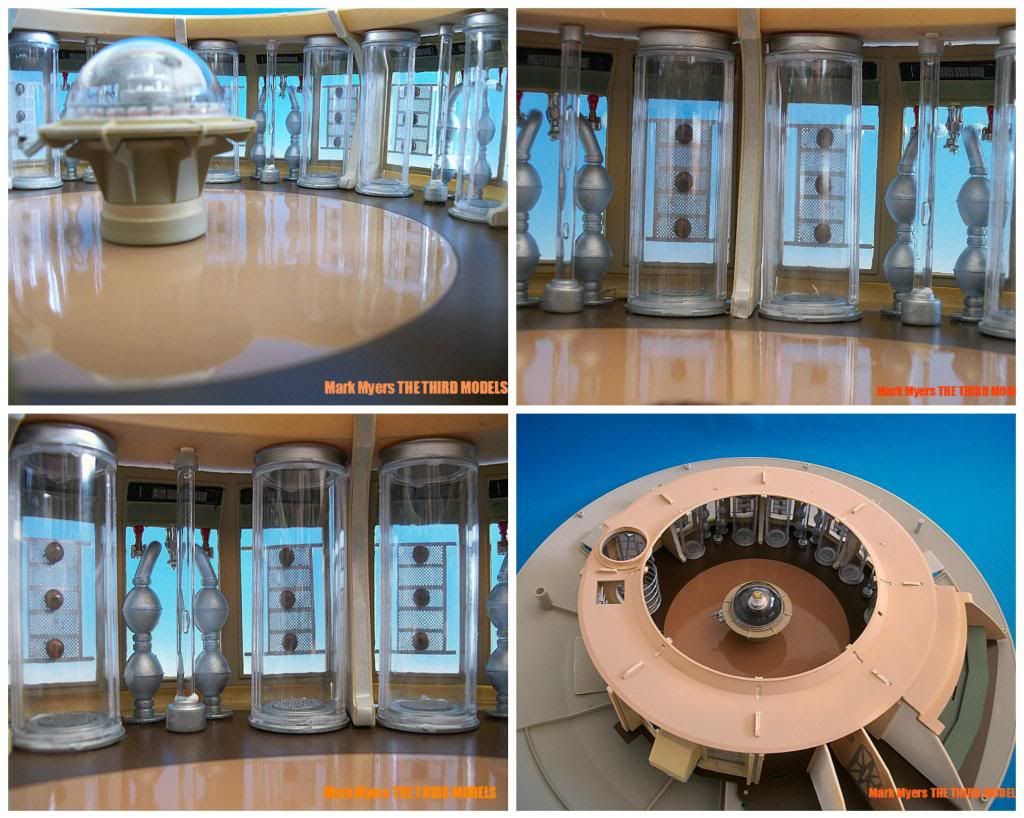
More in progress shots of the interior...Some more cleaning up required before I am completely happy.
- - - Updated - - -
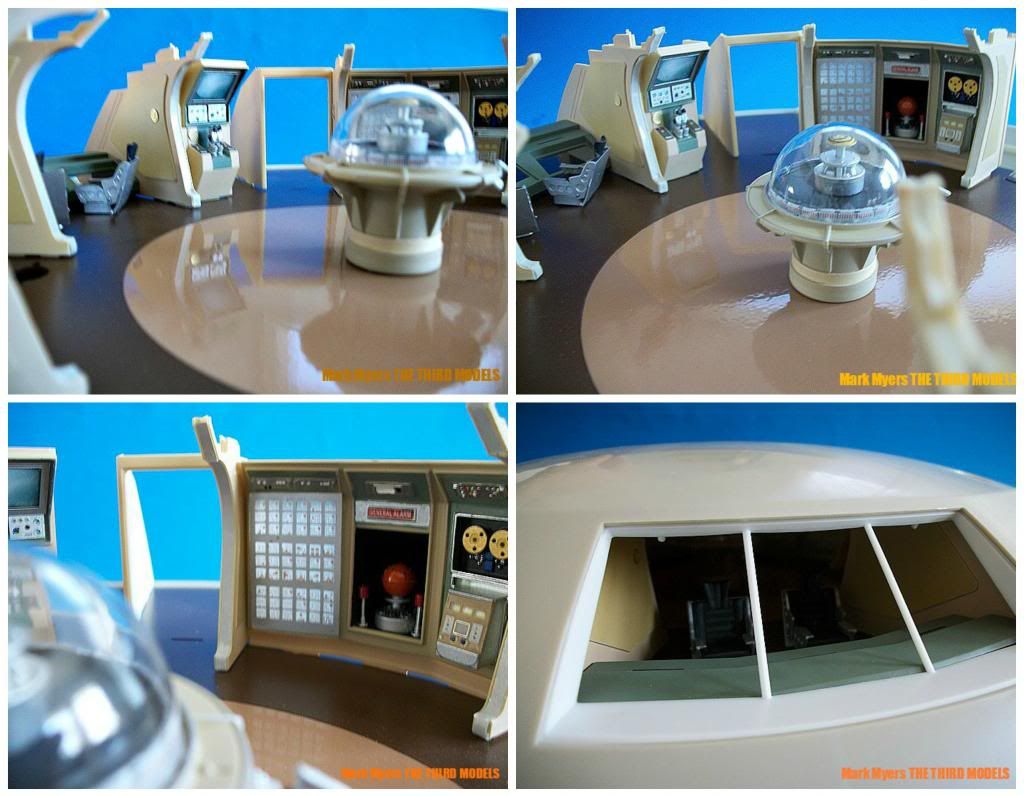
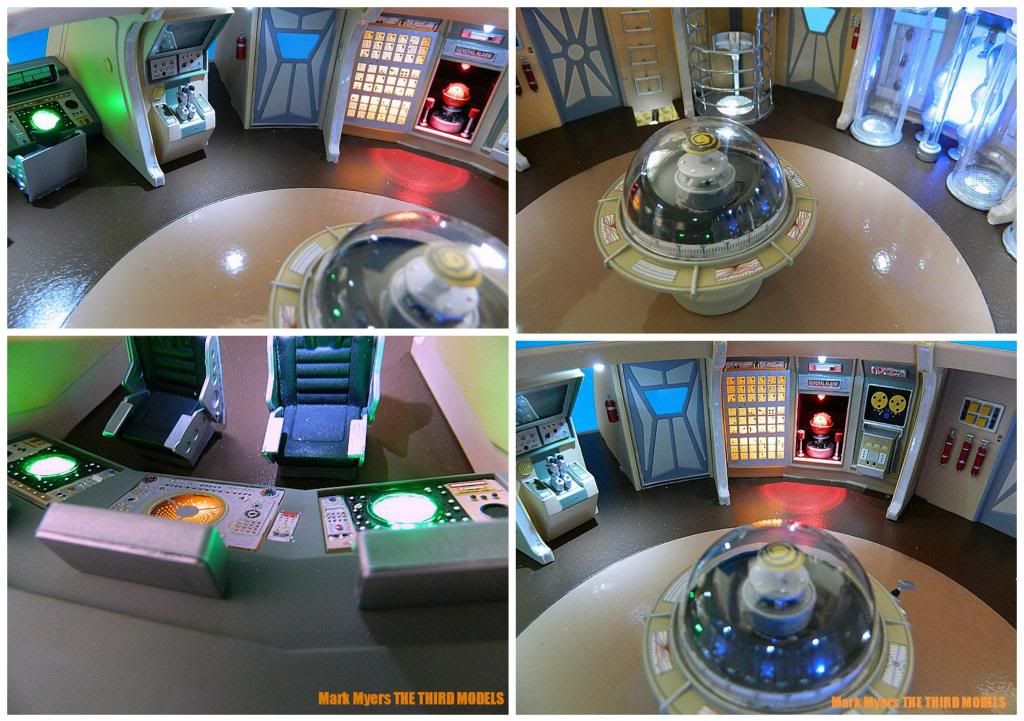
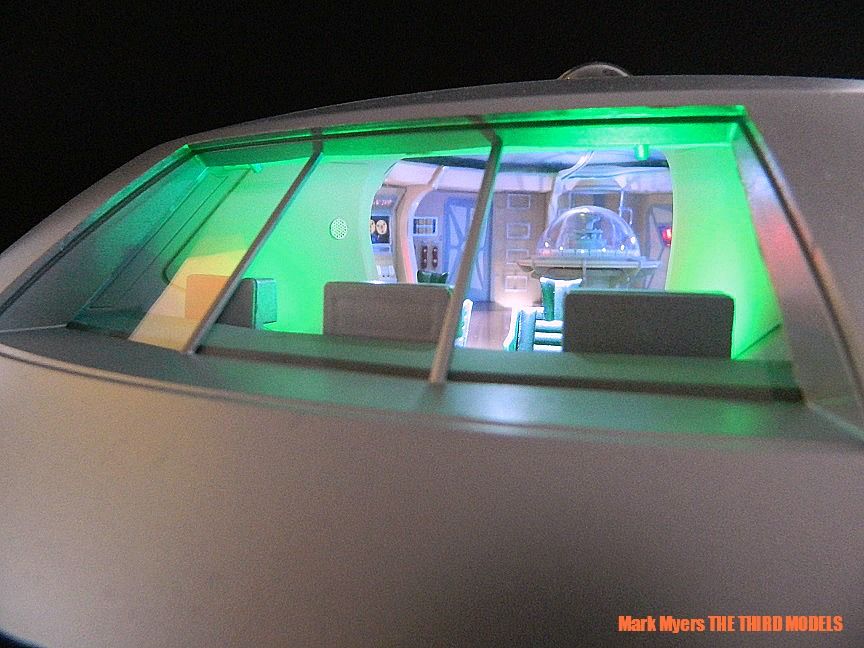
The interior Lit by using the Moebius Lighting kit as requested. I mixed and matched the kit parts along with the Photo etched parts details to enhance the model.
- - - Updated - - -
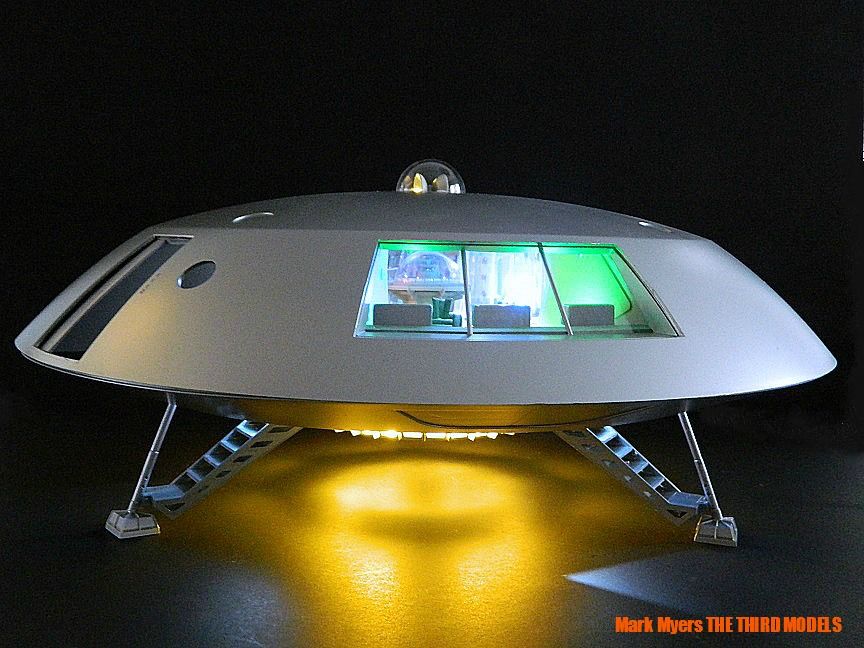
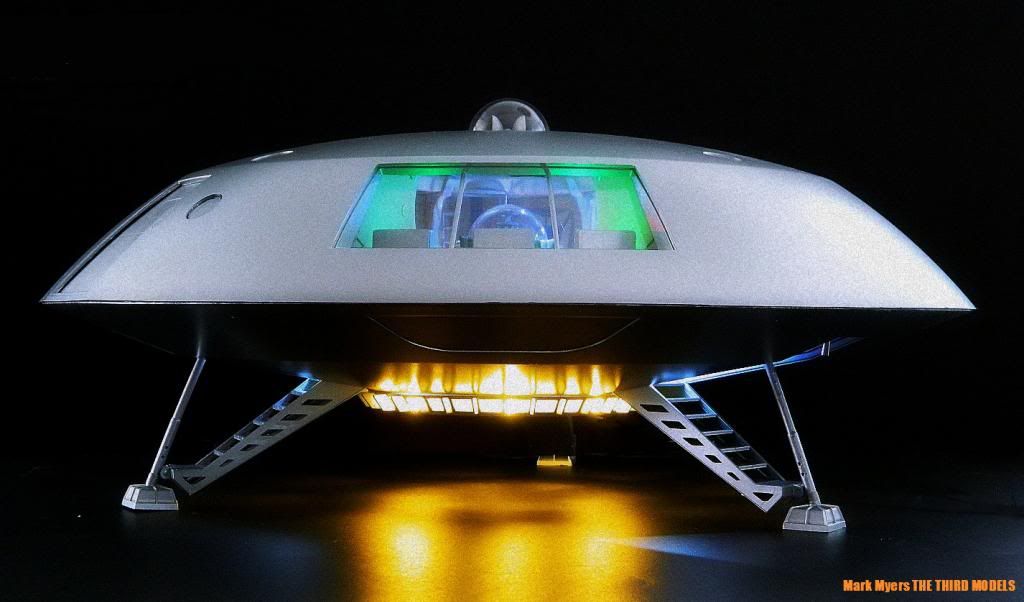
The completed model as it awaits shipping to it's new home. The exterior hull is a mixture of Tamiya silvers/greys to get the correct look of the ship. It was not painted a bright silver. The miniature would have reflected the strong lighting need to photograph it if it were a Bright silver..
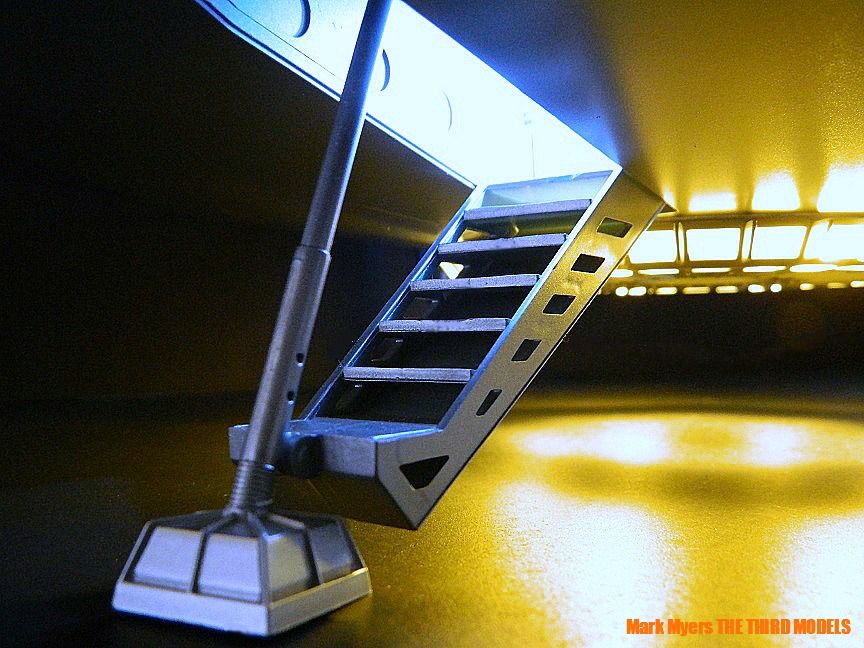
Landing gear detail...
A straight on Beauty shot...
The opening hatch detail...accurate to the show and the ability to easily see the detailed interior...
Another view of the detailed interior...
[
I just completed this , yet my umpteenth Moebius 1/35 Jupiter 2 build ups. The specs on this are it had to be the late third season build(I couldn't add my additional ceiling beams and center brace), painted per the actual set/miniature, full lighting package, my working hatches(Both exterior airlock and interior air-lock hatches).
I also used Photo etch parts from Paragrafx and fedoranation along with scratch built parts to enhance the model. I was directed to make the landing gear in it's deployed position. I used the Moebius Models Lighting kit for this build, as I have on several others in the past.
The entire model was Air Brushed using My IWATA system, to get the desired results.
Here the parts are being painted and getting ready to be painted. You can see I removed the Molded in exterior hatch from the upper hull...

Here you can see the re built exterior hatch as well as the Inner interior hatch with the ability to slide open and closed. This feature allows for interior viewing without having to remove the upper hull and remain accurate to the actual set/ miniature. The removable of the hatch requires care as a slip of the knife will result in a damaged upper hull. Rebuilding of the exterior hatch is also required .

- - - Updated - - -
Here we see the basic construction and test fitting of the interior assemblies. The Walls and Parts have been Air Brushed their appropriate colors...


- - - Updated - - -
Here is a Picture of the in progress shots of the freezing wall. Photo Etched details and decals applied..

More in progress shots of the interior...Some more cleaning up required before I am completely happy.
- - - Updated - - -
The interior Lit by using the Moebius Lighting kit as requested. I mixed and matched the kit parts along with the Photo etched parts details to enhance the model.

- - - Updated - - -
The completed model as it awaits shipping to it's new home. The exterior hull is a mixture of Tamiya silvers/greys to get the correct look of the ship. It was not painted a bright silver. The miniature would have reflected the strong lighting need to photograph it if it were a Bright silver..

Landing gear detail...

A straight on Beauty shot...

The opening hatch detail...accurate to the show and the ability to easily see the detailed interior...

Another view of the detailed interior...

[