Eric Ardros
Sr Member
1992 Hallmark Shuttlecraft "Galileo" Rebuild
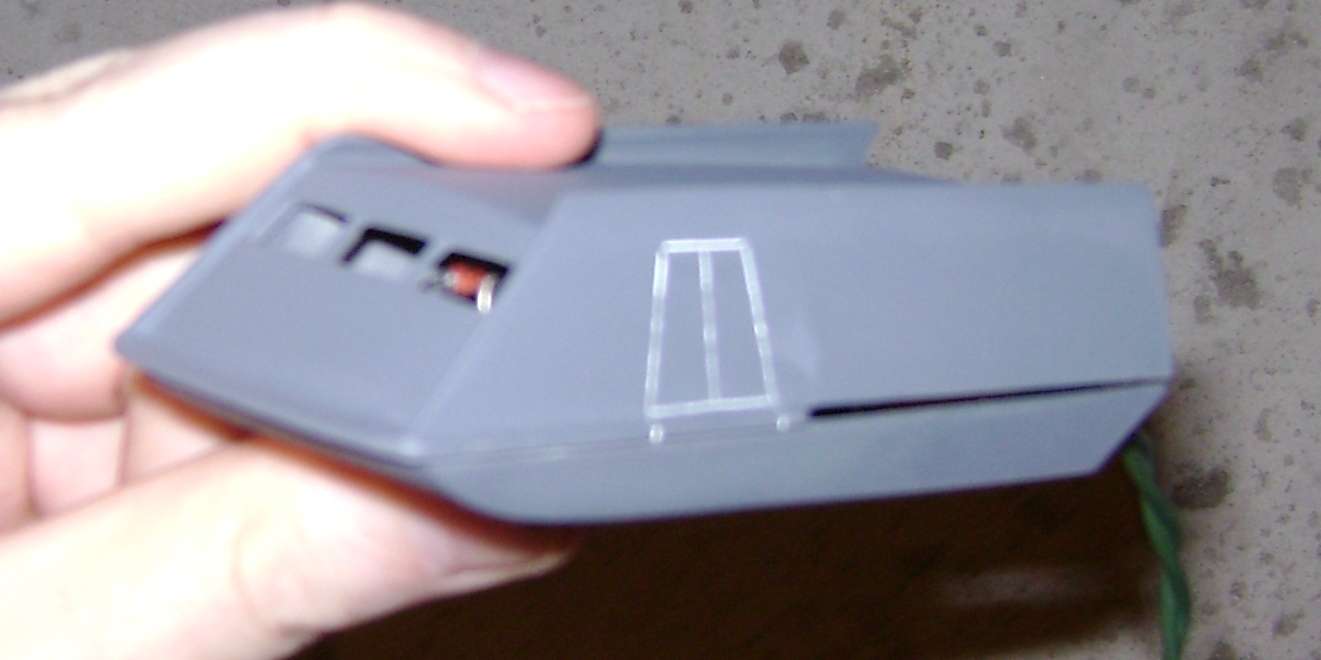
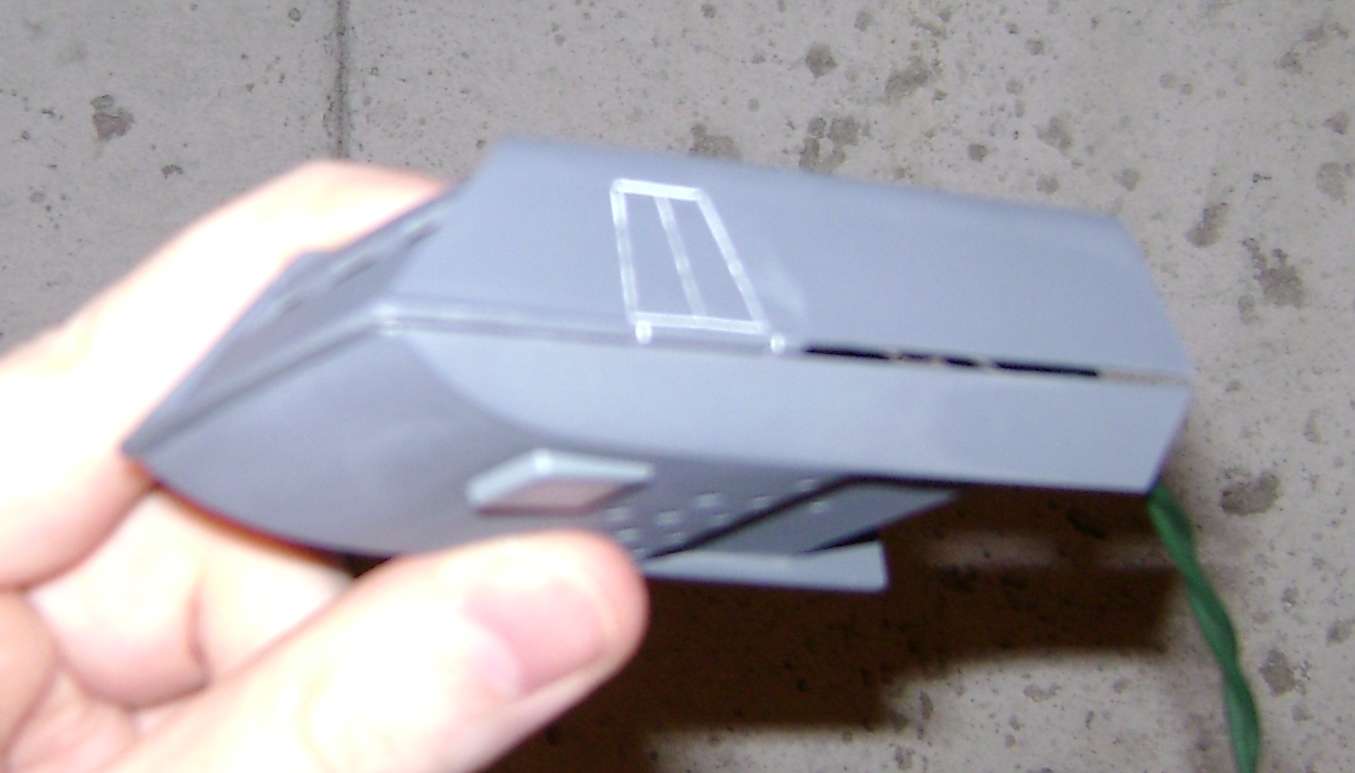
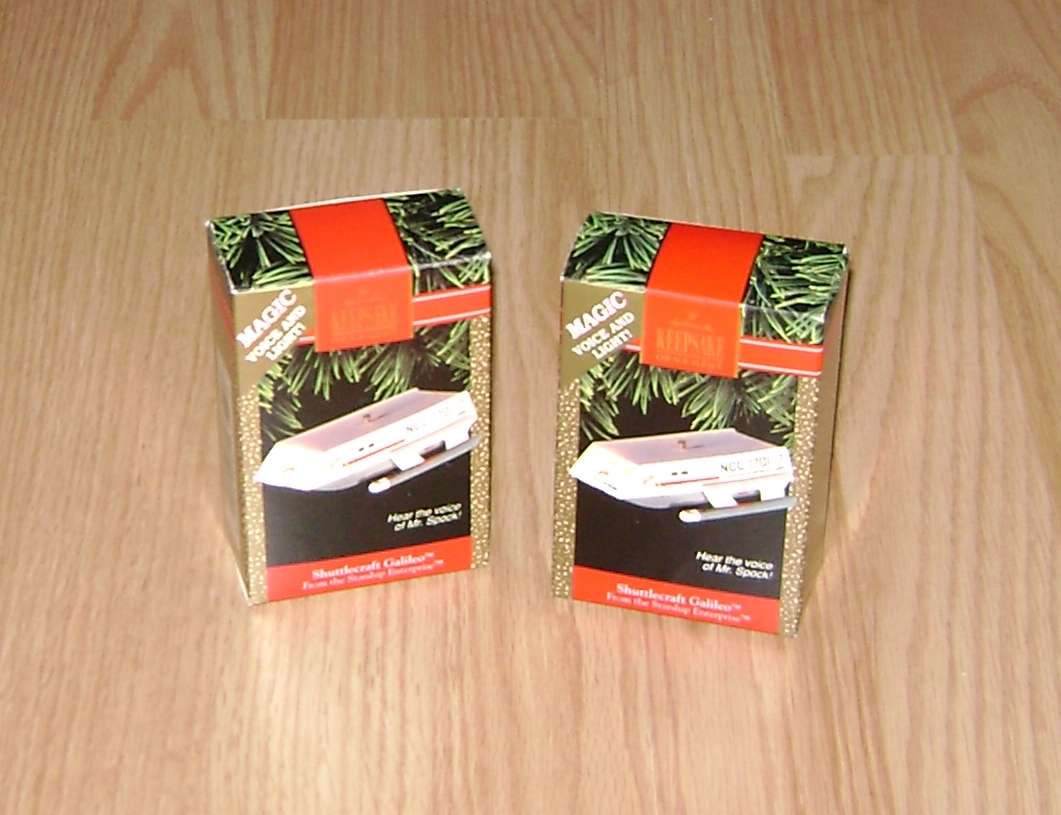
Got two of these in the mail a while back (for $20.00 plus $8.00 shipping; helluva deal, imho), but kind of forgot about them, lol:
I'd originally bought them for the sole purpose of improving on Hallmark's design, since as I've become more of an expert on the TOS Shuttlecraft through projects like my 22-inch filming model and 1 9/16" small-scale models, the more I wanted to see an accurate version of this ornament made.
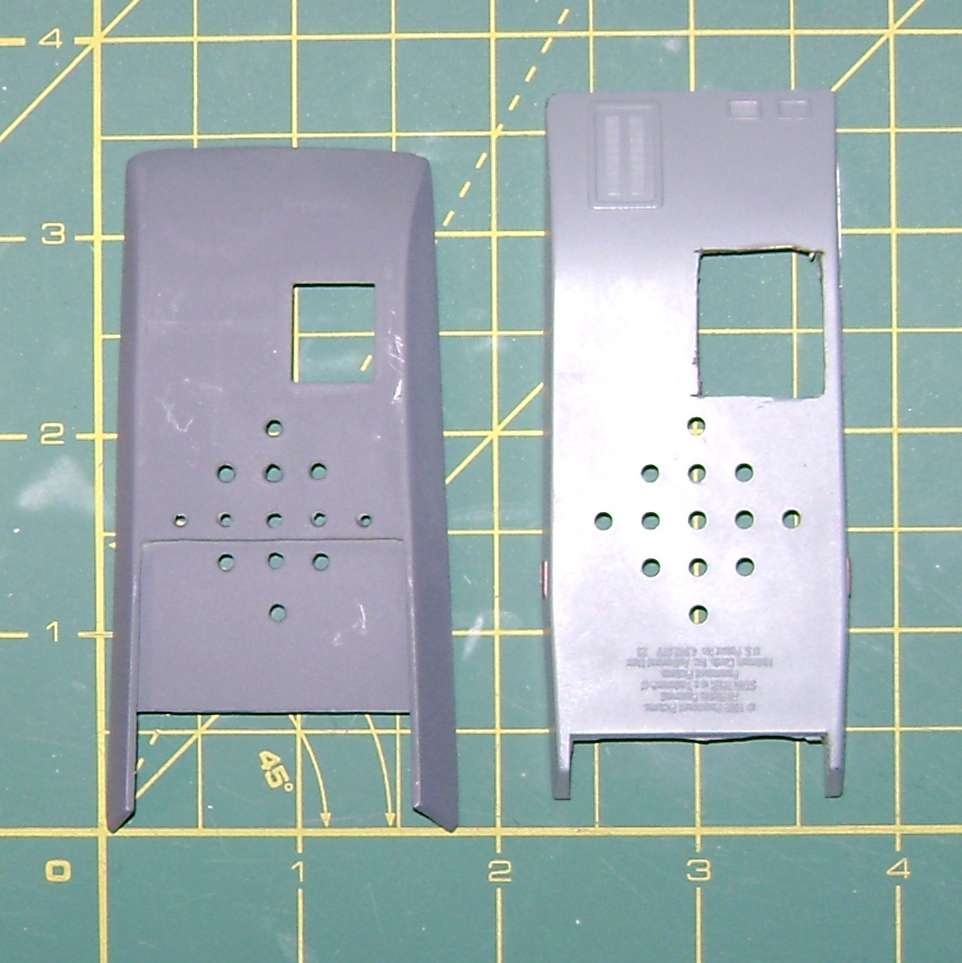
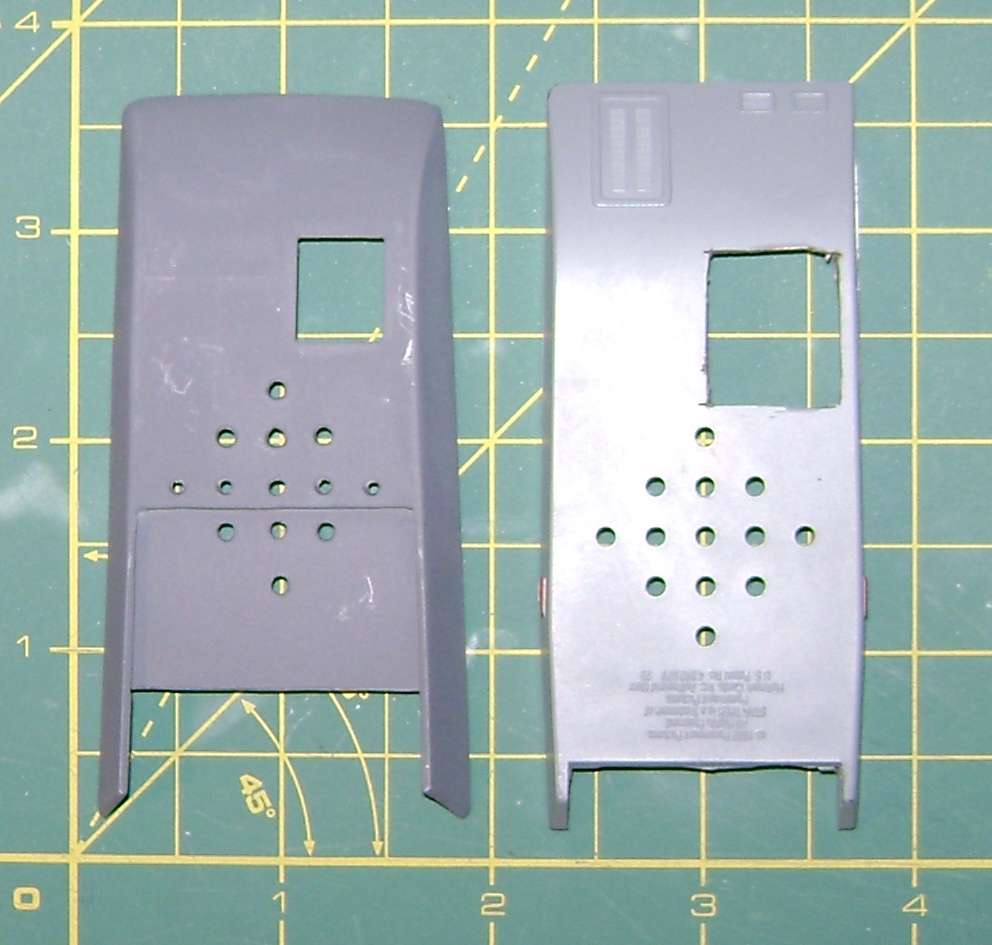
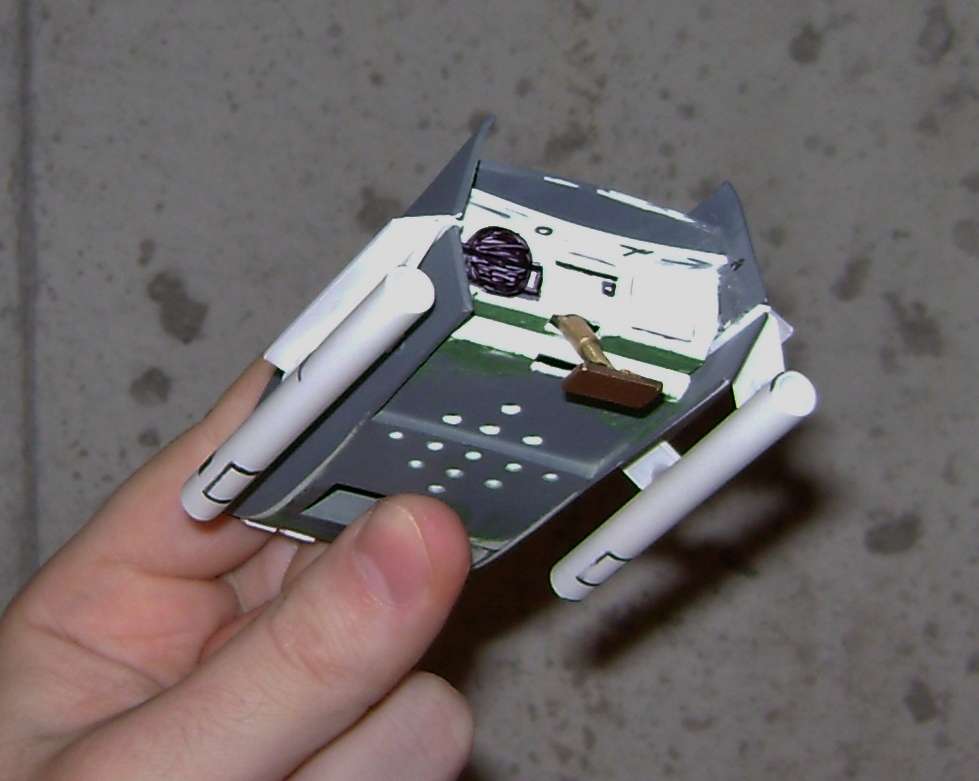
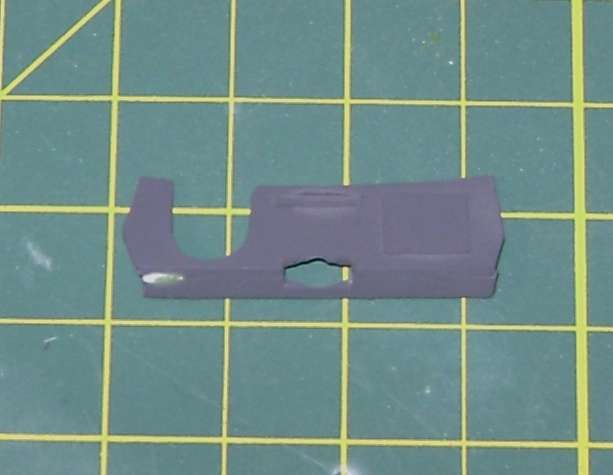
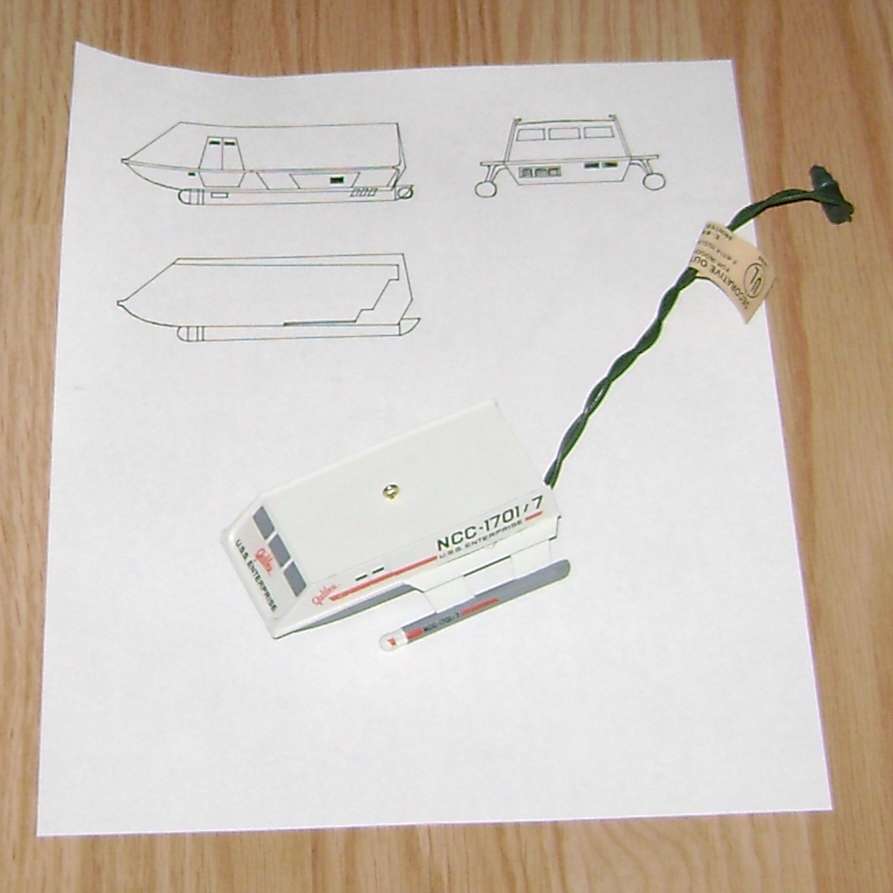
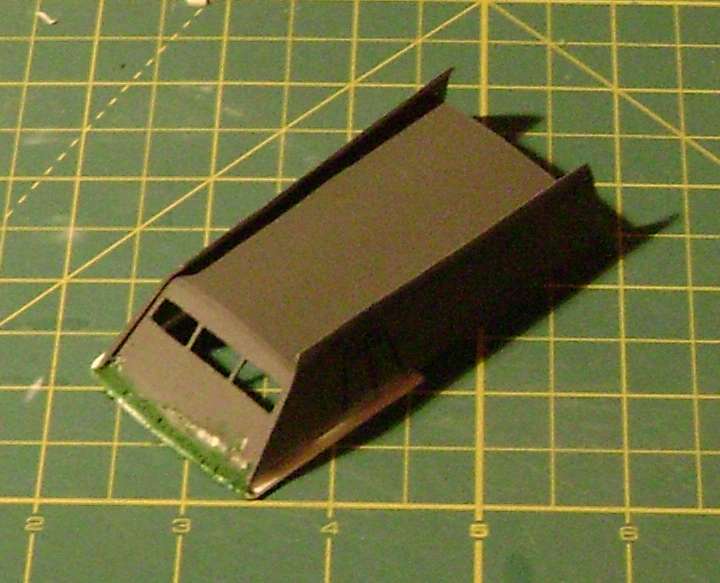
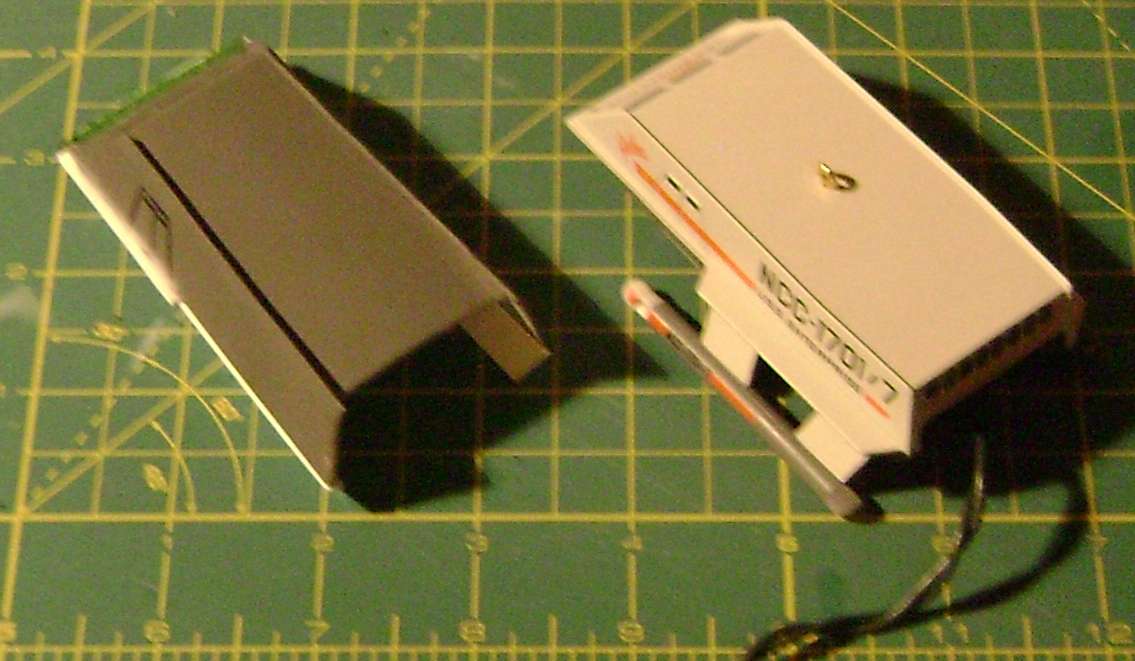
While rummaging through some of my prop stuff the other day, I found them again, which rekindled my interest in doing these justice. The first thing I did was open one of them up, to see what I was working with:
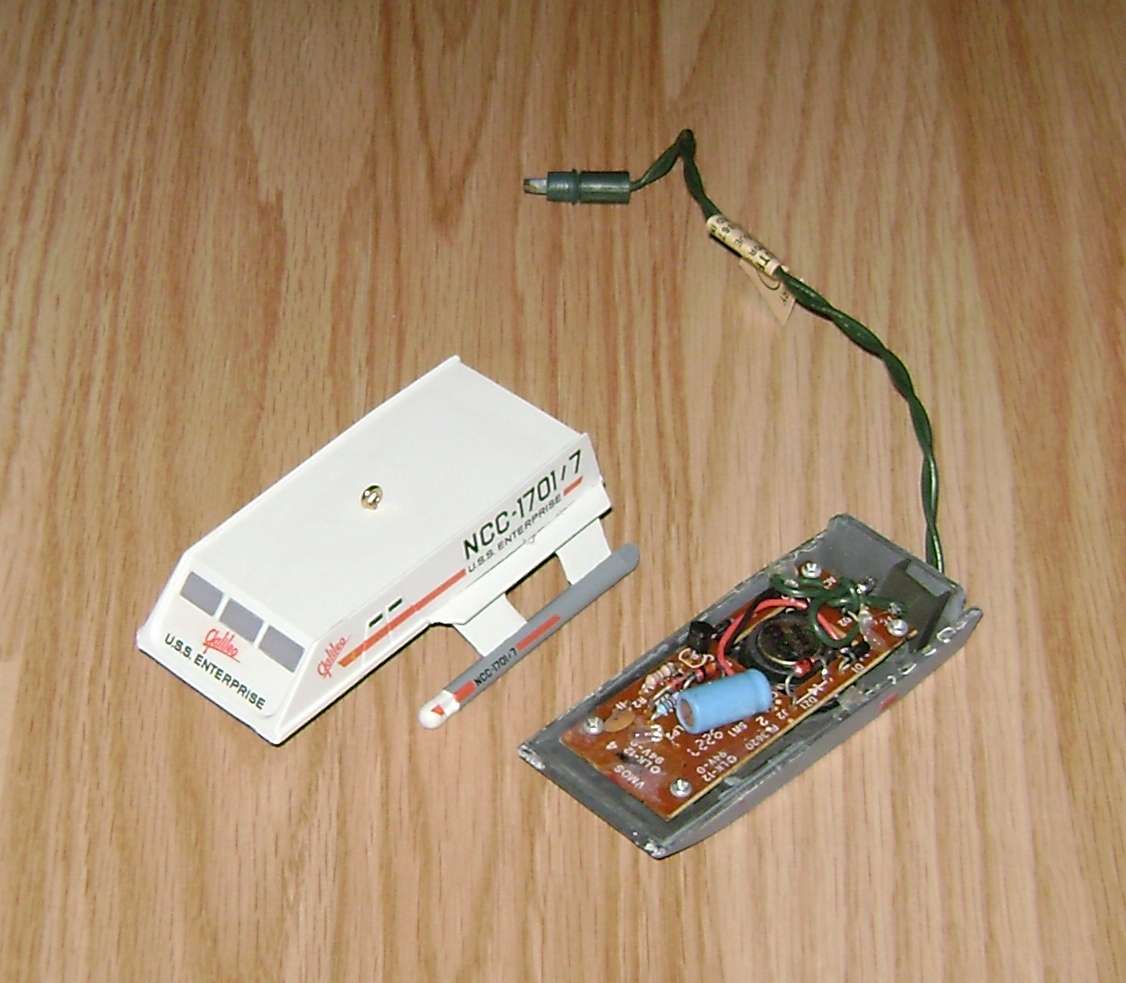
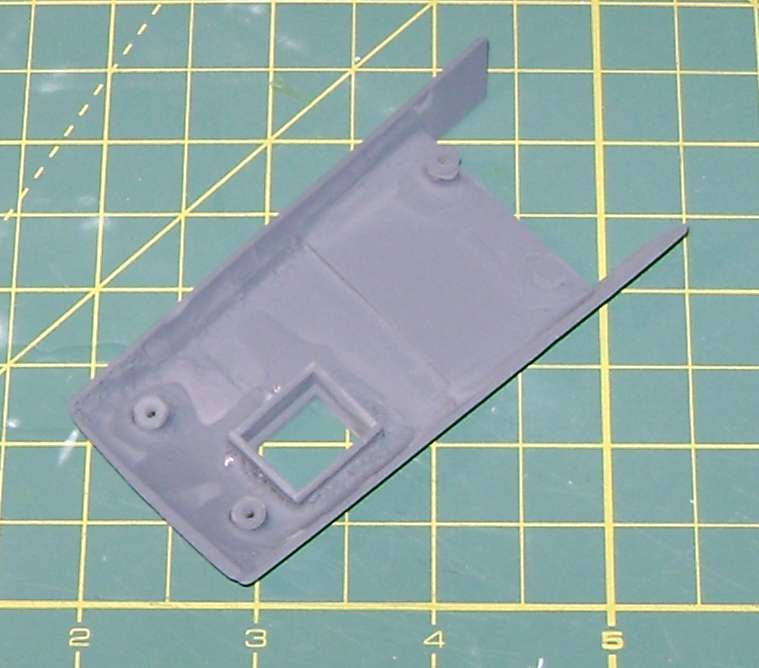
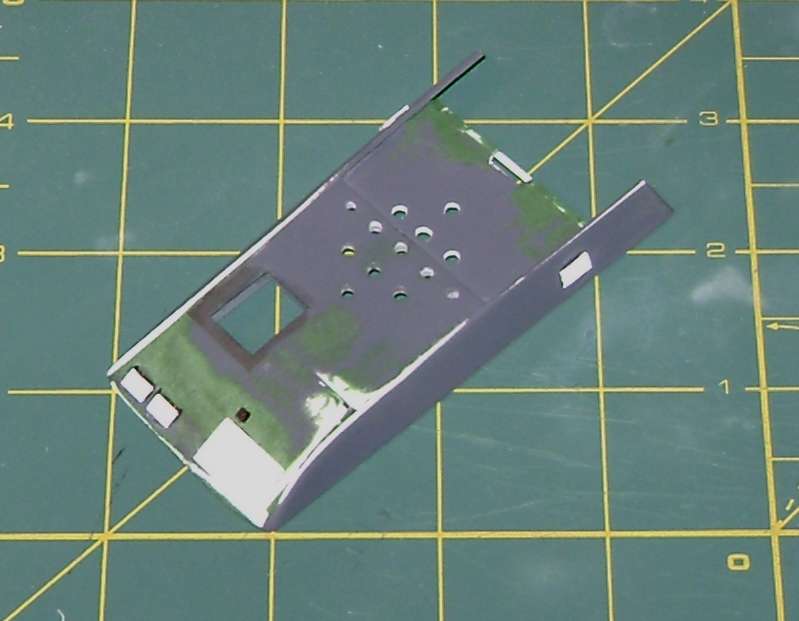
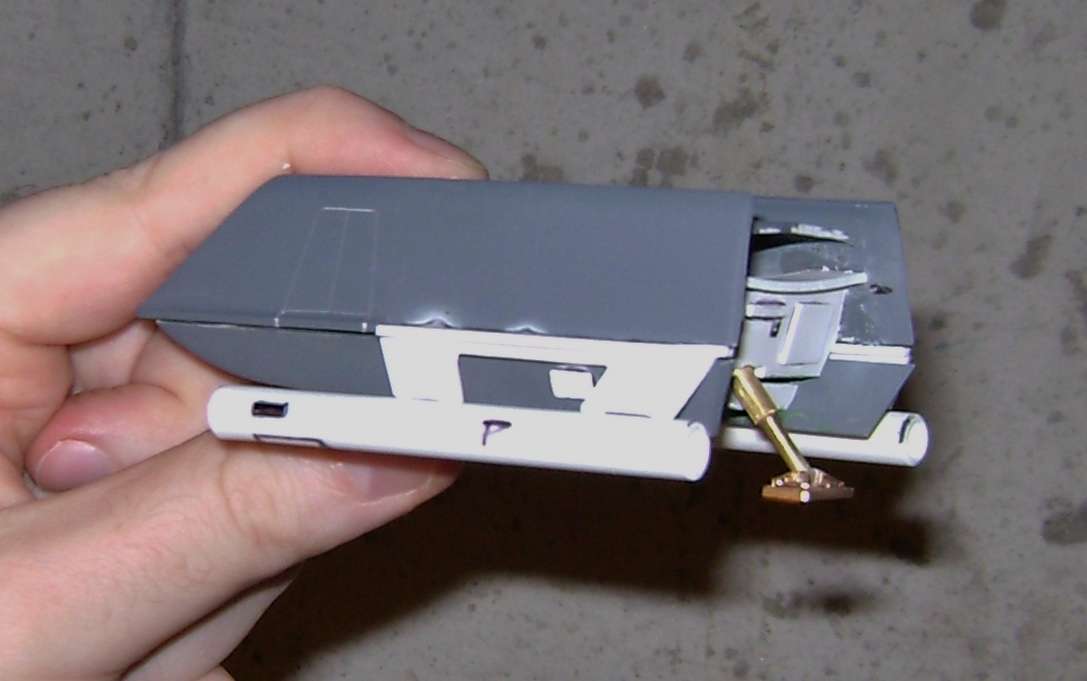
I actually kind of mangled it a bit trying to safely open it, but as I'll have no need for the original hull it's not a big deal. Next, I got to work drawing up a basic set of plans to work from for the rebuild:
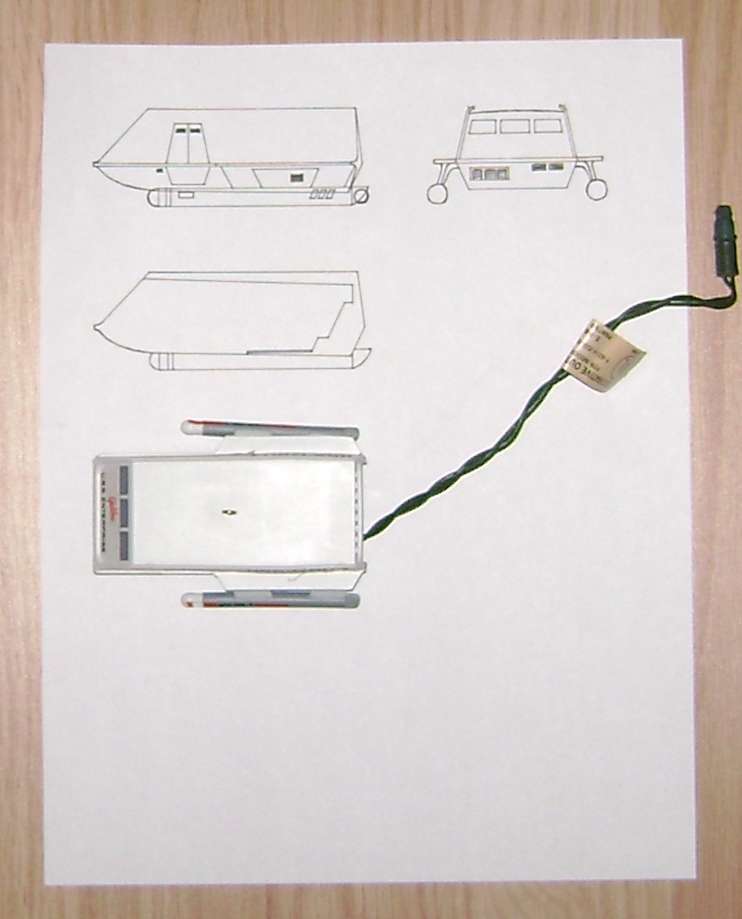
I kept the length and width the same, as I didn't want to make the ornament any bigger, though I did have to add about 3/16" of height to get everything proportionate. All the contours look to be in scale to each other now. I also thickened the nacelles a bit to 1/4", so they too are proportionate to the rest.
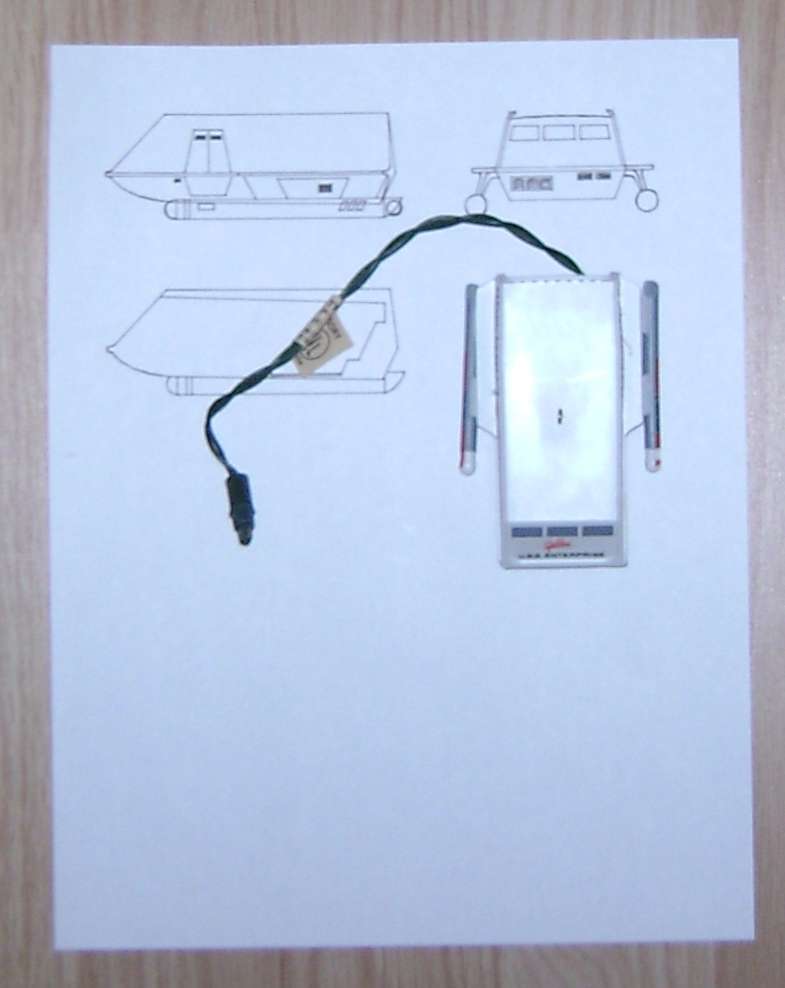
And as with both my 22-inch and 1 9/16" models, I intend to add the angled, recessed detailing at the rear beneath the main impulse engine. What with the way Hallmark designed theirs it wouldn't have been possible to add in that detail, but with a slight shift of the circuit board placement I'm confident I can.
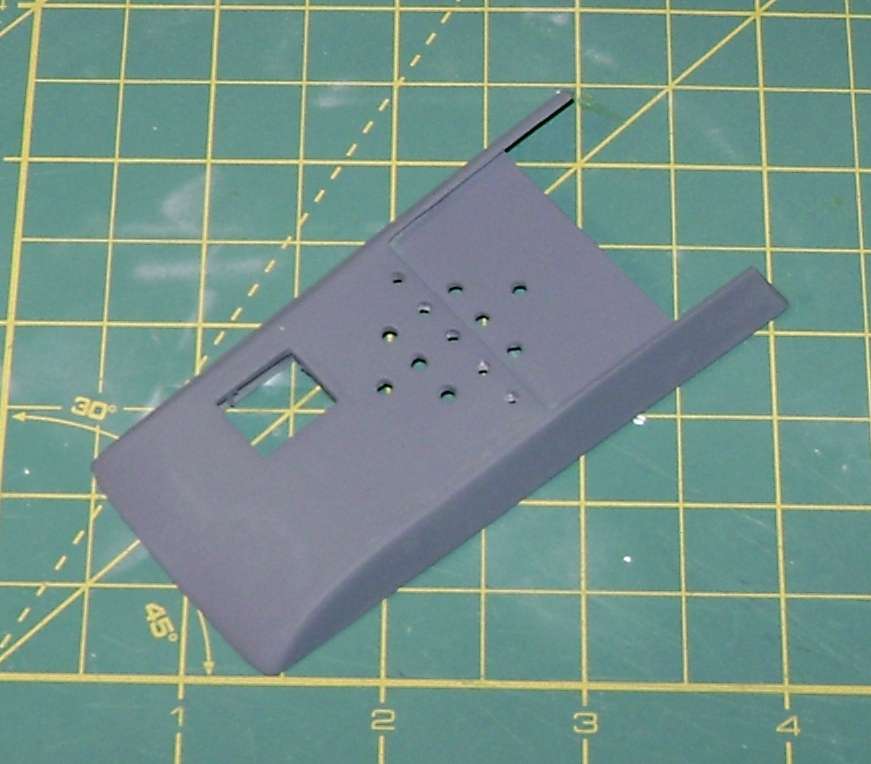
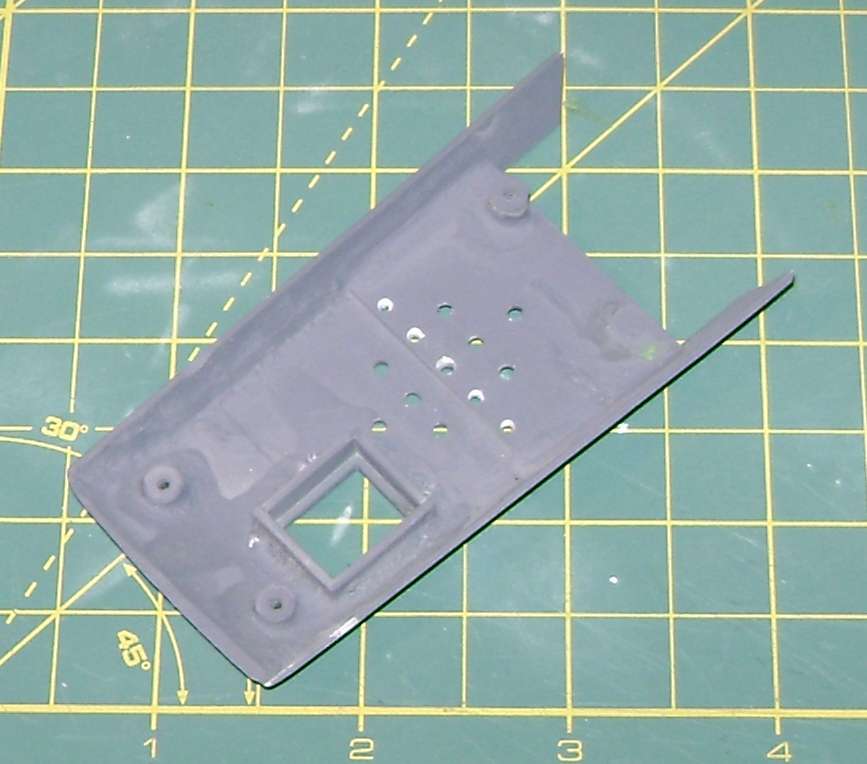
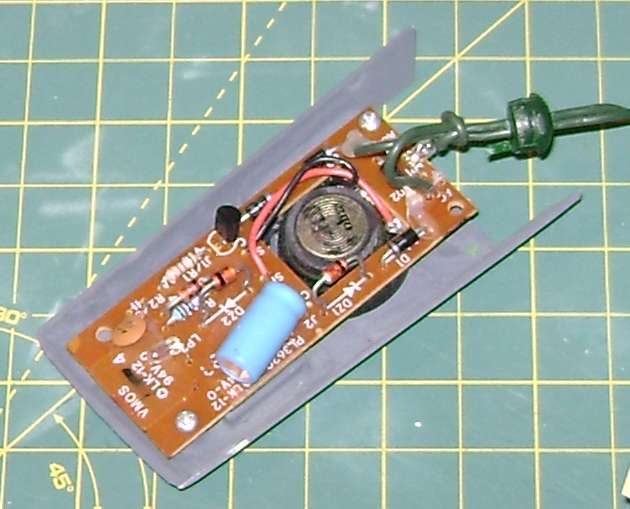
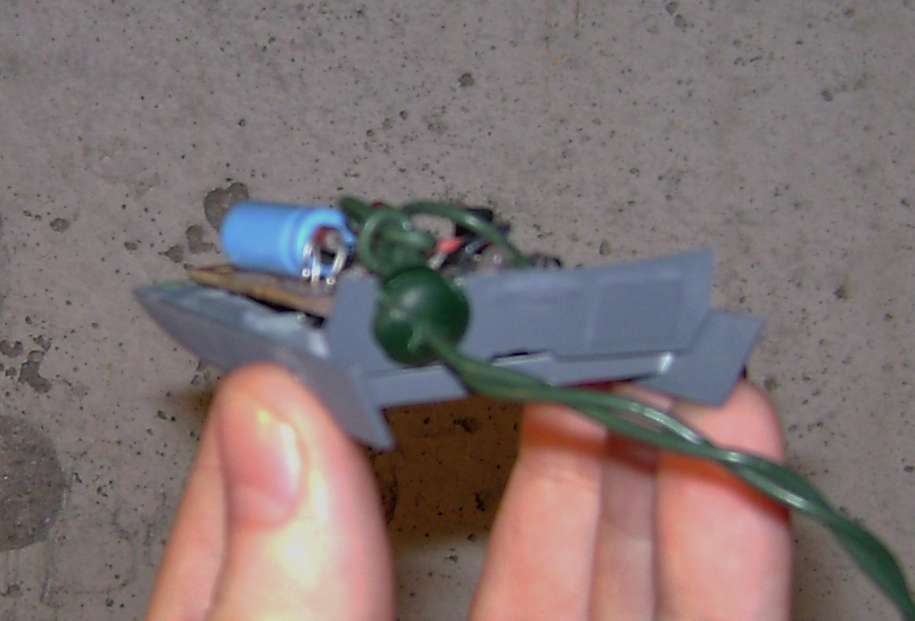
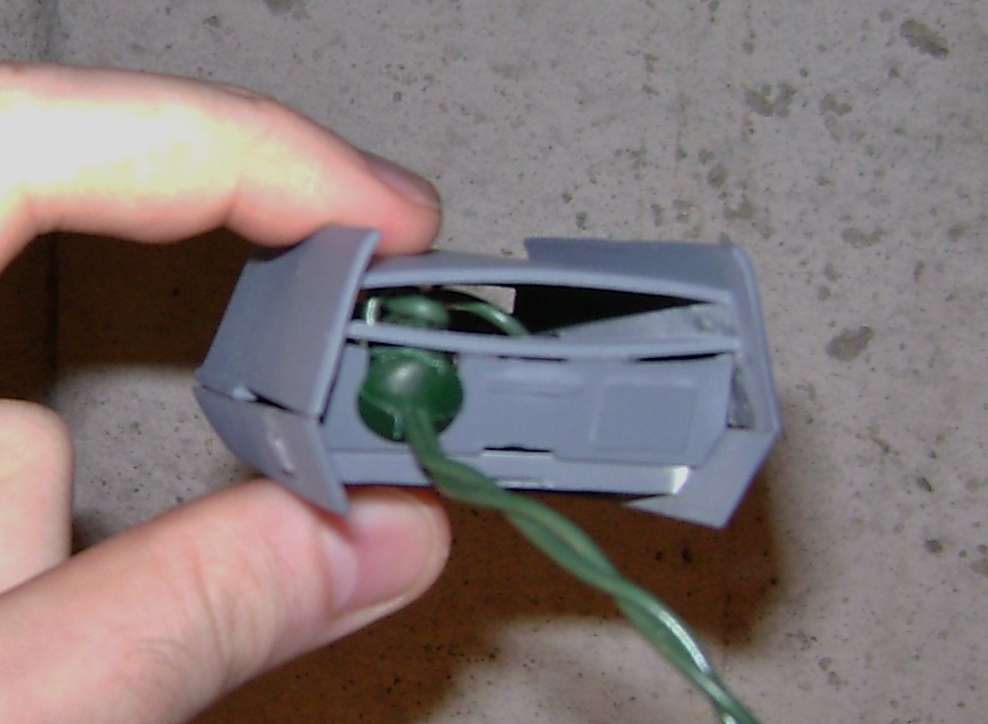
Though I'll be scratch-building a new hull and nacelles, and so won't be needing the original one, I found the forward windows, impulse engine, "Press Here" button and screws for securing the circuit board are all salvageable, as is the cicruit board. I plan on designing the bottom half of the hull as Hallmark did, to retain the same features.
You know, there was a time when I felt bitten by the "Phaser" bug, and focused on nothing but those for a while. Seems lately I've been bitten by the "Shuttlecraft" bug, lol.
- - - Updated - - -
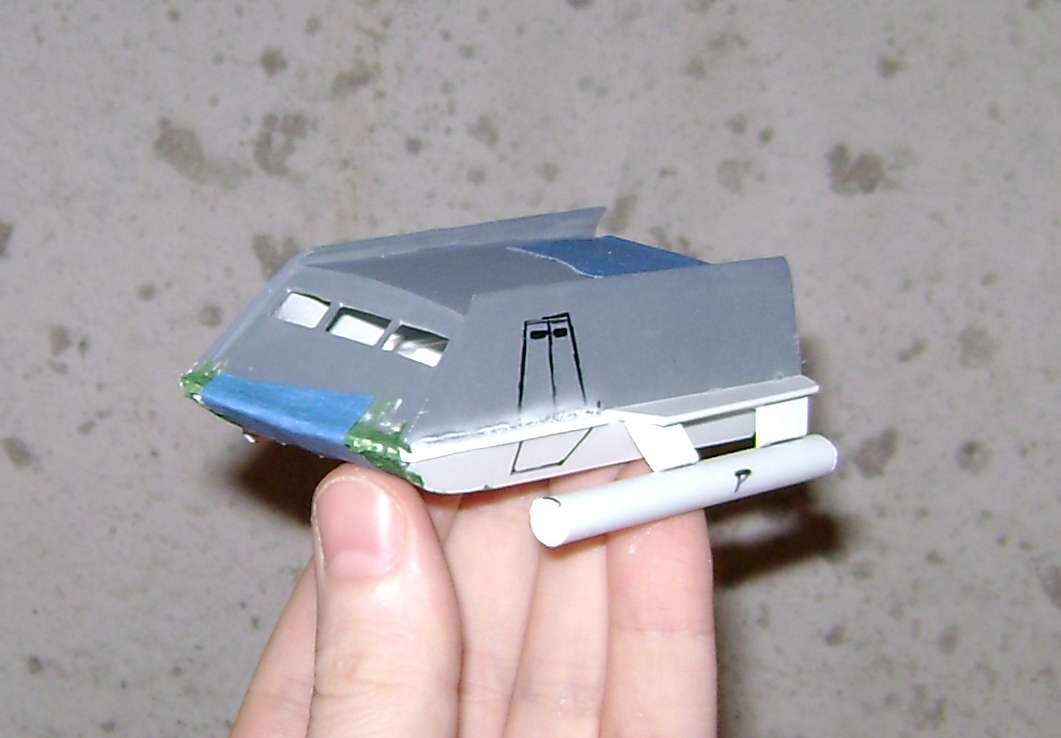
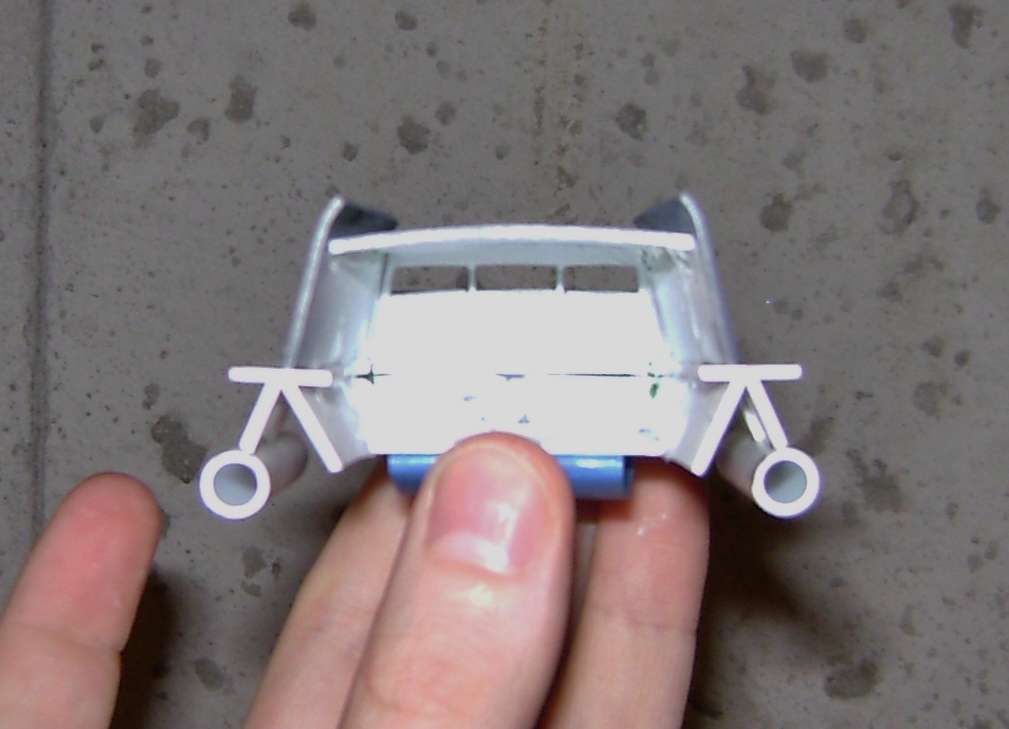
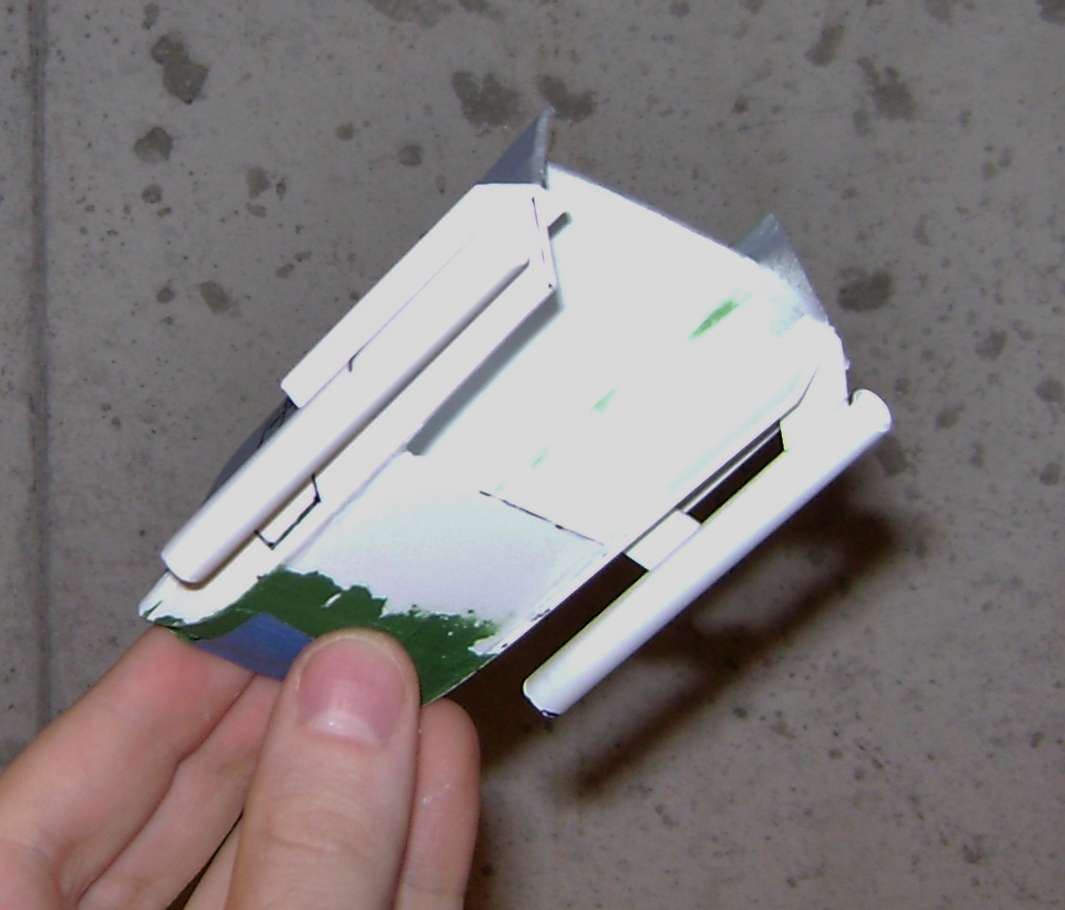
Here's a bunch of WiP pics of my "New and Improved" Hallmark Shuttlecraft Galileo Ornament.
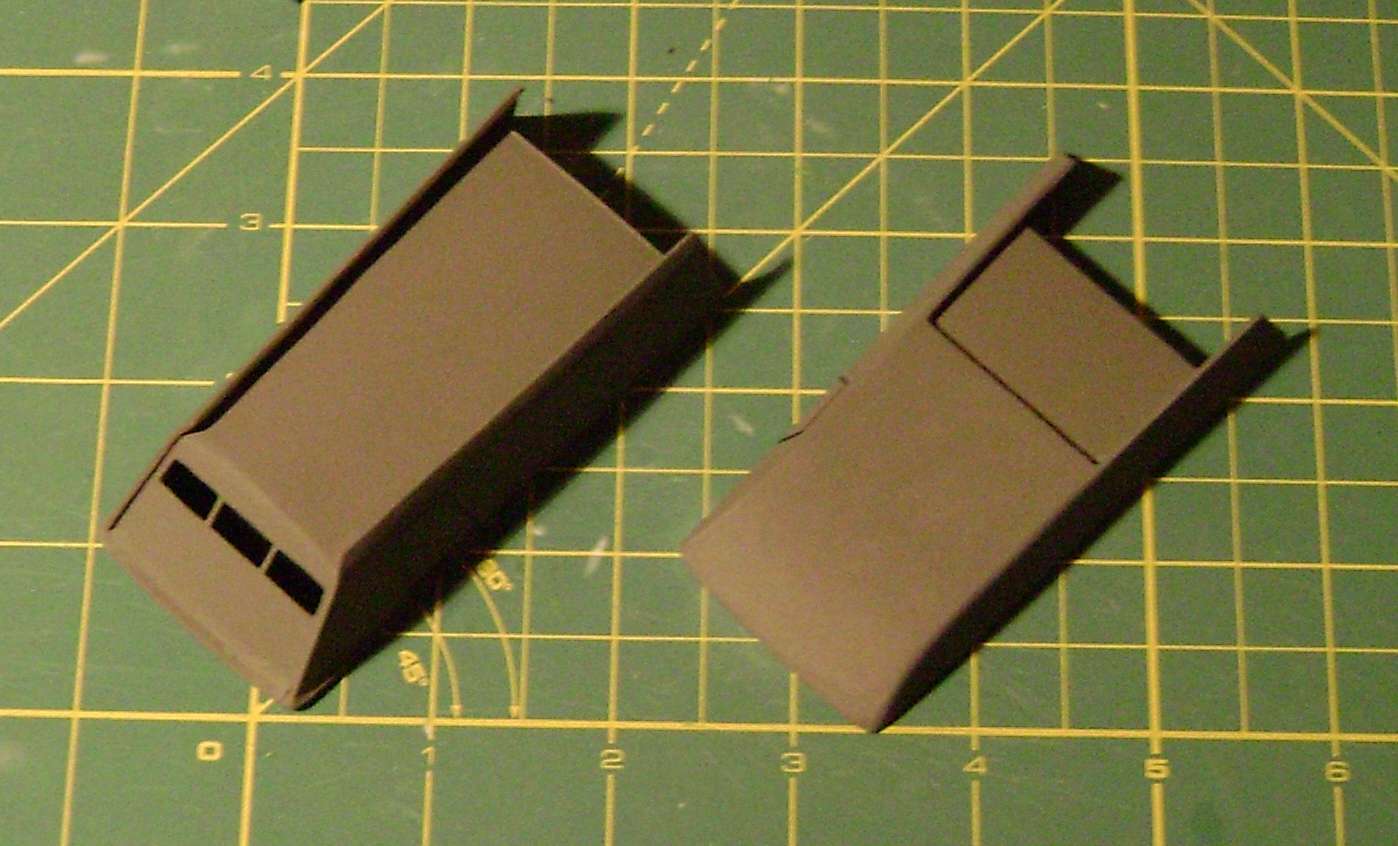
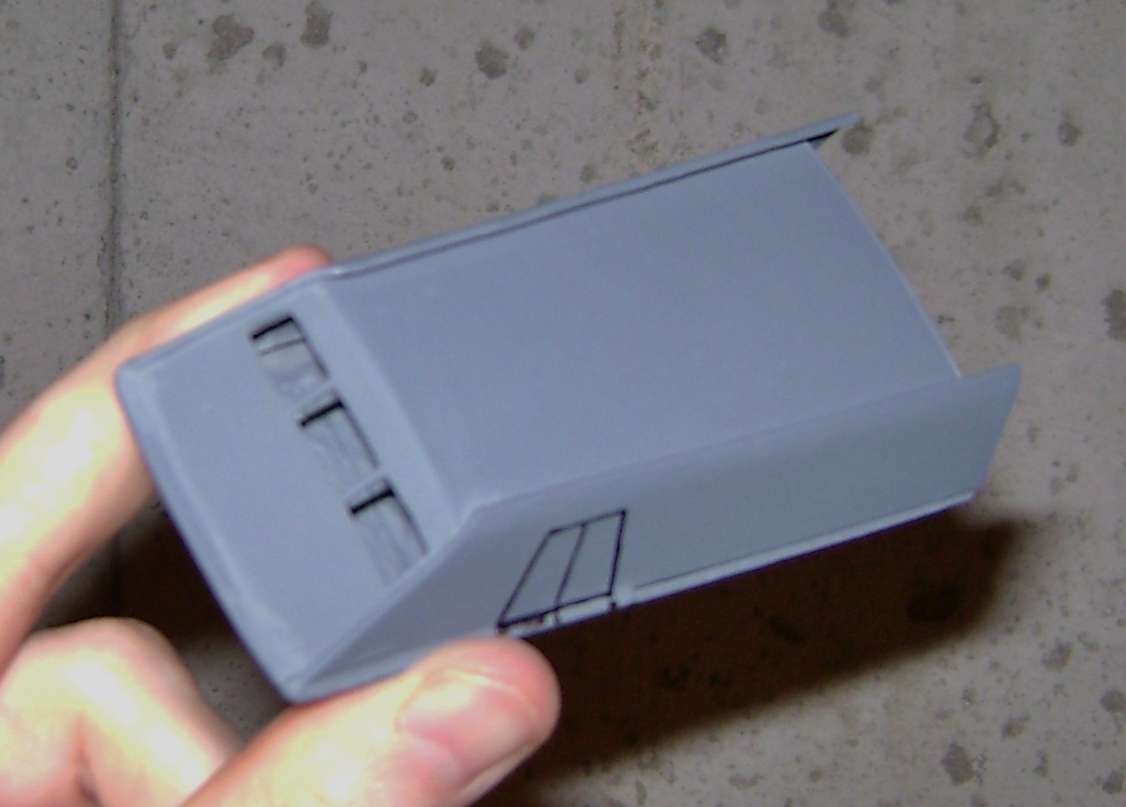
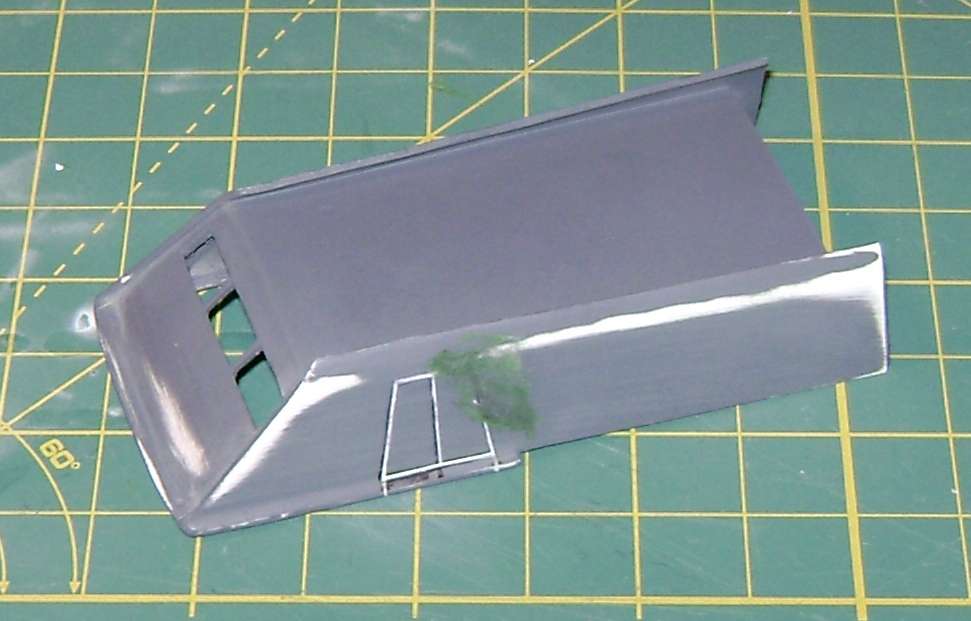
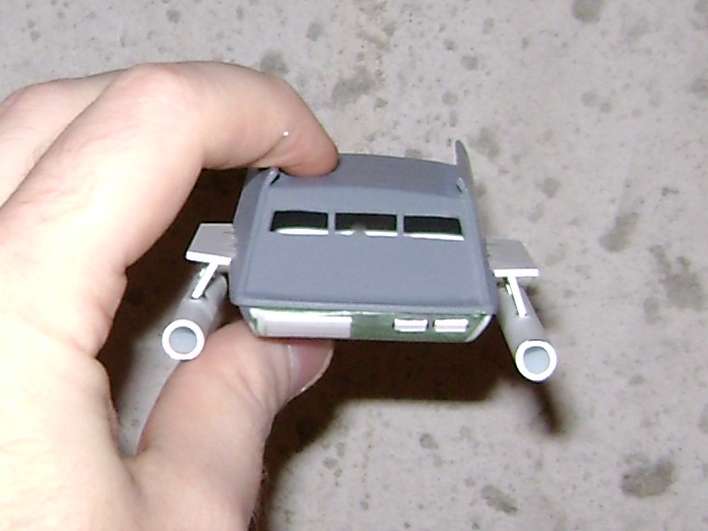
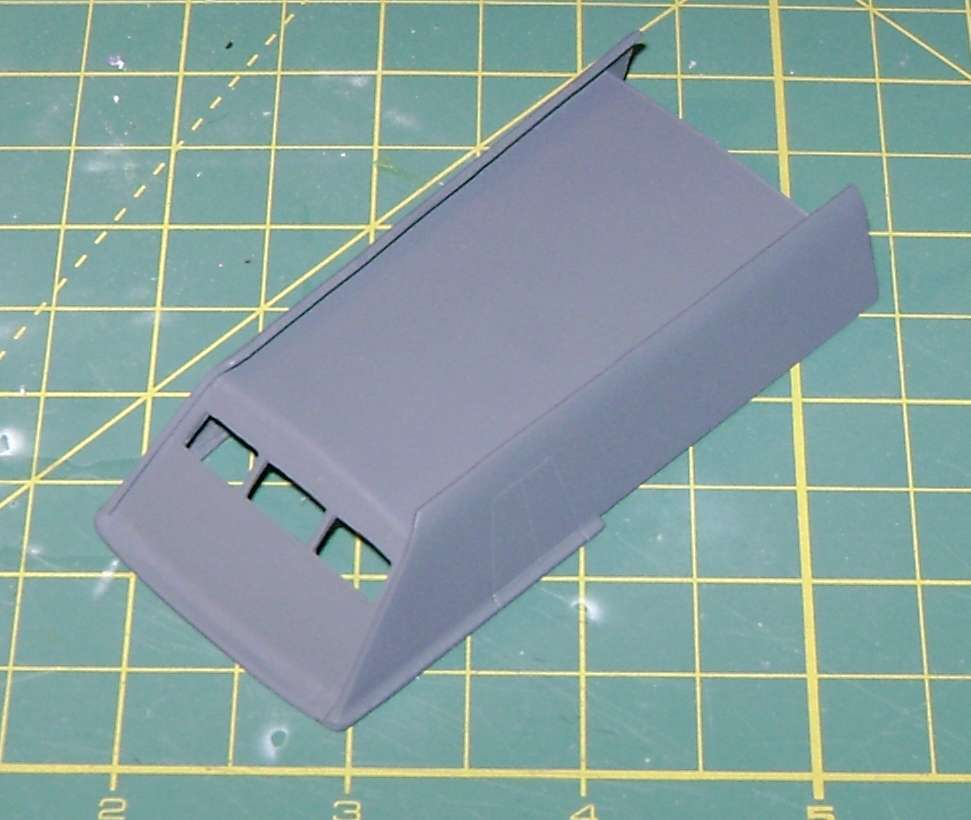
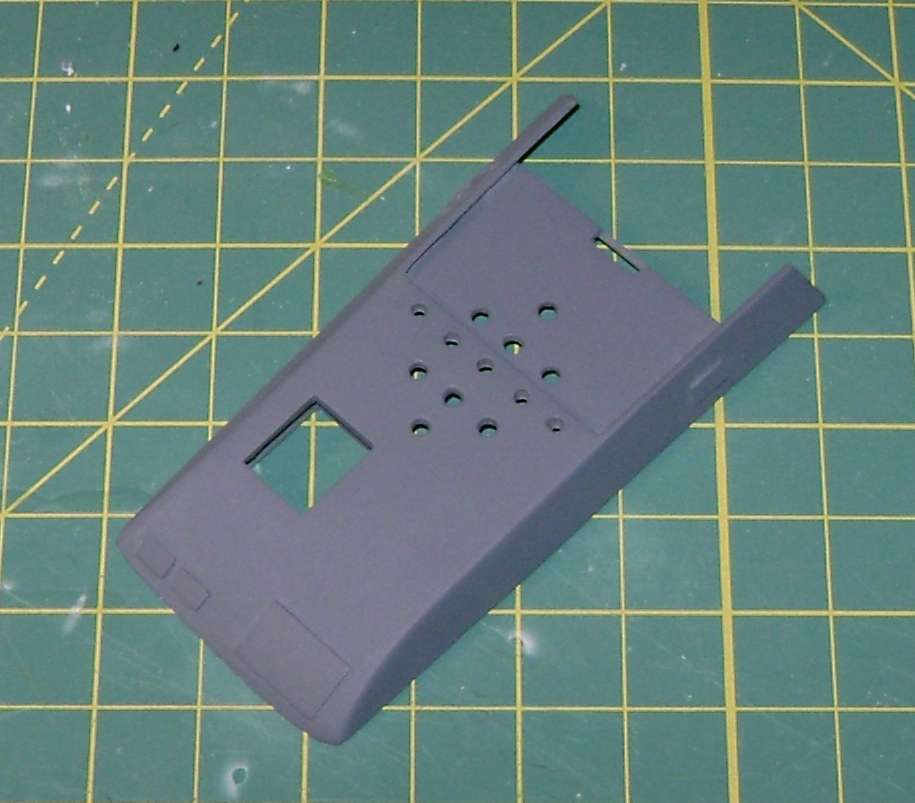
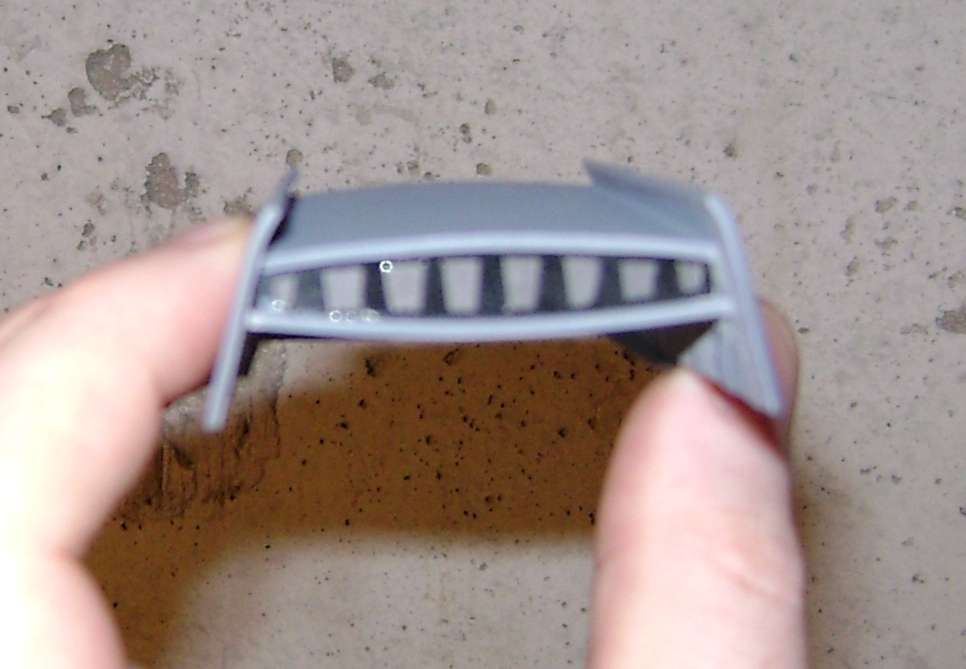
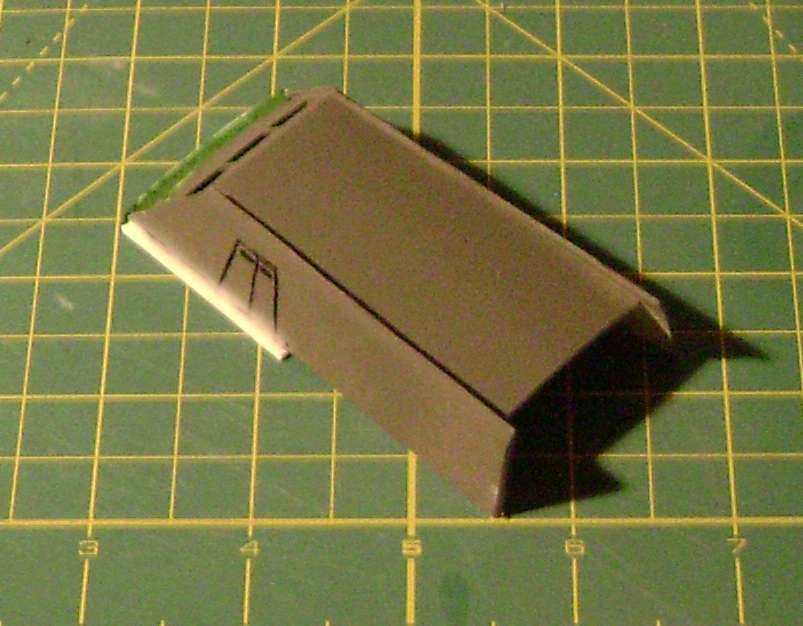
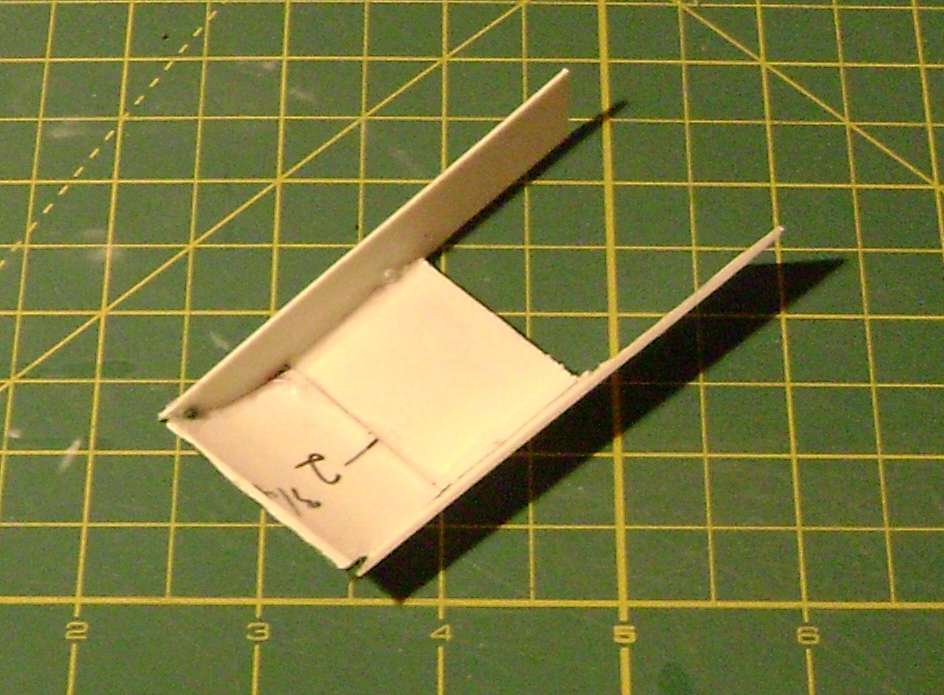
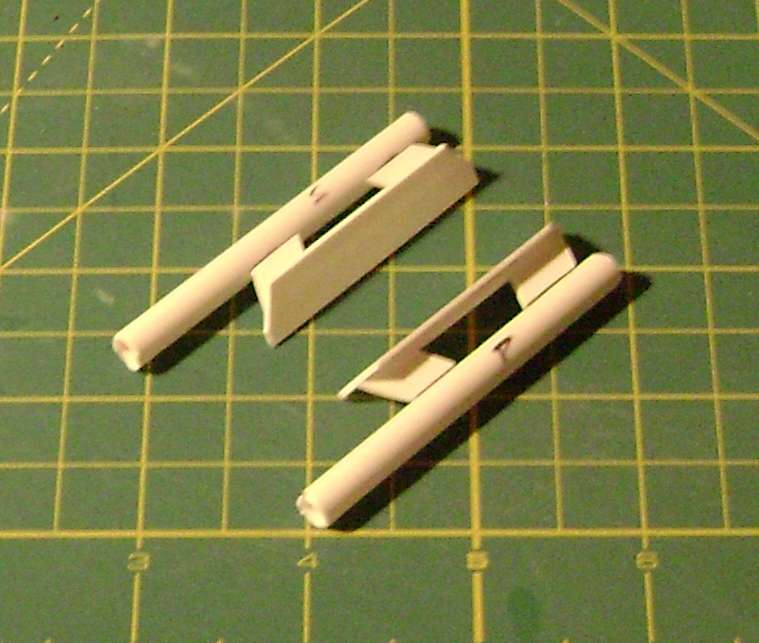
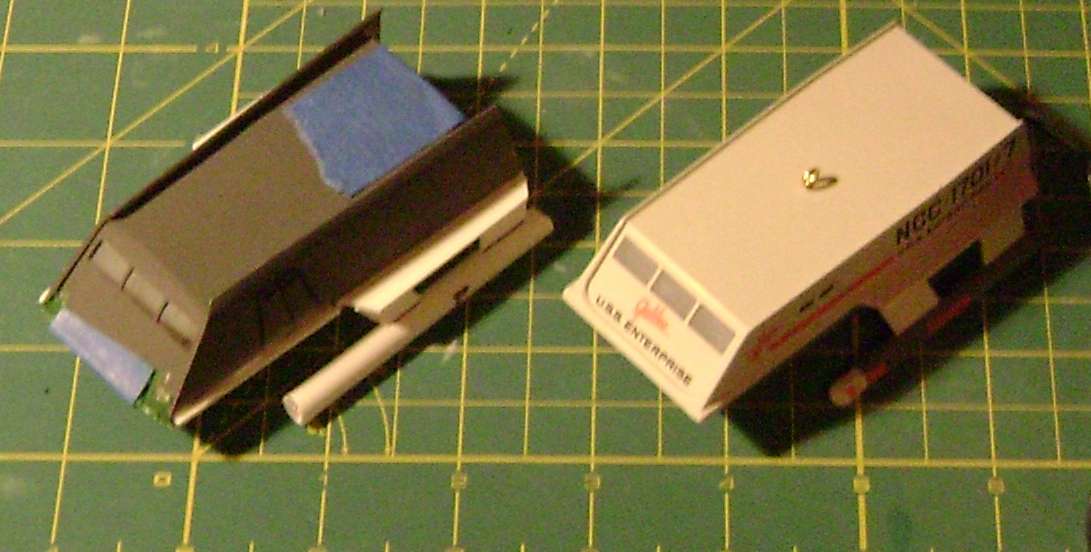
As can be seen, I already have all of the major parts fabricated. Just need to clean some of them up. I'm pleased to say I didn't cut through anything I wasn't supposed to, which was a concern regarding the window cut-outs, but they came out great and intact. There's a noticeable difference in size between the original ornament's nacelles and the proportionately scaled ones I'm using:
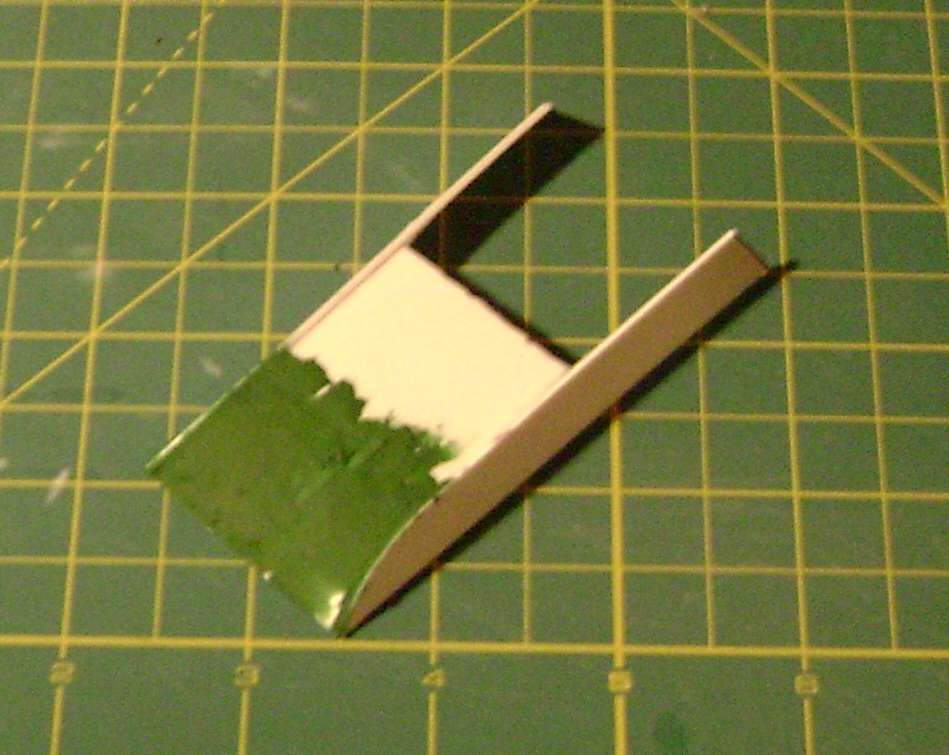
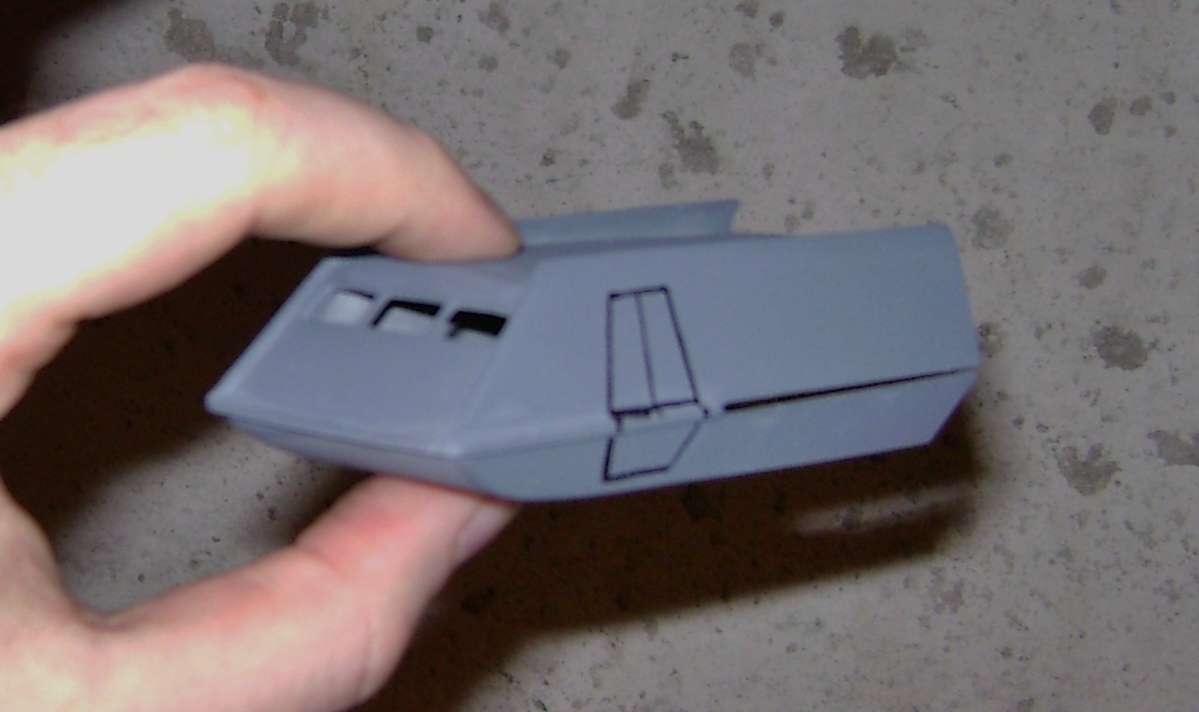
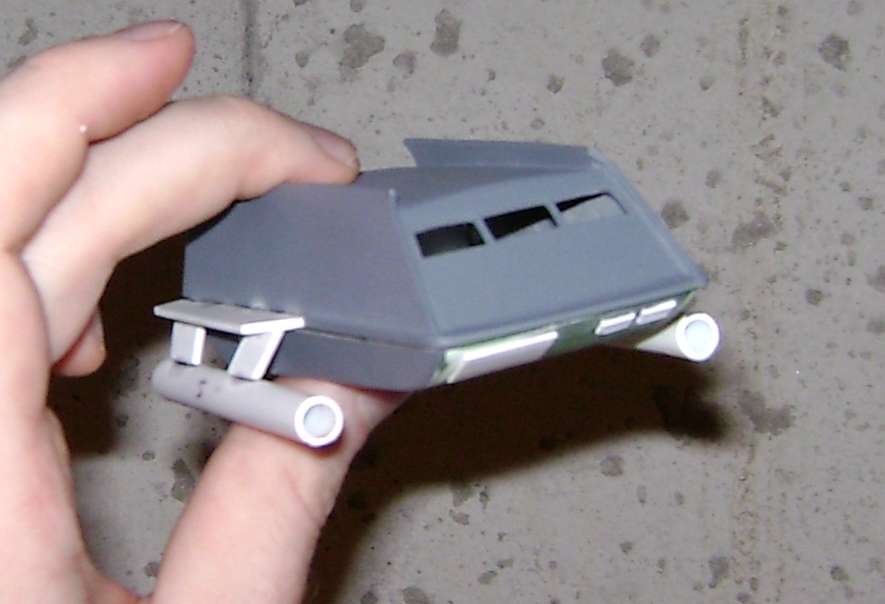
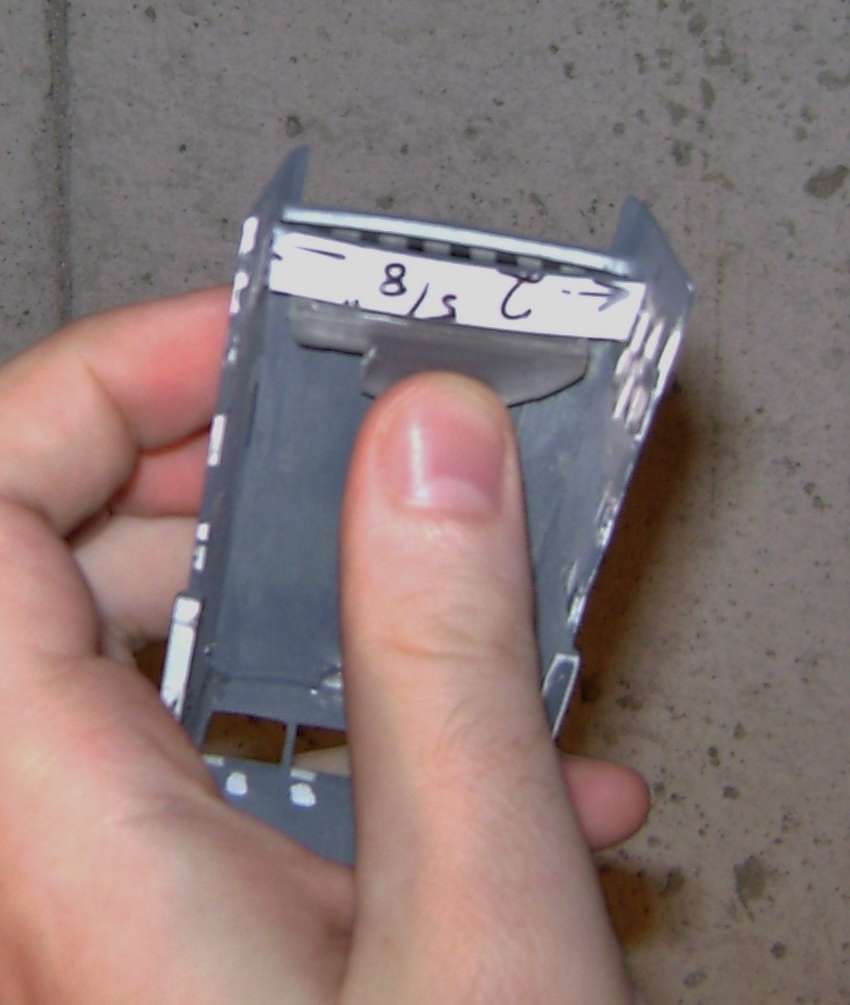
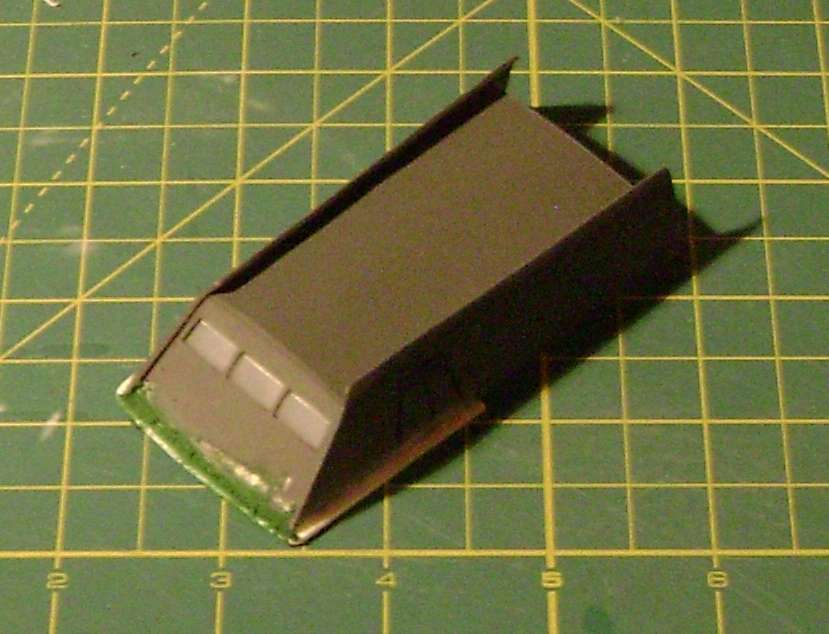
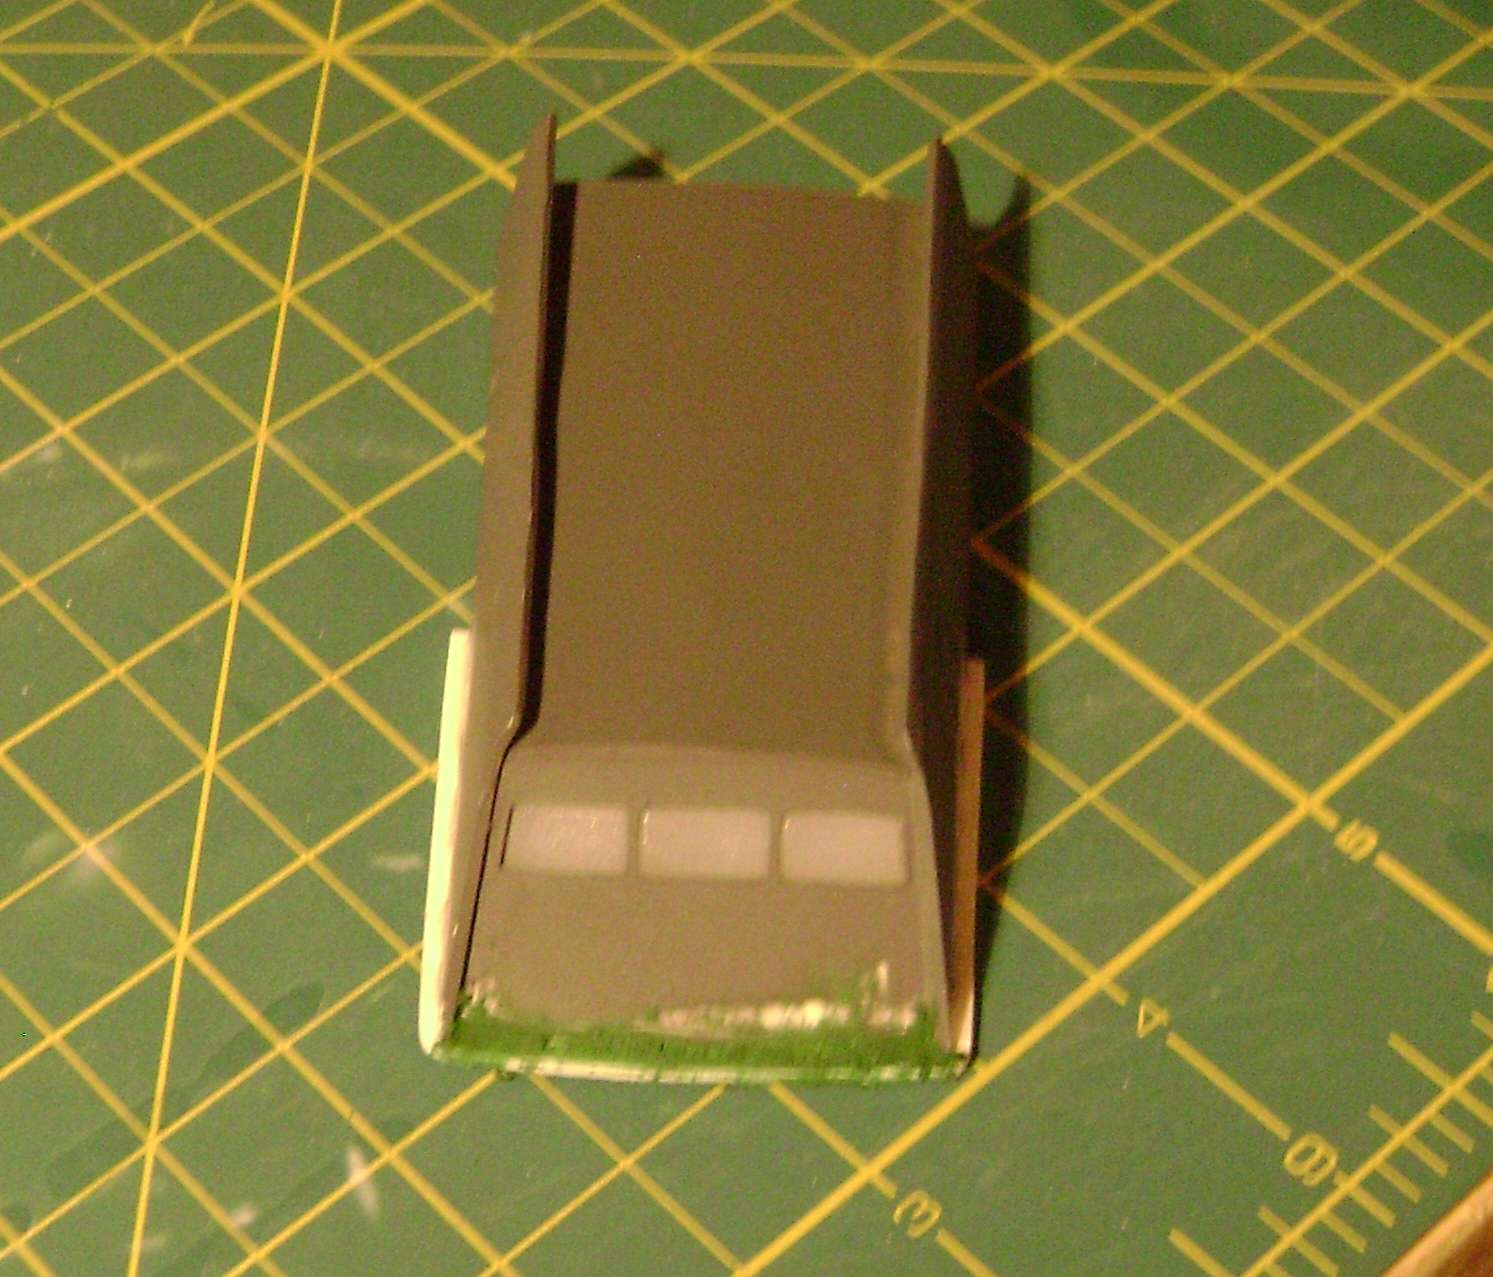
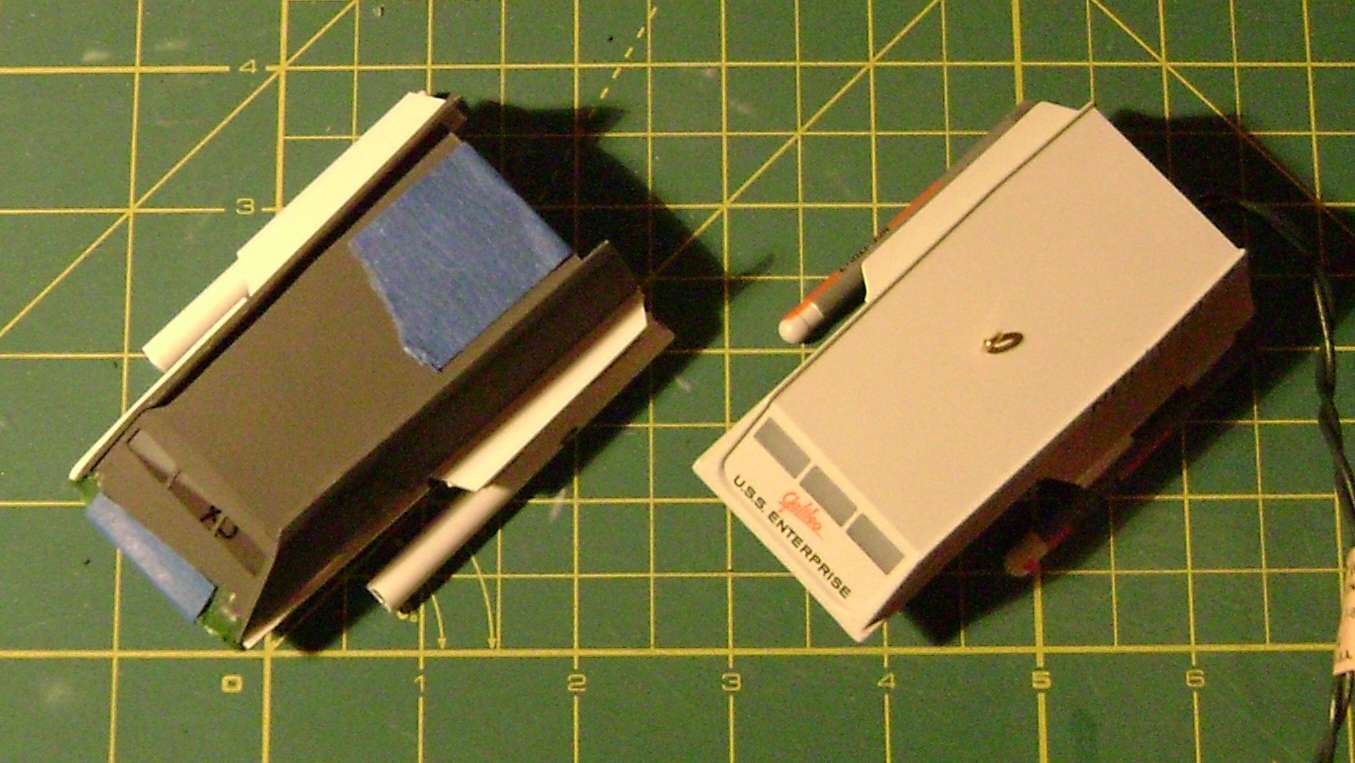
Just like I said I would, I was able to repurpose the "frosted" plastic insert for the windows. Took me a while to get it in there, as there was a lot of fine trimming involved to make sure it fit properly. Ended up having to trim off some of the sides so the windows would fit in the angled cut-outs I made, but now it fits like a glove:
- - - Updated - - -
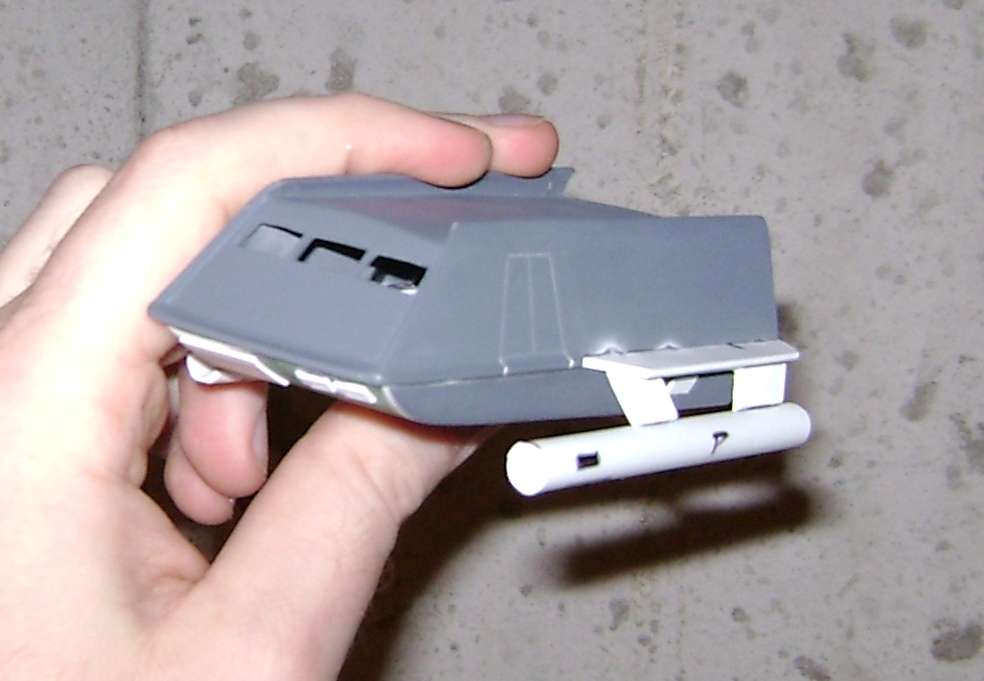
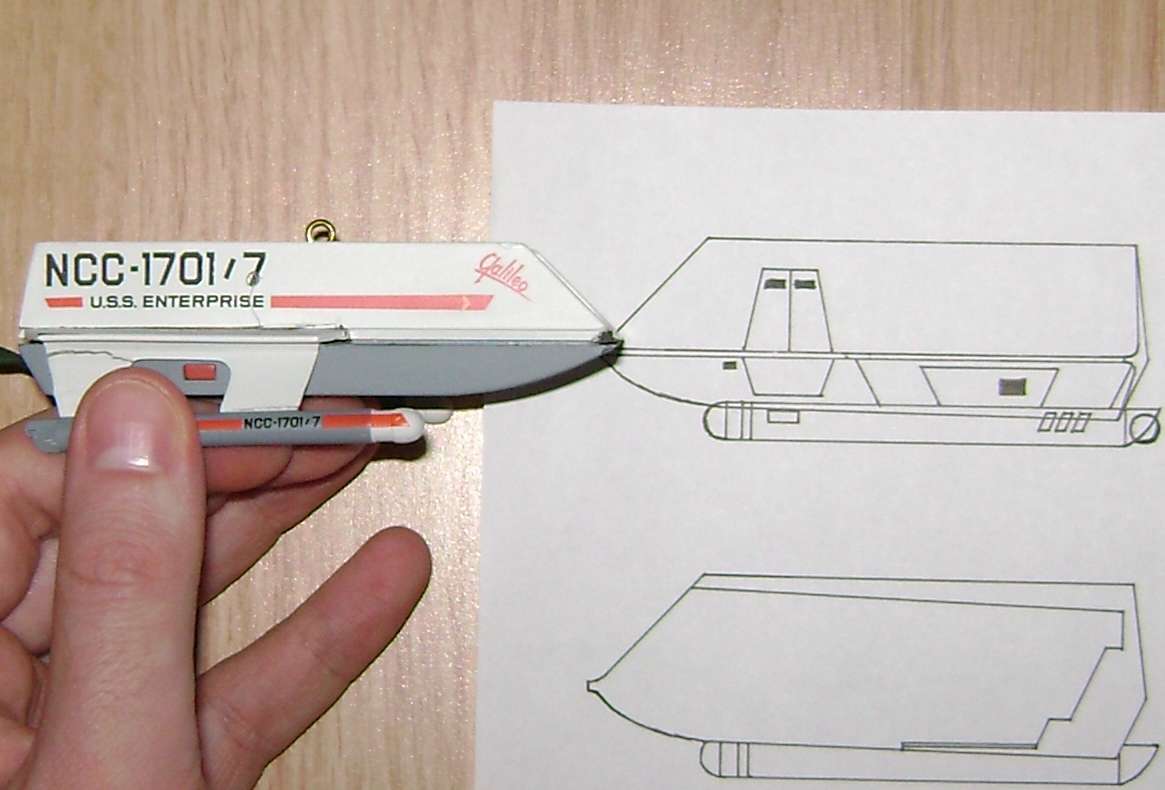
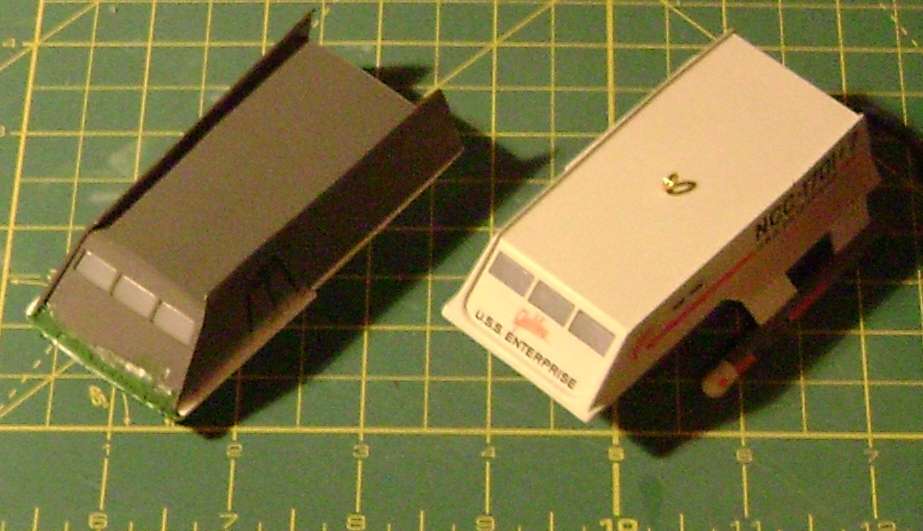
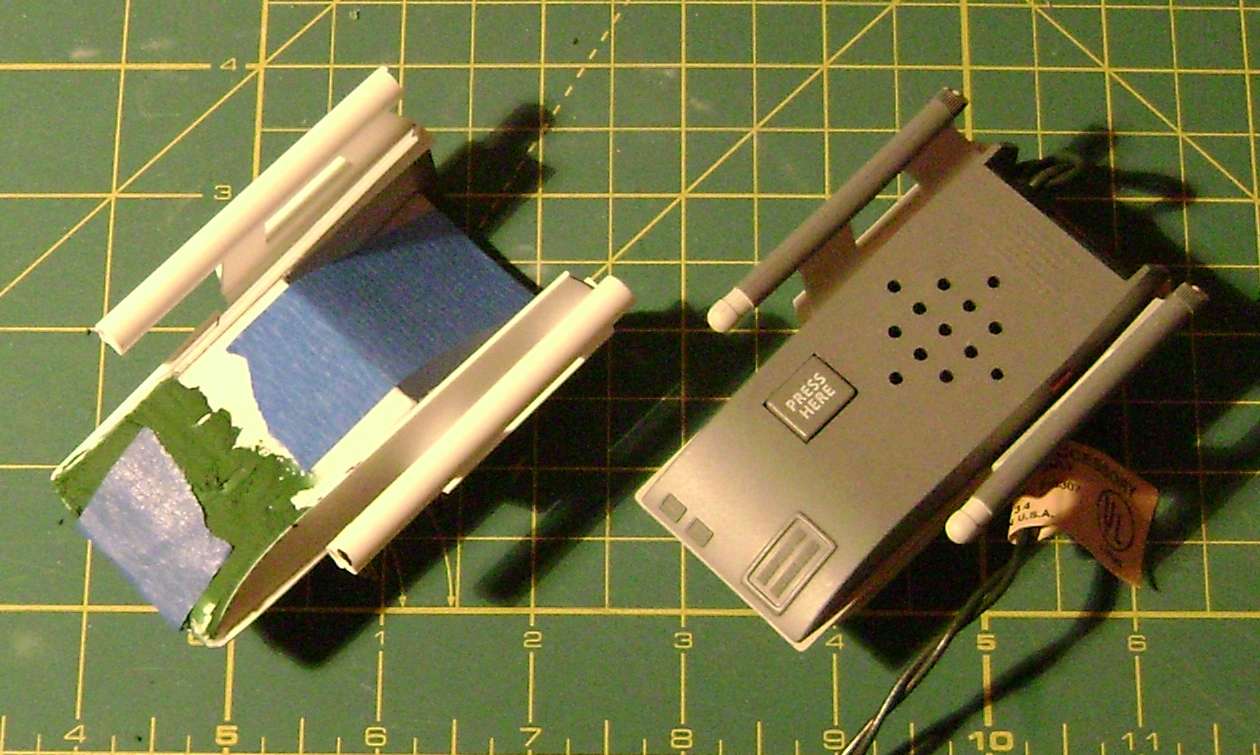
I took the next two pics simply to show the difference in size and shape between the original ornament and my accurized version, wherein the ones after those are to show the difference of everything between the two:
And now for some beauty shots:


Questions? Comments? All are welcome
Got two of these in the mail a while back (for $20.00 plus $8.00 shipping; helluva deal, imho), but kind of forgot about them, lol:
I'd originally bought them for the sole purpose of improving on Hallmark's design, since as I've become more of an expert on the TOS Shuttlecraft through projects like my 22-inch filming model and 1 9/16" small-scale models, the more I wanted to see an accurate version of this ornament made.
While rummaging through some of my prop stuff the other day, I found them again, which rekindled my interest in doing these justice. The first thing I did was open one of them up, to see what I was working with:
I actually kind of mangled it a bit trying to safely open it, but as I'll have no need for the original hull it's not a big deal. Next, I got to work drawing up a basic set of plans to work from for the rebuild:
I kept the length and width the same, as I didn't want to make the ornament any bigger, though I did have to add about 3/16" of height to get everything proportionate. All the contours look to be in scale to each other now. I also thickened the nacelles a bit to 1/4", so they too are proportionate to the rest.
And as with both my 22-inch and 1 9/16" models, I intend to add the angled, recessed detailing at the rear beneath the main impulse engine. What with the way Hallmark designed theirs it wouldn't have been possible to add in that detail, but with a slight shift of the circuit board placement I'm confident I can.
Though I'll be scratch-building a new hull and nacelles, and so won't be needing the original one, I found the forward windows, impulse engine, "Press Here" button and screws for securing the circuit board are all salvageable, as is the cicruit board. I plan on designing the bottom half of the hull as Hallmark did, to retain the same features.
You know, there was a time when I felt bitten by the "Phaser" bug, and focused on nothing but those for a while. Seems lately I've been bitten by the "Shuttlecraft" bug, lol.
- - - Updated - - -
Here's a bunch of WiP pics of my "New and Improved" Hallmark Shuttlecraft Galileo Ornament.
As can be seen, I already have all of the major parts fabricated. Just need to clean some of them up. I'm pleased to say I didn't cut through anything I wasn't supposed to, which was a concern regarding the window cut-outs, but they came out great and intact. There's a noticeable difference in size between the original ornament's nacelles and the proportionately scaled ones I'm using:
Just like I said I would, I was able to repurpose the "frosted" plastic insert for the windows. Took me a while to get it in there, as there was a lot of fine trimming involved to make sure it fit properly. Ended up having to trim off some of the sides so the windows would fit in the angled cut-outs I made, but now it fits like a glove:
- - - Updated - - -
I took the next two pics simply to show the difference in size and shape between the original ornament and my accurized version, wherein the ones after those are to show the difference of everything between the two:
And now for some beauty shots:
Questions? Comments? All are welcome