Page 1 of 6 123456 LastLast
  1. Formerly Orange Mechanic Nwerke's Avatar
    Join Date
    Jan 2003
    Location
    'Straya, maaaate!
    Message Count
    4,490
    Jan 14, 2012 - My Red Y (aka lazybones build) - some tips for the slack modeler #1

    It's probably a bit premature to start this thread as for now I only intend to assemble and prime the model. It's too hot here at the moment to go all the way into painting, that will have to wait for later in the year.

    That said, I've been finding a few talking points - in case anyone is about to kick off their build, this might be of some use, hopefully. Please note my build is pretty spartan - no lights, no extra mount points, no panavise or ILM/industry-style stand, just a steel rod for the underside mount, and a mahogany base. Much of this won't apply if you intend to create wing mount points:

    1. I drilled the main armature rod all the way through using a 7/16 bit in a drill press. It was just a sharp bit that happened to be ready to hand; you could go a little smaller or larger, but it is an ideal size in several respects.

    2. You could probably do just about as well with a hand drill if you have a good eye and a vise, or can clamp it down well. Centrepunch the location for drilling first off or your drill bit will wander.

    3. K&H make nice 7/16 brass tubing and stainless steel rods and hopefully your LHS will carry these. I went for stainless, it will need cutting - I hate cutting stainless but it should last forever.

    4. *Don't* drill the wing bar (if you are only making a lower mount). That will allow the bar to be a stop for the mount rod - it will rest on top of the mount rod and hold the model up. You can just clean off any burring at the cut ends, no need to do more. (Note Jason's excellent instructions give the bar length as 12.5" while mine was slightly smaller. If you are marking the centreline to drill for the upper mount, take note of the exact length of YOUR bar, as it seems they vary - though it shouldn't ultimately vary enough to actually matter. But, you know. We're modelmakers. A bit OCD sometimes. So I thought I'd mention it.)

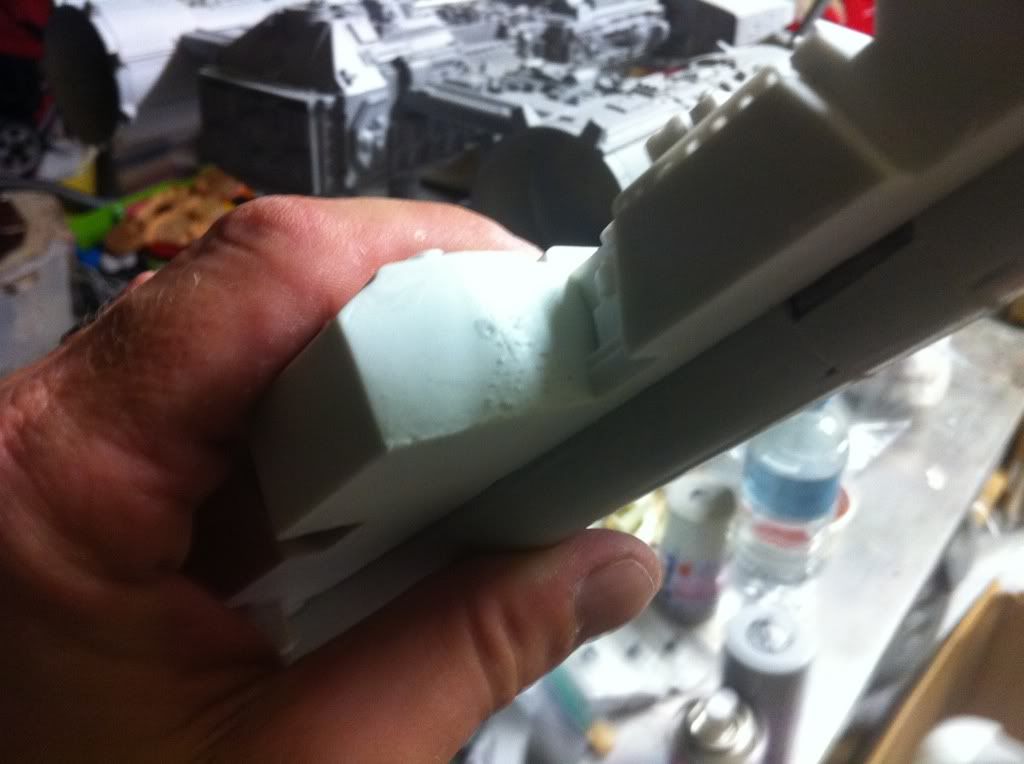
    5. That said, DO follow Jason's advise religiously on trimming the fuselage and engine location points for the wing bar. The resin pieces have shrunk slightly, the aluminium ones haven't. You will need to slice and sand out a slight channel in the front or rear (or both) of the fuselage location for the bar in order for it to sit nice and flat. DO sand the horizontal mating surface of the hull, too, as it can be flatter. The same goes for the wing bar location points inside the engines. In all this be sure you don't end up with a loose fit. It's not a structural requirement, it's just that tight fits are always much nicer. Cough.

    6. Since you aren't using wing mounts, you can slide your engines straight onto the wing bar AFTER assembly. I recommend building the engines first as it will make cleaning up the seams MUCH easier.

    7. You can also attach all four of the cone shroud support vanes directly to the cone shroud before you assemble it to the engine body. This seems easier than the other method as you can just slide the assembly straight into the back of the Saturn can. Obviously do this BEFORE you start attaching the Plastruct!

    8. The support vane thingies are too thick. At least they are to my eyes and a couple of others agree. Not by much but by a little. I am as lazy as a modelmaker can get while still occasionally actually making a model, so I didn't make new ones in styrene. Instead I adzed the trailing edges of the vanes with a single-edged razor blade, then sanded them lightly. Yes, I am THAT lazy.

      This took around thirty seconds per vane, only a few passes with a sharp blade does the trick. It's way quicker than cutting 2mm or 3mm styrene replacements would have been.

    9. When assembled, the conical inserts in the rear of the Saturn cans prevent the seams aligning well along one side, as noted in the instructions. You can shim as described, or you could also try sanding down the conical insert piece around its circumference slightly. I did not do this, but wished I had tried it.

    10. Another area of poor fit is pointed out in the instructions at the front of one of the Saturn cans. There are little doglegs of flash or pour stubs; this one can be resolved by removing them. Your Saturn can diameter will be slightly smaller so check for fit against the L'Eggs. (But then again, if it fit perfectly it wouldn't be ILM!)

    11. The wing skins can be made to fit without cutting if you're careful - I THINK - mine did, anyway. Possibly another case of individual variation. I had only the slightest misalignment along the rear tubes, maybe a quarter of a millimetre - well within the putty and sanding range.

    12. The cockpit rear bulkhead is beautiful but cast in a harder resin. Some details need to be removed, and a circular hole drilled out, as described in the instructions. The ideal tool for this would have to be an end mill bit in a Dremel; don't try to shave the details with Xactos, the resin is too hard. I would LOVE TO KNOW why my LHS and hardware stores haven't carried Dremel end mill bits for years.

      Ow, my sliced finger.


    All for now. There will be pics but has to wait for tomorrow or Monday.
    Last edited by Nwerke; Jan 14, 2012 at 10:55 PM.
  2. RPF Premium Member jedimaster's Avatar
    Join Date
    Nov 2009
    Location
    Planet Perth
    Message Count
    2,681
    Jan 14, 2012 - Re: My Red Y build - some tips #2

    Pix or it didn't happen.
  3. Formerly Orange Mechanic Nwerke's Avatar
    Join Date
    Jan 2003
    Location
    'Straya, maaaate!
    Message Count
    4,490
    Jan 14, 2012 - Re: My Red Y build - some tips #3

    That's nice coming from a joker who drank my beer and pored over my build this very afternoon!
  4. Colin Droidmilk's Avatar
    Join Date
    Jan 2009
    Location
    Greece
    Message Count
    1,523
    Jan 14, 2012 - Re: My Red Y build - some tips #4

    Ta for all this. The LHS actually has K&H tubes so my mount woes are beginning to look a bit less intractable now, lol...

    J'master's right, though - let's see some pics...
  5. Formerly Orange Mechanic Nwerke's Avatar
    Join Date
    Jan 2003
    Location
    'Straya, maaaate!
    Message Count
    4,490
    Jan 14, 2012 - Re: My Red Y build - some tips #5

    Good to hear! Yeh, pics tomorrow if relly bash stuff doesn't keep me away. Just got too late today.

    Oh get this. Last night I was trimming up the cockpit bulkhead, then left it to go water the new bamboos I've planted. It's summer here so I've been working on the deck. My 4.5yo son was 'helping daddy', and he carried on without me (knives out of reach of course). When I got back both engine subassemblies, the cockpit, the cockpit bathtub, the canopy AND THE COCKPIT BULKHEAD, were all assembled up...correctly.

    ME SO PROUD!!!
  6. RPF Premium Member jedimaster's Avatar
    Join Date
    Nov 2009
    Location
    Planet Perth
    Message Count
    2,681
    Jan 14, 2012 - Re: My Red Y build - some tips #6

    Maybee he could make a start on the other dozen studio scale kits you have? Maybe that way he could actually start a build thread unlike his dad.
    And I was actually talkin about cuttin ya finger and ya beer was cheap.

    Actually while I'm at it. For those living in a warmer climate, you may just wanna check for air bubbles. I only found a few and they will be pretty much covered up but it'll only take five minutes to fix.

  7. Formerly Orange Mechanic Nwerke's Avatar
    Join Date
    Jan 2003
    Location
    'Straya, maaaate!
    Message Count
    4,490
    Jan 14, 2012 - Re: My Red Y build - some tips #7

    God you are a nasty bit of work, Graver.

    Yeah good point. Looks like you've got just a few more bubbles than me - hardly any bubbles on mine at all. I'd settle for popping them. Can't do any harm if there's no trapped air, and they're covered over.
  8. Join Date
    Nov 2009
    Message Count
    173
    Jan 14, 2012 - Re: My Red Y build - some tips #8

    Clarification on number 4. You say not to drill the cross bar but you don't really say why. Then, in the same section, you talk about measuring it for drilling. I realize you mention Jason's build and drilling, but I'm just a little fuzzy here.
  9. Formerly Orange Mechanic Nwerke's Avatar
    Join Date
    Jan 2003
    Location
    'Straya, maaaate!
    Message Count
    4,490
    Jan 14, 2012 - Re: My Red Y build - some tips #9

    Covered under the overriding clause regarding only going for a lower mounting rod, but you're right, have edited that item for clarity. If you are going for an upper mount then you do need to drill the bar.
  10. Turret n' Probot moffeaton's Avatar
    Join Date
    Mar 2001
    Location
    Baltimore MD
    Message Count
    7,870
    Jan 14, 2012 - Re: My Red Y build - some tips #10

    Good stuff!

    Upper mount really comes in handy for painting the bottom of the bird, but that's just me
  11. Formerly Orange Mechanic Nwerke's Avatar
    Join Date
    Jan 2003
    Location
    'Straya, maaaate!
    Message Count
    4,490
    Jan 14, 2012 - Re: My Red Y build - some tips #11

    You're totally right.

    I plan to half-arse it.

    Hey, are you doing the small black squares, btw? I was wondering whether they might be done as masking over the black base coat.
  12. Turret n' Probot moffeaton's Avatar
    Join Date
    Mar 2001
    Location
    Baltimore MD
    Message Count
    7,870
    Jan 14, 2012 - Re: My Red Y build - some tips #12

    They could be, yeah. I just did 'em - laid down Tamiya mask tape, cut them out by eyeballing with an X-Acto, and a quick PSSSHT PSSSHT with the airbrush, the end!
  13. Formerly Orange Mechanic Nwerke's Avatar
    Join Date
    Jan 2003
    Location
    'Straya, maaaate!
    Message Count
    4,490
    Jan 14, 2012 - Re: My Red Y build - some tips #13

    Cool, looking forward to pics. Always wondered what the thinking was, with those. They're such a weird, funky little detail. And they're on (almost) EVERYTHING!
  14. Formerly Orange Mechanic Nwerke's Avatar
    Join Date
    Jan 2003
    Location
    'Straya, maaaate!
    Message Count
    4,490
    Jan 14, 2012 - Re: My Red Y build - some tips #14

    Just rereading this after taking some pics...want to stress, I am not trying to take anything away from Jason's instructions. They're *excellent*!

    This actually came out of a conversation with a friend over nitty gritty details. It just occurred to me that perhaps some expansion on those aspects might be helpful to anyone who doesn't have a strong background in resin studio scale stuff. Anyway, pics!

    Adzing the shroud supports:


    Modded shroud supports on the left, unmodified on the right:


    If you build these as units they can just slot straight in. Sorry for crap pic:


    Gap on left wing requires some pressure inside engine (via outer hatch) when gluing to wing bar. It will disappear, but slow superglue is a must:


    This is the misalignment on the rear of the starboard wing - I didn't think it was worth cutting:


    Ditto port wing. Note I have carried out the surgery Jason recommends on the Saturn corrugations to get a good fit here - but also, a couple of details on the engine where it meets the underside of the wing need to be shaved a tiny bit, and all three tubes on the upper wing sleeve also need a fraction of a millimetre shaved off their ends:


    Here's where I'm at so far, with the K&H 7/16" bar I chose for my mount. It is product no. 7145:

    Attached Thumbnails Attached Thumbnails 00a.jpg   01a.jpg   02a.jpg  

    03a.jpg   04a.jpg   05a.jpg  

    06a.jpg  
    Last edited by Nwerke; Jan 14, 2012 at 10:49 PM.
  15. Turret n' Probot moffeaton's Avatar
    Join Date
    Mar 2001
    Location
    Baltimore MD
    Message Count
    7,870
    Jan 14, 2012 - Re: My Red Y build - some tips #15

    Looks excellent!
  16. Formerly Orange Mechanic Nwerke's Avatar
    Join Date
    Jan 2003
    Location
    'Straya, maaaate!
    Message Count
    4,490
    Jan 14, 2012 - Re: My Red Y build - some tips #16

    Thanks Jason. Just the bare bones as yet though; I will be keeping this in subassemblies for a long while yet unfortunately. Just too much on the plate and the weather is too hot for spraying anyway. Paint dries before it leaves the airbrush!

    I *should* really be leaving it in the box and doing other things, but it is irresistible.

    It also goes together really well. I gotta stress that...the engineering is great. Nitpicking tiny details can always run the risk of giving a negative impression but trust me, I am ecstatic with this kit.
  17. RPF Premium Member Scott Graham's Avatar
    Join Date
    Dec 2007
    Message Count
    1,120
    Jan 14, 2012 - Re: My Red Y (aka lazybones build) - some tips for the slack modeler #17

    That's a good addendum!
  18. neosporing's Avatar
    Join Date
    Apr 2005
    Location
    Kent Ohio (wish it was Negril Jamaica)
    Message Count
    1,199
    Jan 15, 2012 - Re: My Red Y build - some tips #18

    Nwerke said: View Post
    ... It just occurred to me that perhaps some expansion on those aspects might be helpful to anyone who doesn't have a strong background in resin studio scale stuff.

    that'd be me.. Thanks for the documentation, 'tis greatly appreciated. I haven't received my kit yet but, the more documented builds that's out there the better!
  19. Colin Droidmilk's Avatar
    Join Date
    Jan 2009
    Location
    Greece
    Message Count
    1,523
    Jan 15, 2012 - Re: My Red Y (aka lazybones build) - some tips for the slack modeler #19

    Lovely, and very helpful, ta.

    But hey, this weak-SS-background-novice wants full credit for showing the master the mod required on the 4 engine shroud bracket thingies, lol! And I'm gonna prove you wrong on that cockpit bulkhead detail shaving - I WILL get it done with an xacto and a file - since I have no bleedin' choice!

    Nice to see your son chipping in. I always wondered about how he takes his Dad's hobby, whether he considers that SW is for kids so by rights the kits should really be HIS. Or whether he just thinks the whole thing is sad beyond belief. Anyway, that's very generous of you, letting him glue stuff together. Good job I don't have kids - I would have ended up making a pathetic, petulant spectacle of myself: 'What are you doing making Daddy's model? This is DADDY'S model! Get away from Daddy's model!'
  20. Formerly Orange Mechanic Nwerke's Avatar
    Join Date
    Jan 2003
    Location
    'Straya, maaaate!
    Message Count
    4,490
    Jan 15, 2012 - Re: My Red Y (aka lazybones build) - some tips for the slack modeler #20

    neosporing, you're welcome, if this helps I'm really pleased to hear it.

    CD, you'll have to share the credit with jedimaster I'm afraid; he'd spotted it too. Good eye you guys, it is only something less than a mill's difference, I think, yeah? Anyway, hate throwing away parts so a bit of shaving does the trick.

    I shaved the bulkhead using an Xacto and a single-edged razor blade. My end mill bit gave up the ghost forever ago and I haven't been able to track one down since. Damned overpriced things locally; never got around to ordering some from overseas either. Must do: an end mill bit in a Dremel is a THING OF BEAUTY.

    As for Morgs, he's still pretty much at the "I like your spaceship, Daddy!" stage. No gluing, just dry fitting - he'd destroy himself if I ever let him get near cyanoacrylate. He just sits and commentates mostly - "it's from Star Wars! Isn't it, Daddy? Isn't it? It's very big! It's big and huge, huge like the sky! I like your big spaceship Daddy!!!! Look, I have a dinosaur!"

    So, not all that much critical thinking going on just yet, I'm guessing.

    Pic 1: Kid knows a Messerschmitt cannon mount when he sees one.
    Pic 2: Curse your inevitable betrayal!
    Attached Thumbnails Attached Thumbnails 01150037.jpg   01150045.jpg  
  21. Colin Droidmilk's Avatar
    Join Date
    Jan 2009
    Location
    Greece
    Message Count
    1,523
    Jan 15, 2012 - Re: My Red Y (aka lazybones build) - some tips for the slack modeler #21

    Ah, bless.
  22. RPF Premium Member EvanW's Avatar
    Join Date
    Jun 2006
    Location
    Toronto, Canada
    Message Count
    176
    Jan 15, 2012 - Re: My Red Y (aka lazybones build) - some tips for the slack modeler #22

    Looks like a really great start. I can't wait to get mine. Something about #41 on the list...
  23. Muzza's Avatar
    Join Date
    Jul 2010
    Location
    Perth, Western Australia
    Message Count
    190
    Jan 15, 2012 - Re: My Red Y (aka lazybones build) - some tips for the slack modeler #23

    Hay Martyn, The Y Wing is coming along nicely, I am sure we will more tables at the show this year..
  24. RPF Premium Member jedimaster's Avatar
    Join Date
    Nov 2009
    Location
    Planet Perth
    Message Count
    2,681
    Jan 15, 2012 - Re: My Red Y (aka lazybones build) - some tips for the slack modeler #24

    Muzza said: View Post
    Hay Martyn, The Y Wing is coming along nicely, I am sure we will more tables at the show this year..
    Yeah like 3 more tables.
  25. Colin Droidmilk's Avatar
    Join Date
    Jan 2009
    Location
    Greece
    Message Count
    1,523
    Jan 30, 2012 - Re: My Red Y (aka lazybones build) - some tips for the slack modeler #25

    Martyn, your engine shrouds... I was going to do it your way and attach the brackets to the shrouds first, but found that the brackets will then fail to touch the Saturn cylinders, which seems to be born out from your photo. They should touch the cylinder as far as I can make out. However, dry-fitting it Jason's way, I'm getting collossal 2mm gaps between the brackets and the shroud. Further, with Jason's method, I can't for the life of me see how he crammed the shroud into place with 3 brackets already glued in there. The shroud is 5mm too big for the space allowed by the fronts of the brackets. Are we supposed to squeeze the shroud, at the risk of cracking it, to force it in there or what? Or am I missing something entirely?
Page 1 of 6 123456 LastLast

Similar Threads

  1. My Proteus Build in Sci-Fi and Fantasy Modeler Vol 28
    Captain Han Solo, General Modeling
    Replies: 2
    Last Post: Dec 15, 2012, 9:33 PM
  2. Big Baby Build - aka - suck on this
    Godsmulligan, Replica Movie Props
    Replies: 13
    Last Post: Feb 29, 2012, 9:27 AM
  3. Tips for sewing Jedi cloth, aka crinkle cotton
    Bizarro Lois, Replica Movie Costumes
    Replies: 3
    Last Post: Oct 27, 2011, 6:25 PM
  4. Replies: 26
    Last Post: Jul 5, 2011, 10:36 PM
  5. Replies: 4
    Last Post: Oct 2, 2008, 4:10 PM

1 2 3 4 5 6 7 8 9 10 11